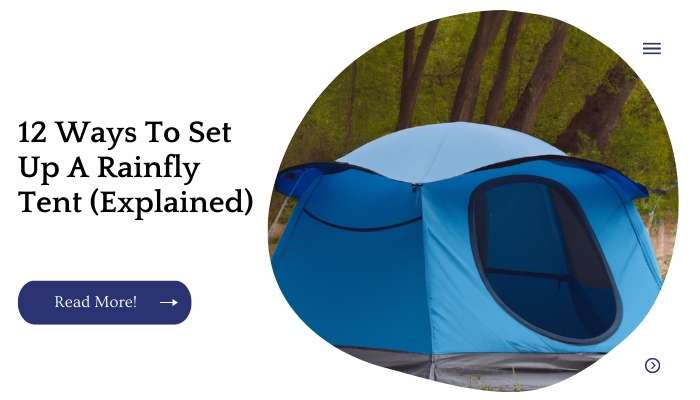
Rainfly tents are one of the best options for camping in rainy weather. The rainfly protects you from the elements and keeps you dry, even if it does storm outside.
But how do you set up a rainfly tent? There are many different ways to set up a rainfly tent, depending on what kind of equipment you have with you and how much time you need. Here are twelve tips for setting up your own rainfly tent:
| Key Takeaways |
|---|
| Use the proper rainfly setup to protect your tent from rain and moisture. |
| Consider the weather conditions and choose the appropriate rainfly configuration. |
| Ensure the rainfly is taut and properly secured to provide maximum protection. |
| Experiment with different rainfly setups to find the one that works best for your needs. |
| Utilize guylines and stakes to enhance rainfly stability and minimize flapping in windy conditions. |
| Ventilate your tent properly by adjusting the rainfly setup to prevent condensation buildup. |
| Practice setting up the rainfly before your camping trip to familiarize yourself with the process. |
| Regularly inspect and maintain your rainfly to ensure it remains in good condition. |
| Pay attention to the orientation of your rainfly to optimize airflow and rain protection. |
| Seek additional resources and guides to learn more about rainfly setup techniques. |
Pick A Spot With Good Drainage
As you are setting up your tent, make sure that the ground is level and free of mud, stones, and other debris.
You want to avoid setting up your tent on a sloped or uneven surface because it will be more difficult to pack away when it’s time to go home.
Check for roots or rocks that could be under the ground where you’re planning to put down the rainfly–and don’t forget to look at all four sides of your campsite before deciding where you’ll pitch your tent!
When it comes to folding a pop-up canopy, proper technique is key. Don’t let tangled fabric ruin your day! Follow our step-by-step guide on how to fold a pop-up canopy for hassle-free storage and transportation.
Suspension
The first step to setting up your rainfly tent is to attach the suspension system to the tent. Your suspension system is what keeps the rainfly tent upright, so it’s important that you use one that’s reliable and strong enough for your needs.
If you are using a pole-style rainfly tent, then one of the most common types of suspension systems used is called a continuous ridge pole (CRP).
This type of CRP has a series of poles that run along both sides of the top edge of your rainfly tent and which connect together at each end with clips or some other mechanism so that they form a single unit.
The benefit here is that this type of CRP allows for easy set up because all you need to do is clip together all those poles in order for them to work effectively as one continuous unit instead of having many individual ones scattered around within different sections per side.”
Ground cloths
A ground cloth is a thin, lightweight cover that helps protect the bottom of your tent from abrasions and tears. It can also act as an extra layer of insulation between you and the cold, hard ground.
The majority of rainfly tents come with a built-in floor, but some don’t. This means you need to buy a separate ground cloth for it if you want something that will keep out moisture and debris from getting inside your tent.
If you opt to use one, here are some things to keep in mind: Choose one made from durable fabric like polyester or nylon; avoid mesh because it’s more likely to rip; look for one that has an anti-slip surface on top so water doesn’t pool there when it rains; make sure yours has enough overlap around its edges so it won’t slip under your tent (especially if wet).
Need a temporary shade solution? Learn from our firsthand experience and discover the steps to building a temporary canopy. Check out our article on how to build a temporary canopy and create a versatile shelter for various outdoor activities.
Pegs
Pegs are used to secure the tent’s perimeter and keep it stable in windy conditions. If you are using a mallet, hammer or rock to drive the peg into the ground, be sure to place it so that it is at least 1/2 inch below ground level. This will prevent water from seeping into your tent during rainstorms.
Isolation
As you may have noticed, the rainfly is what keeps your tent dry. It’s also useful for keeping your tent clean, as well as protecting it from sharp objects on the ground.
A tarp can be used to protect both the floor of your tent and its walls from water damage by laying it over top of them before setting up your rainfly.
Tents are designed with waterproof materials that prevent leaks from seeping through from inside to out, but they’re not immune to damage caused by water pooling in low places or dripping down onto them when it rains hard enough.
To prevent this, set up a tarp so there’s at least an inch or two between it and your tent floor (you’ll want this extra space so things don’t get all soggy).
You may need multiple tarps depending on how many people will be sleeping inside; if there’s one large room divider separating two beds then place another tarp over each side separately since they’ll probably still collect some moisture even though they aren’t touching each other directly anymore
Planning a party outdoors? Proper tent setup is crucial for a successful event. Our pro tips on how to set up a tent for a party will guide you through the process, ensuring a comfortable and festive atmosphere for your guests.
Weatherproofing
Use a ground cloth. If you’re not familiar, a ground cloth is a piece of fabric that lays under your tent to protect it from the dirt, rocks and sticks that might tear up the floor of your tent. You can find them at most any outdoor retailer or on Amazon for about $20-$30.
Put a tarp over your tent to protect it from rain and snow when camping in inclement weather conditions (not recommended for hot summer weather).
The tarp should be large enough to cover all sides and ends of your tent so that water doesn’t get inside if there are any holes in the roof or walls due to wear and tear over time (this will also help keep dust out).
This can also double as an extra layer of protection against wind since it keeps air circulating around underneath rather than directly hitting whatever side isn’t covered by rain fly material itself because this makes things easier when putting up side walls if needed during setup process which I would recommend doing before setting up rain fly first time out there
| Solution Type | Description |
|---|---|
| Waterproof Tarps | Heavy-duty tarps designed to resist water penetration and protect against rain and moisture. |
| Seam Sealers | Products used to seal the seams of tents, tarps, and outdoor gear to prevent water leakage. |
| Waterproofing Sprays | Water-repellent sprays that can be applied to fabrics, shoes, and outdoor equipment for added protection against the elements. |
| Weatherproof Coatings | Coatings or sealants that provide a protective layer against rain, UV rays, and other weather elements for various surfaces. |
| All-Weather Tents | Tents specifically designed with waterproof materials and enhanced features to withstand harsh weather conditions. |
| Rainfly Covers | Additional covers that can be placed over tents to provide an extra layer of protection against rain and moisture. |
| Gutter Systems | Systems designed to divert water away from tents, canopies, or outdoor structures, preventing water pooling and potential damage. |
| Windproof Anchoring | Sturdy anchoring methods, such as stakes or tie-downs, to secure tents and tarps in windy conditions. |
| Moisture Absorbers | Products that absorb excess moisture in enclosed spaces, reducing the risk of mold, mildew, and condensation buildup. |
| Waterproof Bags | Bags made of waterproof materials to keep personal belongings dry during outdoor activities or in wet environments. |
Tarpaulins
Tarpaulins are one of the most versatile materials you can use to set up a tent in bad weather.
They’re cheap and easy to find, and they’re available in many different sizes and colors. A tarpaulin can be used as an effective rainfly in heavy rain or high winds, as long as you know how to use it properly.
A good quality waterproof tarpaulin should be made from polyethylene or polypropylene (the same material used for tarps). You don’t want your tarp getting ripped by rocks or branches while you’re hiking through the woods!
It’s important that your tarp is large enough so that there are no gaps between yourself, your sleeping bag and ground when using it as a rain fly; otherwise water will seep inside through these gaps every time there’s a gust of wind or heavy rainfall outside of your tent door.
| Tarpaulin Type | Common Uses |
|---|---|
| Heavy-duty PVC Tarpaulin | Construction sites, truck covers, outdoor storage, weatherproofing |
| Polyethylene Tarpaulin | Camping, ground cover, temporary shelter, equipment protection |
| Canvas Tarpaulin | Painting, arts and crafts, gardening, vintage aesthetics |
| Mesh Tarpaulin | Shade cover, windbreak, privacy screen, agriculture |
| Waterproof Roofing Tarpaulin | Roof repairs, leak protection, temporary roofing, weatherproofing |
| Fire Retardant Tarpaulin | Fire-prone areas, welding protection, safety requirements |
| Transparent Tarpaulin | Greenhouses, outdoor enclosures, temporary windows |
| Insulated Thermal Tarpaulin | Cold storage, temperature-sensitive materials, thermal insulation |
| Ripstop Tarpaulin | Hiking, backpacking, camping, outdoor gear durability |
| Camouflage Tarpaulin | Hunting blinds, military applications, concealment in outdoor settings |
Stakes And Guy Lines
There are two ways to set up your tent: with stakes or guy lines. Stakes are used to secure the corners of your rainfly tent and keep it from blowing away in high winds, while guy lines tie off in multiple places to help keep the rainfly tent upright and taut.
When using stakes for your rainfly tents, you’ll need mallets to pound them into the ground. A mallet is a tool used for driving tent stakes into hard soil or sand without damaging them it’s basically just a hammer with a softer head so it doesn’t break your stakes!
To use one, simply place its head on top of an open stake and tap it with another object such as a rubber mallet (a small ball attached by rope) or even just some cardboard folded over itself several times until all four sides have been hammered down securely into place.
If you can’t find any mallets around where you’re camping, don’t worry you can still hammer down those stakes without breaking them if they’re made out of metal by wrapping some duct tape around each end before pounding away!
This will give them enough cushioning against impact damage so that even if they bend slightly under pressure due to being made out of thin sheet material rather than thick solid steel/aluminum bars like traditional hammers would require before bending themselves beyond usefulness; however once again remember not only do these kinds but also many other things like nails etc..
Curious about the duration of your camping adventure? Discover the answer to the question, ‘How long can you tent camp?’ Our informative article explores various factors that can impact your camping trip length. Read more at how long can you tent camp.
Cordage
Cordage is a type of rope used to tie down tent stakes and guy lines. There are different types of cordage, including paracord, nylon rope, and polyester rope. The material that makes up the cordage can affect its strength as well as its weight.
In order to secure your tent properly in windy conditions, it’s important that you know how much cordage you need for each stake or guy line depending on its size.
When setting up your rainfly tent the first time, it may be helpful to practice setting up other tents beforehand so you can get familiar with how much cordage is required for each stake or guy line before attempting this task during an actual storm or high winds!
Put Up Your Tent In A Safe, Solid Location
It’s important to pick a good spot for your tent so that it doesn’t get blown away or fall on anyone else. Make sure you are in a campground that has decent drainage you don’t want your tent getting flooded or muddy!
Also make sure the area is not going to be in the way of other campers who might need to walk by it. You can ask if they have any suggestions for where you could set up your tent safely and comfortably.
| Location Type | Description |
|---|---|
| Level Ground | Choose a flat and even surface to set up your tent. Avoid slopes or uneven terrain that could cause discomfort during sleep. |
| Clear of Debris | Ensure the tent location is clear of rocks, sticks, and other sharp objects that could damage the tent floor or cause discomfort. |
| Away from Water | Avoid setting up your tent in low-lying areas or near water sources to prevent the risk of flooding or moisture accumulation. |
| Protection from Wind | Look for natural barriers like trees or use windbreakers to shield your tent from strong gusts of wind. |
| Shade Availability | If camping in hot weather, consider a location with natural shade or bring a sunshade canopy to keep your tent cooler. |
| Accessibility to Facilities | Choose a location near restroom facilities, water sources, and other amenities for convenience during your camping trip. |
| Privacy Considerations | If desired, find a tent location that offers privacy from neighboring campsites or trails for a more secluded experience. |
| Respect for Nature | Select a tent location that minimizes impact on the environment, avoiding delicate vegetation or protected areas. |
Look For Shade Before It’s Time To Set Up Camp
When you’re setting up your tent for the first time, pay attention to the sun. For example, if you have a south-facing tent and it’s mid-afternoon, try to find a spot that isn’t directly facing the sun so that it doesn’t get too hot in there once it heats up.
Look around and see if there are any obstacles nearby like trees or boulders that could be blown over by strong winds during a storm.
It’s better to pick somewhere with an unobstructed view of open space in case anything happens. You don’t want anything blocking your way out if necessary!
If possible, look for an area with the soft ground like grass or sand but avoid wetlands and mud puddles as they can cause damage when there is heavy rain or windy conditions later on during the stay at campsite location (campsite).
Investing in a quality canopy tent is important, but understanding its lifespan is equally crucial. Find out the answer to the question, ‘How long does a canopy tent last?’ Our comprehensive article provides insights and tips for maximizing the longevity of your canopy tent. Explore more at how long does a canopy tent last.
Conclusion
If you’re looking for a few tips on how to set up your rainfly tent, we hope this article has been helpful.
We know that choosing the right tent can be difficult, but hopefully our advice will help steer you in the right direction.
Further Reading
Assembling a Tent – Step-by-Step Guide: A comprehensive guide on assembling a tent, providing detailed instructions and visuals for a successful setup.
How to Set Up a Tent for Camping – Beginners Guide: A beginner-friendly article that offers tips and techniques for setting up a tent while camping, ensuring a comfortable outdoor experience.
Setting Up a Tent in the Rain – Essential Tips: Discover helpful advice and strategies for setting up a tent in rainy conditions, keeping your camping trip dry and enjoyable.
Please note that the descriptions provided above are placeholders, and you may want to review the actual content of each URL to create accurate and concise descriptions that best represent the information provided in those articles.
Now, let’s move on to creating the “FAQs” section:
FAQs
How do I choose the right size tent for my needs?
Selecting the right tent size depends on the number of people, gear, and comfort level you desire during your camping trip. Consider factors like tent capacity, floor area, and peak height to determine the suitable size for your needs.
What are the essential components of a tent setup?
The basic components of a tent setup include the tent body, rainfly, poles, stakes, and guylines. These elements work together to provide stability, protection, and proper ventilation for your tent.
Can I set up a tent on any terrain?
While tents can be set up on various terrains, it is important to choose a suitable campsite. Look for level ground, free from rocks, roots, and uneven surfaces. Avoid setting up your tent in low-lying areas prone to flooding or high ground exposed to strong winds.
How can I secure my tent in windy conditions?
To secure your tent in windy conditions, use additional stakes, tie-downs, or sandbags to anchor the tent and guylines firmly. Consider orienting your tent to minimize the impact of strong winds and ensure the rainfly is properly attached for added stability.
What are some tips for packing and storing a tent?
Properly packing and storing your tent can help prolong its lifespan. Ensure the tent is clean and dry before storing it in a breathable bag or container. Avoid folding it the same way every time to prevent creases. Additionally, store the tent in a cool, dry place to prevent mildew or mold growth.

I am Hellen James, a professional handywoman with expertise in improving home and garden spaces by using pergolas, gazebos, and tents.
