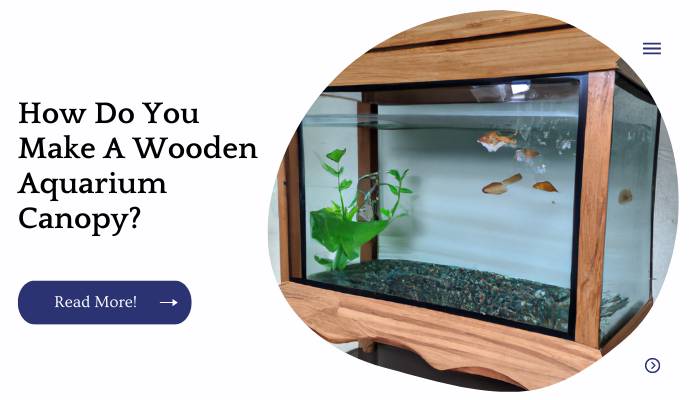
Aquariums can be beautiful, but they’re also a lot of work. One thing that can help make the process easier is a wooden canopy.
After all, adding one will hide away all those cords and pipes while still allowing light to penetrate your aquarium and plants so they can grow better!
You’ll need some basic carpentry skills in order to build one yourself, but it’s fairly easy. Check out this guide for everything you need to know about how to build your own canopy:
| Takeaways |
|---|
| Building a wooden aquarium canopy requires careful planning and precise measurements. |
| Choosing the right type of wood is important for durability and resistance to moisture. |
| Utilizing a proper sealing technique helps protect the wooden canopy from water damage. |
| Incorporating functional features like access doors and ventilation is essential for aquarium maintenance. |
| Adding a finishing touch, such as staining or painting, enhances the overall appearance of the wooden canopy. |
| Regular maintenance and inspections are necessary to ensure the canopy remains in good condition over time. |
Sizing
Sizing your canopy is one of the most important steps in making a wooden aquarium canopy. The canopy should be at least 1 inch larger than the aquarium so that it can fit snugly against the back wall, and always use more than 1/2 inch thick material for strength.
The height of the canopy needs to be at least 4 inches taller than your fish tank so there’s room for a light source and ventilation inside.
Looking to build a cost-effective covered patio? Our guide on how to build a cheap covered patio provides easy fixes and tips to create an enjoyable outdoor space without breaking the bank.
Lumber Selection
Hardwoods are typically harder than softwoods, and they’re usually more durable. They also tend to contain fewer knots and other flaws that might compromise the integrity of your canopy. Hardwood lumber is preferred for its strength and durability.
Softwood species like pine or cedar would be a better choice if you’re looking at something more decorative or rustic in design, given their natural grain patterns that lend themselves well to finishing treatments (such as staining).
These woods tend to be softer than hardwoods and may not hold up well over time under constant exposure to sunlight and water vapors.
It’s important to consider what kind of wood you want your canopy made out of before beginning construction—and how much weight it can bear!
If you plan on using thinner pieces of lumber (1×1 or 1×2 boards), then select a smaller aquarium with lower water levels so there isn’t too much pressure placed on any particular part . Thicker boards (2×4s) will offer better stability overall, but take note:
You’ll need additional support underneath this type if it’s going into an aquarium that holds more than one gallon per square foot!
| Lumber Type | Description |
|---|---|
| Pressure-Treated Pine | Treated to resist decay, rot, and insect damage, making it suitable for outdoor use. |
| Cedar | Naturally resistant to decay and insect infestation, known for its durability and aesthetic appeal. |
| Redwood | Durable and naturally resistant to decay, offering a rich color and attractive grain pattern. |
| Douglas Fir | Strong and dimensionally stable, ideal for structural components of the canopy. |
| Composite Decking | Made from a blend of wood fibers and recycled plastic, providing low-maintenance durability. |
| Tropical Hardwoods (e.g., Ipe, Mahogany) | Dense and durable, known for their resistance to rot, decay, and insect damage. |
| Spruce | Affordable and readily available, suitable for non-structural canopy components. |
| Hemlock | Strong and lightweight, often used for framing and support in canopy construction. |
| Oak | Dense and durable, offers a classic appearance and excellent strength for structural elements. |
| Bamboo | Sustainable and renewable option, known for its strength, flexibility, and unique aesthetic. |
Cutting
To cut the wood, use a circular saw. Wear safety glasses to protect your eyes from flying debris and damage to the blade of your saw.
The angle at which you cut will vary depending on what size canopy you are making, and it’s important that you measure this correctly before cutting.
If you have an old jigsaw lying around, use it! A jigsaw is another good tool for cutting with an angled edge, but if not—or if you just don’t want to spend money on yet another tool—a router can work well for this job too!
A miter saw (like a circular saw only smaller) can also be used instead of a router or jigsaw if needed!
To protect and enhance the longevity of your patio furniture, it’s crucial to know how to properly stain and seal it. Check out our informative article on how to stain and seal patio furniture for expert tips and techniques.
Putting the Canopy Together
Putting the canopy together is a simple process. First, you will need to glue and screw the joints.
You can use wood glue or wood screws for this step, but be careful not to over-tighten either type of fastener as that could cause cracking in your aquarium canopy.
Once you have joined all of the pieces together, make sure that they line up properly before moving on to the next step: painting!
Painting the Canopy
Apply a primer to the wood and let it dry, per the instructions on your can of primer.
Once you’ve applied your primer, apply a stain or paint that is UV resistant. If you’re using an oil-based stain, apply it with a brush; if you’re using latex paint and want a glossy finish, use an artist’s foam brush to wipe on coats of latex paint (just remember to clean off any drips before they dry).
Let both of these dry thoroughly before installing your canopy so that no moisture seeps into the wood and ruins its integrity.
Lastly, if your choice of coloring involves non-toxic paints or stains that are low in volatile organic compounds (VOCs), then congratulations! Your aquarium cover is ready for installation!
Installing Hinges and Handles
Once you’ve installed the hinges and handles, it’s time to make sure they’re level.
Use a level on each side of the canopy and adjust until they are straight up and down, then tighten them into place with an Allen wrench or screwdriver.
Make sure that the screws aren’t too long because they can poke through the wood.
Installing a patio door on concrete can seem daunting, but with our easy-to-follow instructions in the article on how to install a patio door on concrete, you’ll be able to tackle the project efficiently and achieve a seamless result.
Sealing the Canopy
Once the canopy is complete, you need to seal it. This will prevent water from entering and damaging your aquarium.
It’s very important that you use a sealant that is safe for aquariums, as well as any paint or stain that comes in contact with water.
You should use a brush to apply the sealant so that it covers all of the joints between pieces of wood. Let the sealer dry for at least 24 hours before continuing on with this project.
If you don’t have access to a brush, don’t worry! You can also use a paint roller instead! Just be sure not to apply too much pressure when rolling over each piece of wood so as not to cause any damage or unevenness in coverage between different parts of your canopy design
| Sealing Option | Description |
|---|---|
| Thompson’s Water Seal | Protects the canopy from water damage with its advanced waterproofing formula. |
| Flex Seal | Provides a flexible and watertight seal to prevent leaks and moisture penetration. |
| Silicone Sealant | Forms a durable and waterproof seal on joints and gaps in the canopy structure. |
| Polyurethane Sealant | Offers excellent adhesion and weather resistance to protect the canopy from the elements. |
| Acrylic Sealant | Creates a clear and flexible seal that effectively seals gaps and cracks in the canopy. |
| Krylon Clear Coat | Provides a protective coating that seals the canopy and enhances its durability. |
| Rust-Oleum LeakSeal | Seals and stops leaks in the canopy with its rubberized coating. |
| Dicor Lap Sealant | Specifically designed for RV canopies, it provides a strong seal against water and weather. |
| GE Silicone II | Offers superior waterproofing and adhesion for long-lasting protection of the canopy. |
| Sashco Big Stretch | Forms a permanent and elastic seal that can withstand extreme weather conditions. |
Adding Plexiglass Panels
It’s time to install the plexiglass panels. First, you’ll need to cut them down to size using a jigsaw and/or table saw.
Make sure that you choose the correct thickness for your canopy—the thicker the panel, the more light it will block out from entering through its surface (which could be either good or bad depending on your needs).
Once you’ve cut all of your pieces, it’s time to drill holes in each corner and screw them into place with large screws that have been pre-drilled through the same boards they’re attached to.
This will keep them sturdy enough not only withstand being bumped around inside of an aquarium tank but also prevent any water getting behind them by accident!
Rusted wrought iron patio furniture can be restored to its former glory. Learn how to repair and revitalize your furniture with our comprehensive guide on repairing rusted wrought iron patio furniture, featuring step-by-step instructions and helpful tips.
Installing Lights On The Canopy
Once you have the lights installed and wired, it’s time to put them into the canopy. First, center the lights on top of your canopy, lining up their holes with those in the wood.
Next, hold them firmly in place by using a small number of screws or nails along each side and at each corner to secure them in place.
| Lighting Option | Description |
|---|---|
| LED Strip Lights | Energy-efficient lighting solution that can be easily attached to the canopy frame. |
| Pendant Lights | Stylish hanging lights that provide focused illumination and decorative flair. |
| Solar-Powered Lights | Environmentally-friendly option that harnesses solar energy for illumination. |
| String Lights | Versatile and decorative lighting option that can be easily draped across the canopy. |
| Spotlights | Directional lights that offer focused illumination on specific areas of the canopy. |
| Fairy Lights | Delicate and whimsical lights that create a magical ambiance under the canopy. |
| Track Lighting | Adjustable lights mounted on a track for flexibility in directing light where needed. |
| Lanterns | Traditional and rustic lighting option that adds charm and warmth to the canopy. |
| Smart Lighting Systems | Integrated lighting systems that can be controlled remotely using a smartphone or voice commands. |
| Chandelier | Elegant and sophisticated lighting fixture that adds a touch of luxury to the canopy. |
Adding Fans To The Canopy
Choose a fan with a low CFM (cubic feet per minute) rating. The canopy’s size will determine the size of your fan. For example, if your canopy is 20 inches wide, you’ll need a smaller fan than if it were 30 inches wide.
Place the fan in one corner of the canopy, facing downward towards its center and not directly at any plants or fish inside it!
Wire up each end of your new aquarium light fixture; connect one wire from each side to complete an electrical circuit that allows power to flow through them when switched on by pressing down on their respective switches (or flicking switches if using push-button controls).
Transform the look of your metal patio door with a fresh coat of paint. Our guide on how to paint a metal patio door provides insights and techniques to achieve a professional finish and give your door a new lease on life.
Conclusion
I hope this article has inspired you to create your own wooden canopy. It’s a relatively easy project, and can be done in just a few hours.
If you have any questions about the process or need some advice on how to accomplish it, please feel free to reach out in the comments below!
Further Reading
Here are some additional resources for further reading on building aquarium canopies:
DIY Basic Aquarium Canopy Plan: This comprehensive guide provides a step-by-step plan for building a basic aquarium canopy, including measurements and materials needed.
Building an Aquarium Canopy: Learn the ins and outs of building a customized aquarium canopy with this detailed article, which covers design considerations, construction techniques, and finishing touches.
DIY Aquarium Canopy Plans: Discover a variety of DIY aquarium canopy plans in this resourceful article, including different styles and sizes to suit your specific needs and preferences.
FAQs
How do I measure for an aquarium canopy?
To measure for an aquarium canopy, measure the length, width, and height of your aquarium, ensuring you account for any equipment or overhang you want to accommodate.
What materials are commonly used to build aquarium canopies?
Commonly used materials for aquarium canopies include wood, acrylic, PVC, and metal. The choice of material depends on factors such as aesthetics, durability, and ease of maintenance.
Do I need ventilation in an aquarium canopy?
Yes, providing proper ventilation in an aquarium canopy is crucial for maintaining optimal air circulation and preventing excessive heat buildup. This can be achieved through the inclusion of vents or fans.
Can I customize the design of my aquarium canopy?
Absolutely! Customizing the design of your aquarium canopy allows you to match your personal style and complement the overall aesthetics of your aquarium setup. Consider factors such as lighting placement and access for maintenance.
How can I ensure the canopy is securely attached to the aquarium?
To ensure a secure attachment, it is recommended to use sturdy brackets or hinges that are specifically designed for aquarium canopies. Additionally, double-check the stability and weight distribution to prevent any accidents or damage to the aquarium.

I am Hellen James, a professional handywoman with expertise in improving home and garden spaces by using pergolas, gazebos, and tents.
