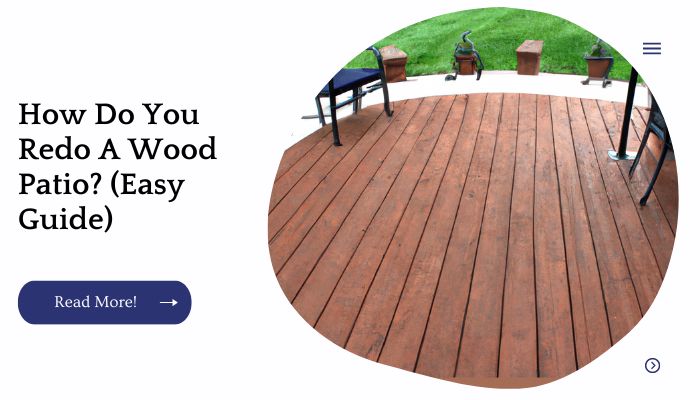
Redoing a wood deck or patio is a great way to refresh your backyard. You can make it look new and modern, which will add value to your home and make you feel proud every time you come back from work or head out for the weekend.
The best part is that redoing a wood deck or patio doesn’t have to be expensive: It can be as simple as painting an old rug or adding some accessories!
Here are some ideas for how to refresh your porch in no time at all:
| Takeaways |
|---|
| Redoing a wood patio can be made easier with a comprehensive guide. |
| Following a step-by-step process ensures a successful patio redo. |
| Consider the condition of your patio and plan accordingly for repairs or replacements. |
| Proper preparation, such as cleaning and sanding, is essential before refinishing. |
| Choose the right materials and finishes that suit your desired outcome. |
| Pay attention to details, including edge work and proper drying time. |
| Enhancing your patio with new features or decorations can add to its overall appeal. |
| Regular maintenance and periodic inspections help prolong the life of your wood patio. |
| Seek professional assistance for complex projects or if unsure about specific tasks. |
| Enjoy the satisfaction of a beautifully redone wood patio and make the most of your outdoor space. |
Carefully Remove The Old Planks
Remove the old planks carefully. This is very important, because you don’t want to damage the decking that’s underneath.
You can use a crowbar or pry bar to gently pop them off if they’re stuck on there pretty good. If they’re not too bad, you can simply pull out the nails with pliers and then use a hammer and chisel to remove any nails that are left behind in the wood.
Looking to build a cheap covered patio for your outdoor space? Our easy guide provides step-by-step instructions and budget-friendly tips. Check out our comprehensive guide on building a cheap covered patio to create a beautiful and affordable outdoor retreat.
Clean Old Planks With A Power Washer
To get your deck or patio ready for new planks, you’ll need to give it a thorough cleaning. It’s best to use a power washer that is safe for use on wood.
You should also wear goggles and gloves when using the machine, as they can produce high-pressure water that could cause injury if mishandled.
To start your cleaning process, you’ll want to apply a cleaning solution available at any home improvement store to the planks of your patio or deck.
Let the product sit for about 10 minutes before starting up your power washer and blasting away all of those old stains!
| Brand | Model | PSI (Pounds per Square Inch) | GPM (Gallons per Minute) | Price Range |
|---|---|---|---|---|
| Karcher | K5 Premium | 2000 | 1.4 | $200-$300 |
| Sun Joe | SPX3000 | 2030 | 1.76 | $100-$150 |
| Ryobi | RY142300 | 2300 | 1.2 | $150-$200 |
| Greenworks | GPW2006 | 2000 | 1.2 | $80-$120 |
| Simpson | MSH3125 | 3100 | 2.5 | $300-$400 |
Sand And Recoat The Planks
When the planks are dry to the touch, you can sand them down. Depending on how smooth you want your patio to be, use a different sanding tool.
You can choose from power tools like an electric or cordless sander, or hand tools like a sanding block and sandpaper.
Hand tools can be effective but they will take more time than an electric sander. If using hand tools such as a sanding sponge or belt sander, use caution not to damage any surrounding areas of woodwork during this part of the project.
When it comes to redoing a wood patio, don’t forget about your patio furniture. Learn how to properly stain and seal patio furniture to protect it from the elements and extend its lifespan. Follow our expert tips in our article on staining and sealing patio furniture for a refreshed and long-lasting patio set.
Add A Concrete Overlay To The Floor Of Your Porch
Adding a concrete overlay to your porch is a good option for those who don’t like the look of concrete.
Concrete overlay is not actual concrete; rather, it’s a thin layer of concrete that can be poured over existing concrete floors. The new coating will give you a fresh new floor with no need to tear up your existing one!
If you’d prefer not to work with any kind of cement at all and want something that looks more like wood, consider making your patio out of composite decking materials.
Glue Carpet Squares To Your Porch
If you’re going for a more modern look, glue carpet squares to your porch. This is a great idea if you have an old wood porch that’s in need of a facelift.
You can buy carpet squares at any major home improvement store and they come in different colors and patterns, so it’s easy to find something that will fit your style.
Spray adhesive makes it easy to apply the carpet squares; simply spray the adhesive directly onto the surface where you want them (don’t forget to wear gloves!) and then apply the carpet square right away before it dries out.
Once all of your squares are glued down, use a glue gun or hot glue stick to seal each seam between two pieces of carpeting together.
If there’s no seam between two pieces then just go over each individual square with one pass of hot glue from start-to-finish at center point on top side only (not bottom).
| Brand | Adhesive Type | Suitable Surfaces | Drying Time | Price Range |
|---|---|---|---|---|
| 3M | Spray Adhesive | Porch Concrete, Wood | 1-2 hours | $10-$20 |
| Roberts | Outdoor Carpet Adhesive | Porch Concrete, Wood | 24 hours | $15-$25 |
| Loctite | Heavy Duty Construction Adhesive | Porch Concrete, Wood | 24-48 hours | $8-$15 |
| Gorilla | Heavy Duty Construction Adhesive | Porch Concrete, Wood | 24 hours | $10-$20 |
| TEC | Pressure Sensitive Carpet Tile Adhesive | Porch Concrete, Wood | 24 hours | $20-$30 |
Paint Your Deck Or Patio
There are three main ways you can paint your deck or patio:
Paint sprayer: The pros and cons of using a sprayer are the same as for any other paint application, but with a sprayer there’s less chance for splatter or drips.
Roller: Rollers work well for large surfaces like decks and patios, but they can be messy if you’re not careful.
You’ll need to take precautions against overspill by applying plastic sheeting around the edges of your surface to catch drips and splatters.
Be sure that the roller is new and clean before use and don’t forget to rinse it out after each section!
Brush: Brushes allow greater control than rollers do, so they’re especially useful when painting intricate details on railings or walkways.
A brush also allows for more precision in hard-to-reach places such as corners or underneath eaves.
Looking for alternative ways to illuminate your patio without relying on traditional string lights? Discover creative lighting ideas in our article on how to light a patio without string lights. From solar-powered lanterns to LED spotlights, find the perfect lighting solution for your outdoor space.
Install Ceramic Or Stone Tile On Your Porch Floor
Installing ceramic or stone tile is likely to be the most expensive part of your redo, but it’s also the biggest bang for your buck.
You’ll want to choose tiles that are waterproof and can withstand high amounts of foot traffic. In general, “tileable” grout is best for outdoor patios because it will expand if it gets wet and won’t crack.
Grouted outdoor tile should also have spacers between each piece so that water doesn’t get trapped inside them (this causes them to decay more quickly).
If you’re installing on an elevated patio floor like a porch I recommend installing three inches worth of concrete board underneath the tiles at least six months prior to installation; this will allow the concrete board time to cure properly before you lay down your new surface.
Installing ceramic or stone tile requires some tools like a hammer drill (to make holes for anchors), masonry bits (to drill into concrete), 10-24 screws (to secure anchors) and sealant tape or caulk (to fill gaps between joints).
I usually use ½”-diameter holes spaced roughly every 12 inches on my patio floors; this gives me plenty of room in which I can run electrical wires through without having any issue with guests tripping over them later down the line!
Paint An Outdoor Rug On Your Porch Floor
Once you’ve decided to paint an outdoor rug on your porch floor, it’s time to get started. You’ll need a few supplies and materials before you begin:
- Paint roller
- Paint
- Drop cloths or tarp (optional)
It’s best if you can find a paint that will stand up to the elements in your area, especially if high temperatures are common.
Also make sure that whatever paint you use has low VOC levels those are the chemicals released into the air by certain paints when they’re being used. If possible, look for one with zero VOCs.
Thinking about installing a patio door on a concrete surface? Our easy-to-follow guide on installing a patio door on concrete provides step-by-step instructions and helpful tips to make the process smooth. Upgrade your patio entrance with confidence using our expert advice.
Use A Stencil To Paint A Design On Your Porch Floor
You can use a stencil to paint a design on your porch floor. Stencils are inexpensive and easy to use. You can make your own stencils with cardboard or wood, or buy them at craft stores.
You can find a wide variety of patterns online, including flowers and geometric shapes like circles and diamonds.
Add Rubber Pavers To Your Patio
Rubber pavers are another good choice for patios. They’re easy to install and durable, and can last for many years. They’re available in different colors, too a bonus if you have a specific color scheme or theme in mind. Rubber pavers are also fairly affordable, so they won’t break the bank as you redo your entire patio with them!
To install rubber pavers on your wood patio:
Remove existing wood decking from the area where you want the rubber paving stones installed; this will leave behind an open space where the new flooring will go
Measure out how much material you need so that each row of paving stones is level with each other (this is important), then cut it down using a circular saw or jigsaw tool if necessary
Place thin strips of wood under each row of rubber pavers so they don’t sink into wet ground during installation process – these should be about 1′ long but not longer than 6″ since they’ll be covered by additional layers later on
| Brand | Material | Size | Thickness | Price per Square Foot |
|---|---|---|---|---|
| Multy Home | Recycled Rubber | 18″ x 18″ | 0.5″ | $3-$5 |
| RevTime | Heavy Duty Rubber | 16″ x 16″ | 0.75″ | $4-$6 |
| Envirotile | Recycled Rubber | 24″ x 24″ | 1″ | $6-$8 |
| Rubber-Cal | EPDM Rubber | 24″ x 24″ | 0.5″ | $5-$7 |
| Sorbus | Interlocking Rubber Tiles | 12″ x 12″ | 0.375″ | $2-$4 |
Get Some New Furniture And Accessories
There are many places to find patio furniture and accessories. You can go to a local home improvement store, but it’s more fun to shop online.
The internet has a plethora of choices that you won’t find in person, including eclectic pieces and vintage collections.
Make sure any new furniture you buy is made from high-quality materials like cedar and teakwood.
These woods resist rot, mold and mildew much better than pressure-treated wood (which can emit toxic fumes when exposed to moisture).
The same goes for your cushions make sure they’re made from treated foam or other synthetic materials that don’t absorb water readily.
Don’t forget about the little things! Your patio will look complete only when you’ve added some finishing touches like decorative planters and potted plants along with an umbrella for shade during those hot summer days when the sun beats down mercilessly on the earth below us all…
Transform the look and feel of your wood patio by laying stylish and durable floor tiles. Our article on how to lay patio floor tiles offers a step-by-step guide and essential tips to help you achieve a professional and stunning result. Elevate your patio’s aesthetic appeal with this easy and effective solution.
Conclusion
As we’ve seen, there are lots of ways that you can redo a wood patio. If you don’t want to paint or stain the deck or patio floor, there are still plenty of other options for improving its appearance and function.
You could install ceramic or stone tile on the floor instead of concrete; cover an outdoor rug with carpet squares; paint a design onto your porch using stencils; add rubber pavers instead of regular ones; or even just get some new furniture and accessories!
Further Reading
Here are some additional resources for related topics:
Clean and Refinish a Wood Deck: Learn how to properly clean and refinish your wood deck to maintain its beauty and extend its lifespan. This guide provides step-by-step instructions and helpful tips.
Go From an Old Deck to New in 4 Steps: Discover a comprehensive guide on revitalizing an old deck. This resource covers everything from cleaning and repairs to staining and sealing, giving your deck a fresh and updated look.
Deck Restoration: Beginner’s Guide: If you’re new to deck restoration, this guide is a great starting point. Learn about the essential steps, tools, and techniques required to restore and enhance the appearance of your deck.
FAQs
Here are some frequently asked questions about deck restoration:
How often should I refinish my wood deck?
The frequency of refinishing your wood deck depends on various factors such as the type of wood, exposure to elements, and the quality of previous finishes. As a general guideline, it’s recommended to refinish your deck every 2-3 years or when the finish starts to deteriorate.
Can I apply a new finish directly over the old one?
In most cases, it’s not recommended to apply a new finish directly over the old one. It’s crucial to properly prepare the surface by cleaning, stripping, and sanding the deck before applying a new finish. This ensures better adhesion and a more durable result.
How do I clean my deck before refinishing?
To clean your deck before refinishing, start by removing any debris and sweeping the surface. Then, use a deck cleaner or a mixture of warm water and mild detergent to scrub the deck thoroughly. Rinse with clean water and allow it to dry completely before proceeding with refinishing.
Should I use a stain or a sealer for my wood deck?
The choice between stain and sealer depends on your preferences and the desired outcome. Stains add color and enhance the appearance of the wood while protecting it from UV rays. Sealers, on the other hand, provide a clear protective layer without altering the wood’s natural color. Consider the look you want to achieve and the level of protection needed before making a decision.
Can I restore a severely damaged deck on my own?
Restoring a severely damaged deck may require professional help, especially if structural repairs are needed. However, minor issues such as surface scratches, small cracks, or worn-out finishes can often be addressed through DIY restoration. Assess the extent of the damage and consult with a professional if necessary.

I am Hellen James, a professional handywoman with expertise in improving home and garden spaces by using pergolas, gazebos, and tents.
