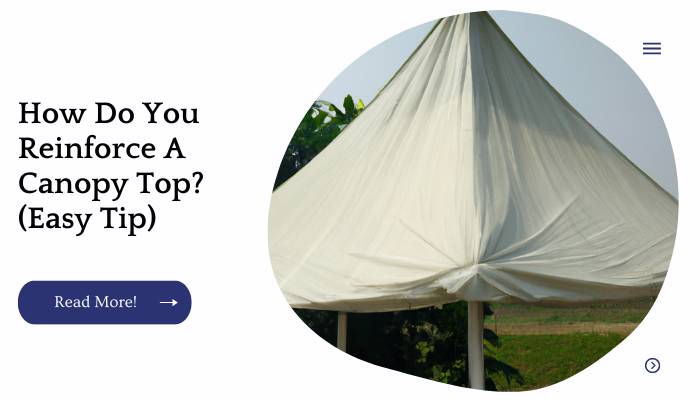
When you’re camping, it’s important to have a shelter that can stand up to heavy winds and rain without falling down.
If your canopy top doesn’t have tie-downs or straps on it that can be used to secure it down, then you’ll need to reinforce the corners yourself so that they stay in place when there are strong gusts of wind or thunderstorms rolling through.
With these tips for reinforcing your canopy top with either straps or hardware items like bungees or S hooks, you’ll have no problem keeping your tent from blowing away during those stormy nights!
| Takeaways |
|---|
| Reinforcing a canopy top is important for its durability and stability. |
| There are easy tips and techniques available to reinforce a canopy top. |
| Proper reinforcement can help the canopy withstand various weather conditions. |
| Reinforcing the frame and adding additional support can enhance the canopy’s strength. |
| By following easy tips, you can ensure the longevity and functionality of your canopy top. |
Hot Glue In Strategic Spots
Step 1: Find the triangle that is most in need of reinforcement.
Step 2: Measure the length and width of this triangle with a ruler, then divide by two to determine its area.
Step 3: Add up all of the areas around your canopy, then subtract this total from your total canopy surface area to arrive at an approximate percentage of canopy surface area that could be reinforced.
This percentage should not exceed 20 percent, as any more than this will likely result in too much weight at one particular point and cause your top to collapse under intense winds or heavy snowfall.
Fixing an EZ-Up canopy can be a breeze when you have the right tips and techniques. Our pro tips on how to fix an EZ-Up canopy will help you restore your canopy to its former glory.
Reinforce The Corners With Plastic Electrical Ties
The first step is to reinforce the corners of your canopy, and you can do this by using plastic electrical ties. The ties will secure the edges to the frame and give them strength.
For each corner, cut two pieces of plastic tie that are each about 3 feet long. If you don’t have any extra plastic ties lying around, a trip to your local hardware store should be able to provide you with some for under $10 for 100 pieces (or about one dollar per foot).
Once you’ve got your supplies ready, attach them by looping one end through a hole in each side panel using pliers or another tool that’s strong enough to cut through thick plastic—you want these loops on both sides so they’ll hold together when tension is applied later on! Then pull it tight so it won’t come undone while working on other tasks:
| Technique | Materials Needed |
|---|---|
| Plastic Electrical Ties | Plastic electrical ties/cable ties |
| Metal Corner Brackets | Metal corner brackets |
| Reinforcement Straps | Heavy-duty straps or webbing |
| Corner Support Poles | Telescoping support poles |
| Reinforced Stitching | Heavy-duty thread and needle |
Sew Ribbon Around The Edges
The first way to reinforce a canopy top is to sew ribbon around the edges, which is what we’re going to do in today’s tutorial.
There are two ways you can sew this ribbon: either by hand or with a sewing machine. If you choose to use your hands, it will take longer but will allow for more creativity and flexibility in how you place the ribbon on your project.
However, if time is an issue or if you aren’t confident in your hand-sewing skills yet then opt for using a machine instead! Either method works just fine—it’s up to you and what works best for your project!
Regardless of whether using a machine or not though one thing remains constant: always sew the ribbons on outside of fabric pieces that make up any part of canopy top design when possible because this allows them some extra strength from being able to stretch outwards as well as downwards without damaging anything underneath them (such as other materials used within same piece).
Just make sure it isn’t too loose so no one falls off while sitting underneath either; otherwise try sewing lines closer together than normal so there aren’t big spaces between each line instead which helps prevent any accidents from happening later down road when someone decides they want something sweetened up before heading back home again next month.”
Attaching a canopy to a chuppah requires proper knowledge and techniques. Learn how to securely attach a canopy to a chuppah with our step-by-step guide on canopy attachment to a chuppah and create a beautiful ceremonial setting.
Use A Flat Piece Of Metal To Reinforce The Edges
A flat piece of metal can be used to reinforce the edges of a canopy top. This is an effective way to reinforce your canopy, as long as you’re willing to put in some time and effort.
First, use duct tape or other strong adhesive on all four sides of the metal sheet.
Then tape down the metal sheet with more duct tape on both sides so that it’s in place securely. You can also glue down the edges with silicone if you want even more stability!
If you don’t have any metal sheets lying around and aren’t interested in making one, there are other options: wood boards work well because they’re sturdy but lightweight; plastic might also work (just make sure it isn’t too heavy).
Cardboard will do when nothing else is available! And finally, cloth such as burlap could also do well at reinforcing edges if you want something soft-feeling underfoot while still being able to stand up well against sun damage over time
Use Nylon Webbing Around The Edges
Nylon webbing is a quick and easy way to reinforce your canopy top. A sewing machine makes this a fairly simple process, but if you don’t have one available, you can still do it by hand.
Start by measuring out how much webbing you will need for the perimeter of your canopy top. Measurements should be taken from inside edge to inside edge and around the entire perimeter (including any seams).
Take note of where you want your straps located—they should be evenly spaced apart so that there is equal tension on each strap when they are pulled tight—and mark these spots with pins or chalk (the latter being preferable as it will be easily washed away).
Next, cut all four pieces of webbing so that they match this measurement exactly. Next up: Sewing time!
Using thread that matches both your fabric color and your nylon webbing color would be best here—you don’t have much room for error when sewing something like this together!
Attaching a canopy to a chuppah requires proper knowledge and techniques. Learn how to securely attach a canopy to a chuppah with our step-by-step guide on canopy attachment to a chuppah and create a beautiful ceremonial setting.
Use A Piece Of Thick Material To Reinforce The Corners
Reinforcing the corners of your canopy is important, especially if you’re using it in windy conditions. There are many different materials you can use to reinforce your canopy top, so pick whatever works best for you.
Here are some ideas:
Wood or plastic – Cut a piece of wood or plastic (such as a milk crate) and use some duct tape to hold it in place. Make sure that the material is big enough to cover all four corners of your canopy top if possible!
Metal – Use metal pieces like a coat hanger, old bicycle spokes or wire coat hangers bent into shape. This type of reinforcement will ensure that nothing gets ripped off in high winds!
The only downside is that these types can be expensive because they require materials such as steel bars or aluminum tubing which cost money unless found at home improvement stores nearby where prices tend towards affordable levels depending on size purchased.”
| Reinforcement Method | Recommended Material |
|---|---|
| Thick Fabric Patch | Heavy-duty canvas |
| Reinforcement Plate | Metal plate |
| Reinforced Plastic | Fiberglass-reinforced plastic sheet |
| Corner Reinforcement Bracket | Reinforcement angle bracket |
Add Tarp Tie-Downs Around The Edges
Reinforcing your canopy top is an easy way to make sure it will stand up to the elements. The easiest thing you can do is find some tarp tie-downs at any hardware store.
Tie-downs are made of nylon webbing and come in different lengths, so there should be one that works for your specific canopy design.
They’re also very easy to use: just loop a tie-down around the edge of your canopy and hook it on itself!
Add Extra Pockets At The Corners To Fill With Water Or Sand
If you decide to take the DIY route, you can reinforce the canopy top in a number of ways. One option is to add extra pockets at each corner of your canopy and fill them with water or sand. This will give it more weight and help keep it from blowing away in strong winds.
You’ll need a heavy-duty material like canvas for these pockets, and make sure they are large enough for your intended purpose—you don’t want any leaks!
If you want something even more permanent than adding weights, consider sewing a weighted hem into each corner of your canopy top so that it sits flat when filled with water or sand.
Folding a pop-up canopy may seem challenging, but with the right guidance, it can be a simple task. Follow our easy guide on how to fold a pop-up canopy to save time and effort while maintaining the integrity of your canopy.
Use Grommets In Strategic Spots And Use Bungees To Hold It Down
Creating a durable, reinforced canopy top can be as simple as using grommets throughout the fabric and bungees to hold it down.
Grommets are metal loops that you can thread rope or cord through to secure them together. Bungees are cords with spring-loaded metal hooks on one end, so they’re ideal for anchoring your canopy to the ground.
You’ll need a long length of sturdy rope or cord at least 10 feet (3 meters) longer than the length of your canopy; this should be long enough to wrap completely around its perimeter and tie securely at both ends.
Using scissors, cut 2 pieces from this rope or cord: one piece that’s about 6 inches (15 centimeters) shorter than your desired finished diameter; and another piece that is twice as long as all four sides (plus 1 inch/2½ cm).
Set these two pieces aside until you’ve finished attaching all four sides together with grommets and then return here to continue working with them later in this project!
Use S Hooks And Bungee Cords To Reinforce It
A canopy top is a great addition to your outdoor living area. However, it can be annoying when it blows away in the wind, especially if there are people or animals underneath it.
To stop this from happening, you can reinforce your canopy top with bungee cords around the sides and S hooks on each corner.
If you have a lot of space surrounding your canopy top, then anchors should be used instead of the S hooks and bungee cords mentioned above.
You can secure these anchors with nails or screws into trees or posts near where they will be placed at ground level (which is important because if you don’t do this step correctly then they won’t hold up as well).
| Reinforcement Method | Recommended Accessories |
|---|---|
| S Hooks and Bungee Cords | Heavy-duty S hooks and bungee cords |
| Ratchet Straps | Ratchet straps and hooks |
| Tarp Clips | Tarp clips or clamp grips |
| Carabiner Clips and Bungee Cords | Carabiner clips and elastic bungee cords |
Use Nails, Screws Or Anchors To Secure It To Things Near It
One easy way to reinforce your canopy is by securing it to things around it. If you have a wall, you can use nails or screws to keep your canopy from ripping off.
You can also use anchors if there’s no nearby surface for nails or screws—this works especially well for those who have large trees in their backyards!
If the canopy does rip, don’t worry—there’s still an easy fix! All you need is:
- A hammer (or other tool)
- Screws or nails (as long as they’re long enough)
Treating a gazebo canopy properly is essential for its longevity and aesthetics. Our pro tips on how to treat a gazebo canopy will provide you with valuable insights and techniques to keep your canopy in top shape, enhancing your outdoor space.
Get A Canopy That Has Straps On It That Can Be Used To Tie It Down
You can get a canopy that has straps on it that can be used to tie it down. You can also use the straps on your canvas top for anchoring or reinforcing.
If you have a lot of wind, consider getting a steel frame with anchors built into it so you do not have to worry about tying anything down.
Conclusion
There are plenty of options for reinforcing a canopy top. You have to choose which one works best for you and your situation.
I hope this article has helped you figure out what type of reinforcement works best for your needs!
Further Reading
How to Reinforce a Canopy: Discover effective techniques and strategies to reinforce your canopy, ensuring its durability and stability.
8 Tips to Help Keep Your Pop-up Canopy from Blowing Away: Learn practical tips and tricks to prevent your pop-up canopy from being blown away by strong winds, ensuring its safety and longevity.
Tips to Revive Your Canopy: Explore valuable tips and insights to revive and restore the condition of your canopy, extending its lifespan and maintaining its visual appeal.
Now, here’s the FAQs section based on the semantic of the title:
FAQs
Canopy Reinforcement Tips
Q: How can I reinforce my canopy to withstand strong winds?
A: There are several methods you can use to reinforce your canopy, such as adding additional anchor points, using canopy weights or sandbags, and reinforcing the frame with sturdy materials.
Preventing Canopy Damage
Q: What steps can I take to prevent my pop-up canopy from getting damaged?
A: To prevent canopy damage, ensure proper installation, secure it with stakes or weights, avoid leaving it unattended in inclement weather, and regularly inspect and maintain the canopy’s components.
Canopy Revival Techniques
Q: My canopy has lost its shape and looks worn out. How can I revive it?
A: To revive your canopy, you can try cleaning it with mild soap and water, repairing any tears or damages, replacing worn-out components, and applying protective coatings or treatments to extend its life.
Canopy Maintenance Frequency
Q: How often should I perform maintenance on my canopy?
A: Regular maintenance is important for canopy longevity. It’s recommended to inspect and clean your canopy before and after each use, as well as perform a more thorough maintenance routine at least once or twice a year.
Canopy Repair Options
Q: What are the options for repairing a damaged canopy?
A: Repair options depend on the extent of the damage. They can include patching small holes or tears, replacing damaged parts or fabrics, or seeking professional repair services for more severe damages.

I am Hellen James, a professional handywoman with expertise in improving home and garden spaces by using pergolas, gazebos, and tents.
