When you buy a greenhouse, it’s important to know how to preserve it. This article will tell you everything that you need to know about sealing your Ikea greenhouse cabinets.
| Takeaways |
|---|
| Sealing IKEA greenhouse cabinets is essential for maintaining optimal conditions for plant growth. |
| Silicone caulk or weatherstripping can be used to seal gaps and prevent air leakage. |
| Applying adhesive-backed foam tape to the edges of the cabinet can help create a tight seal. |
| Regularly inspecting and resealing the cabinets can ensure long-term effectiveness. |
| Proper sealing helps regulate temperature, humidity, and prevents pests from entering the greenhouse cabinets. |
Paint With Benjamin Moore
For the interior of the cabinets, you want to use a high-quality paint that is specifically designed for plastic. This will help your cabinet last longer and prevent any damage or discoloration over time.
You can use any type of exterior paint on the outside of your greenhouse cabinets, but oil based primers are recommended since they dry faster than latex paints do.
When it comes to attaching a canopy to a chuppah, proper techniques and secure fastening are essential. Our comprehensive guide on canopy attachment to a chuppah provides step-by-step instructions and expert tips to ensure a sturdy and beautiful setup for your special occasion.
Stain With Varathane
Use a rag or brush to apply the stain, following the directions on your can. Once you’ve applied one coat, let it dry for at least four hours before applying a second coat. After it dries overnight, use your new cabinet as normal!
Use A Vinyl Laminate Coating
You’ll want to use a vinyl laminate coating for the best results.
You can apply it using many different methods:
Sprayer – You can purchase a sprayer and get the job done quickly. It will give you an even coat of paint, but this method can be messier than some of the others.
Roller – The roller is another great way to give your cabinet doors and drawers an even coat of paint or sealant, plus it makes it easier to apply too much product in areas that need less coverage than others.
Brush – Brushes are also great for applying coatings evenly because they allow you to spread out the product without putting too much on one area at once, which ensures everything gets covered completely without being too thick or thin on any particular surface (like a brush stroke).
Rag – Rags are another good option if you don’t have access to any other tools like rollers or brushes because they allow for more control over how much product gets applied per spot so that nothing gets missed while still making sure everything looks uniform after application has been completed overall throughout all surfaces being worked with at once (not just one area alone).
| Brand | Description |
|---|---|
| 3M | Trusted brand offering high-quality vinyl laminate coating with excellent durability. |
| Avery | Well-known brand providing a wide range of vinyl laminate coatings suitable for various applications. |
| Oracal | Reliable brand offering vinyl laminate coatings known for their long-lasting performance and UV protection. |
| VViViD | Popular brand specializing in vinyl laminate coatings, offering a diverse selection of finishes and colors. |
| Grafix | Quality brand offering vinyl laminate coatings ideal for protecting and enhancing the appearance of surfaces. |
Cleaning The Lower Cabinets
To clean the lower cabinets, use a mild detergent and a soft cloth to wipe down the outside of each cabinet.
Use another soft cloth or sponge to clean the inside of each cabinet and wipe off any dust from the shelves. Finally, use another soft cloth or sponge to clean all sides of the glass doors and shelves.
Now that all your cabinets are nice and clean (and sealed), it’s time for you to seal them!
Sanding The Cabinets
The next step is to sand the cabinets. Use a sander fitted with a sanding pad and vacuum to remove the dust.
Sandpaper suited to the job will allow you to get into corners and crevices and create an even surface for your stain or paint. If you’re using stain, use a paintbrush instead of spraying it on because spraying can create uneven coverage that may need touching up later.
To ensure the longevity and stability of your canopy, it’s important to reinforce the canopy top properly. Our article on easy tips for reinforcing a canopy top offers practical advice and techniques to strengthen your canopy, providing peace of mind during outdoor events.
Cutting A Hole In The Back Of The Lower Cabinet
To cut a hole in the back of your lower cabinet, use a jigsaw or circular saw. Wear safety goggles when cutting to protect your eyes from stray wood chips and dust.
- Measure and mark where you want to cut using a tape measure, pencil, and ruler.
- Cut along these marks with your saw blade set at 45 degrees (this will make it easier for you to access the fan later).
Painting Them With Loft Paint
If you can’t find a sealant that meets your needs, you may want to paint the cabinet doors and/or drawers with a paint that’s made for both indoor and outdoor cabinets.
To make sure your new coat of paint will last as long as possible, consider using Loft brand paints by Valspar. These paints are designed specifically for use on household furniture like cabinets and drawers, so they’re guaranteed to stand up well against moisture damage.
They also come in a wide range of colors including white! If you decide to go with this option instead of sealing up cracks yourself or purchasing pre-sealed cabinets from Ikea (which will be more expensive), make sure your cabinetry is clean and free from dust before painting it with Loft Paints.
| Brand | Description |
|---|---|
| Behr | Durable and high-quality loft paint suitable for various surfaces. |
| Sherwin-Williams | Trusted brand offering a wide range of loft paint colors and finishes. |
| Benjamin Moore | Premium loft paint brand known for its excellent coverage and long-lasting results. |
| Valspar | Versatile loft paint brand offering a variety of color options and finishes. |
| PPG | Reliable brand providing quality loft paint for a smooth and professional finish. |
Installing A Baseboard
In order to install the baseboard, you’ll need to first measure it and cut it to size. Cut your baseboard with a jigsaw or circular saw, but be sure that you’re using a blade specifically designed for softwood (i.e., wood that’s not hardwood).
Next, glue the baseboards onto the cabinet. You can use any type of wood glue you like here; we recommend using Titebond III Premium Wood Glue because it works well on both softwood and hardwoods and is waterproof once cured.
We used clamps while our glue dried overnight so that it would adhere well—you don’t have to do this if you don’t have them handy!
Planning a temporary event or need a quick shade solution? Learn how to build a temporary canopy with our guide that shares valuable insights and our firsthand experience. Check out our detailed instructions on building a temporary canopy for a versatile and easy-to-assemble shelter.
Filling In Gaps
A variety of tools can be used to fill in any gaps between the cabinets and doors. Caulk is a simple solution, but it’s messy and can take a long time to dry.
A putty knife is also an easy solution when combined with some caulk or another type of filler. Foam brushes are great for creating even surfaces when using caulk or other types of fillers, while rollers are good if you’re working on a larger surface area.
Fixing an EZ-Up canopy is a common challenge faced by outdoor enthusiasts. Our article on fixing an EZ-Up canopy provides pro tips and step-by-step instructions to help you address common issues and extend the lifespan of your canopy for many adventures to come.
Painting The Top Shelf And Stemware Racks1
Use a paintbrush to apply the green paint to the top shelf.
Use a long-handled brush to reach the top of your cabinet if you’re using an extension ladder. You could also use a flexible extension pole, but make sure it’s securely attached as you don’t want it falling on you while you’re trying to get paint on there (unless you like pain).
If you’re using a foam roller, use it to apply green paint onto each rack in between glasses or other items that will be stored inside of them, then allow each rack time to dry completely before moving onto another one.
| Brand | Description |
|---|---|
| Sherwin-Williams | High-quality paint brand known for its durability and wide range of color options. |
| Benjamin Moore | Premium paint brand offering excellent coverage and a vast selection of finishes. |
| Behr | Well-known brand that provides durable and easy-to-apply paints, suitable for various surfaces. |
| Valspar | Trusted brand offering a diverse collection of paints, including options specifically designed for furniture and cabinetry. |
| Rust-Oleum | Popular brand known for its specialty paints, such as enamel and spray paints, ideal for specific applications. |
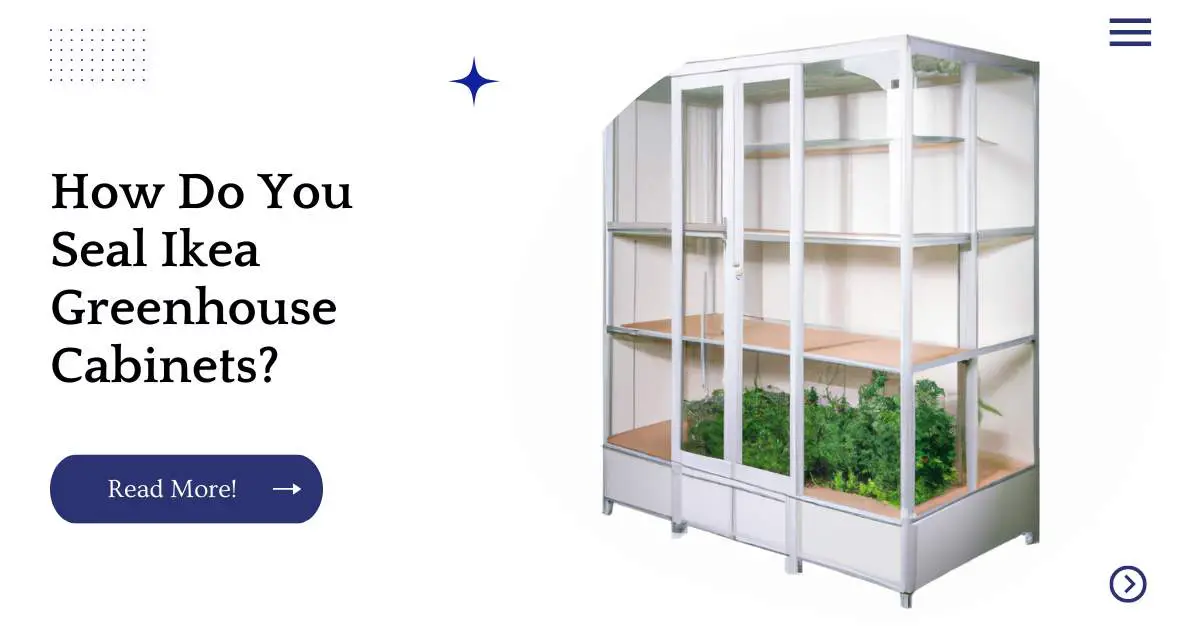
Sealing Ikea Greenhouse Cabinets Is Important
Sealing Ikea Greenhouse Cabinets is important because it protects the wood from moisture. If you don’t seal the wood, it will absorb moisture and eventually rot.
Also, since you’re building a greenhouse and not a regular house, it’s likely that you will be using your greenhouse in wet conditions (rain).
You should use paint that is specifically designed for cabinets and other wood surfaces that need protection from UV rays (the sun), moisture, etc. Most paints aren’t UV resistant on their own—they need to be combined with other materials to achieve this effect.
Unlocking a canopy can sometimes be tricky, especially if you’re unfamiliar with the mechanisms. Discover expert tips and techniques in our guide on unlocking a canopy to make the process effortless and avoid potential frustrations during setup and takedown.
Conclusion
As you can see, there are many ways to seal Ikea Greenhouse Cabinets. The most important thing is to protect your cabinets from water damage and mold.
If you don’t want to spend money on professional paint or vinyl laminate coating, then we recommend using a latex based paint for an easy DIY job.
Just remember that none of these methods will last forever; make sure that you keep up with maintenance so that your cabinets stay looking great!
Further Reading
Here are some additional resources for further reading on building and hacking IKEA greenhouse cabinets:
How to Build an IKEA Greenhouse Cabinet: This detailed guide provides step-by-step instructions and tips on constructing an IKEA greenhouse cabinet, ensuring you create a functional and stylish indoor garden.
Make an IKEA Greenhouse Cabinet: Discover creative ideas and inspiration for making your own IKEA greenhouse cabinet. This article offers design suggestions, customization options, and helpful tips to bring your vision to life.
IKEA Cabinet Hack: Explore innovative ways to transform an IKEA cabinet into a greenhouse or plant display unit. This resource provides insights into DIY hacks, modifications, and unique ideas to make the most of your IKEA cabinet.
FAQs
Here are some frequently asked questions about IKEA greenhouse cabinets:
How difficult is it to build an IKEA greenhouse cabinet?
Building an IKEA greenhouse cabinet can vary in difficulty depending on the model and your experience with DIY projects. However, with proper instructions and attention to detail, it is achievable for individuals with moderate to advanced DIY skills.
Can I customize the IKEA greenhouse cabinet to fit my space?
Yes, IKEA greenhouse cabinets offer flexibility for customization. You can modify the cabinet’s dimensions, add shelves or additional features, and even paint or stain it to match your desired aesthetic or fit your available space.
What materials do I need to build an IKEA greenhouse cabinet?
To build an IKEA greenhouse cabinet, you will typically need the specific IKEA cabinet model, greenhouse panels or materials, necessary tools (such as a screwdriver, drill, or saw), and any additional components or accessories you wish to incorporate into the design.
How do I ensure proper ventilation in an IKEA greenhouse cabinet?
Proper ventilation is crucial for the health of your plants inside the greenhouse cabinet. You can achieve this by incorporating ventilation panels, fans, or even adding ventilation ducts to allow fresh air circulation and prevent excess humidity or temperature buildup.
Can I convert an existing IKEA cabinet into a greenhouse?
Yes, it is possible to convert an existing IKEA cabinet into a greenhouse by adding the necessary greenhouse panels, shelves, and appropriate lighting fixtures. This allows you to repurpose an existing piece of furniture while creating a dedicated space for your plants.

I am Hellen James, a professional handywoman with expertise in improving home and garden spaces by using pergolas, gazebos, and tents.
