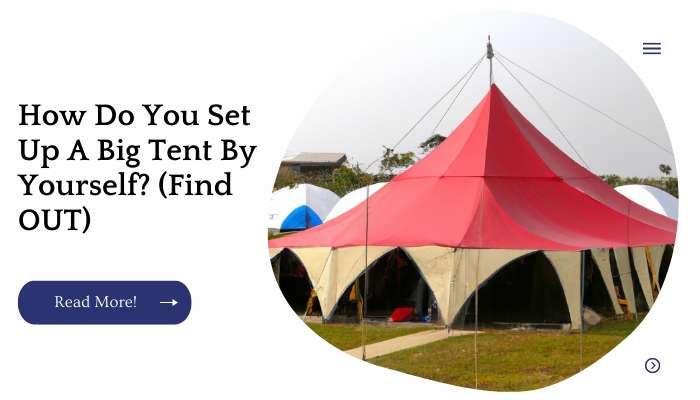
While I love the convenience of a pop-up tent, there’s something special about setting up a big, sturdy canvas tent.
It’s almost like an old-fashioned camping trip – the kind where you spend hours putting it all together and then spend days relaxing in it.
This is not for the faint of heart or weenie-minded! It takes patience and persistence to get this done without help from others. Here are some tips:
| Takeaways |
|---|
| Setting up a big tent by yourself can be a challenging task. |
| Proper knowledge and understanding of tent setup techniques are essential. |
| Following step-by-step instructions can ensure a successful tent setup. |
| Reinforcing the canopy top and securing the tent properly are important for stability. |
| It’s helpful to learn folding techniques for easy storage and transportation. |
| Taking precautions for windy conditions can prevent damage to the tent. |
| Exploring additional resources and guides can provide further assistance. |
Lay Out The Tent
Lay out the tent on the ground. Once you’ve unrolled your big tent and laid it out, make sure that everything is square.
This means that each corner should be at an exact 90 degree angle to all others and not leaning in any direction.
Make sure all poles are in place before you stake down your tent! Most tents come with a mallet included with them, so use that to hammer in those pesky stakes if they need it!
If they aren’t coming through easily enough, try using a stake puller instead of pulling by hand or foot like some people do when setting up their big tents by themselves (we won’t judge).
It’s also important that guy lines are tied off properly before staking down your tent—you don’t want anything coming undone as soon as a gust of wind hits!
Setting up a big tent by yourself can be a challenging task, but knowing how to fold a pop-up canopy properly is crucial. Our easy guide on folding a pop-up canopy provides step-by-step instructions to ensure a hassle-free camping experience.
Get The Poles Ready
Now that you know how to find your tent’s poles, it’s time to get them ready for use.
The first thing you should do is check the length of your poles. If they are too short for your tent and will not reach from one side of the tent to another, then you will need to find longer ones or buy a replacement set.
Next, you’ll want to inspect each pole carefully for cracks or other damage. If there are any cracks in your pole pieces, they won’t be able to hold up properly when erecting your tent.
It’s also a good idea (though not necessary) if all four pieces match up exactly so that when assembled together they form a straight line without gaps between them.
Finally, once all four pieces are clean and undamaged, make sure each one has been fitted with its correct sized little cap piece at its top end these caps act as anchors so that when placed inside threaded holes on top of crossbars located inside tents’ roofs/walls/floors’ bottom edges (depending on whether we’re talking about vertical walls versus angled roofing systems)
Assemble The Poles
Check that the poles are the right size for your tent. You’ll want to measure from ground level to where you’ll be attaching the pole to see if it’s a standard length, or if it’s different than other tents you’ve used in the past.
Insert each pole into its corresponding sleeve, making sure they’re aligned properly before doing so – this is particularly important when working on a large tent.
Make sure all corners of your big tent are square by adjusting its center post until they align perfectly with each other. Once they do, set down another support pole and repeat this process on both sides of the tent’s roof!
When it comes to setting up a big tent, reinforcing the canopy top is essential for stability and durability. Discover our easy tip for reinforcing a canopy top to ensure your tent withstands various weather conditions and stands strong throughout your outdoor adventures.
Insert The Poles Into The Tube Sleeves
Insert the poles into the tube sleeves and make sure they’re correctly inserted into the correct sleeves, which are color-coded by tent size.
In other words, if your tent is an 8-person and you have three poles, then each pole should be inserted through its corresponding sleeve on a different side of the tent (i.e., one pole goes in one sleeve).
Make sure that all poles are inserted before staking down your tent; otherwise, it will be very difficult to insert them later!
| Step | Description |
|---|---|
| Unfold Tent | Lay out the tent fabric and ensure it is positioned correctly |
| Locate Tube Sleeves | Identify the tube sleeves on the tent where the poles will be inserted |
| Insert Poles | Carefully slide the tent poles into the tube sleeves |
| Connect Pole Sections | Join the pole sections together, ensuring a secure fit |
| Extend Poles | Extend the poles fully to provide structure and support to the tent |
Stand Up Each Pole
Once you have the tent and poles in hand, it’s time to get started with the process of setting up your big tent.
The first step is to pound stakes into the ground to secure the guy lines. Use a mallet or hammer to pound each stake into place until it’s flush with the ground, then tie off your guy line to it.
If your tent has a vestibule (which may be separate from or attached to one side of the main tent), be sure that you set up this area before moving on to staking down your main shelter.
Once all stakes are pounded securely into place and guy lines are secured, use a level or other measuring device (such as an app) to make sure that everything is even and level before staking down any other pieces of equipment.
Stake Down Lines And Stake Down Your Tent.
You’ve already assembled your tent and you’re ready to set it up. Here’s what you need to do:
Stake down lines and stake down your tent. The first step is to hammer in stakes at the corners of your tent, connecting them with guy lines (which will keep wind from lifting up the walls).
You’ll find that there are many different types of stakes some have smaller heads, others larger ones; some are made from metal while others are plastic or wood so it’s important that you pick out ones that work best for your situation.
Once those stakes are securely driven into the ground (or concrete), pull on each line until it feels taught but not too taut you don’t want anything snapping when winds pick up later!
If you’re planning to attach a canopy to a chuppah for a special event, it’s important to understand the process. Our guide on attaching a canopy to a chuppah offers valuable insights and step-by-step instructions to help you create an elegant and secure setup.
Set Up Your Rain Fly (Tarp)
Lay out the tarp on the ground and fold over the edges.
Stake down your corners and center seam, then stake down any other seams that need it to make sure it stays in place during a storm or high winds.
Finally, Set Up Your Vestibule
A vestibule is a small extension to the tent that can be used to store gear and shoes. It’s also a great place to cook if you want a break from cooking in your tent. You can set up a tarp for a vestibule, or you can buy a tent with built-in vestibule.
| Item | Description |
|---|---|
| Tent | Provides shelter for sleeping and protection |
| Vestibule | Creates an additional covered storage area |
| Tent Stakes | Securely anchor the tent and vestibule to the ground |
| Rainfly | Offers protection from rain and weather elements |
| Guy Lines | Helps stabilize and secure the tent and vestibule |
| Tent Poles | Provides structure and support for the tent |
Bring A Rubber Mallet For Pounding In Stakes
A rubber mallet is your friend. It’s perfect for pounding stakes into the ground, whether you’re working with hard soil or soft sand.
You may also find it handy when hammering in stake loops, which are what keeps your tent from falling down when there are high winds.
If you have a big tent (like a 10×20) and need to pound in a lot of stakes, this will save you a ton of time and energy!
| Item | Description |
|---|---|
| Rubber Mallet | Ideal for pounding in tent stakes |
| Tent | Provides shelter during outdoor adventures |
| Stakes | Securely anchor the tent to the ground |
| Camping Hammer | Alternative to a rubber mallet for driving stakes |
| Tent Peg Extractor | Helps remove stakes from the ground |
Bring Plenty Of Rope For Tying Off Guy Lines
Another way to keep the tent from blowing away is by tying off the guy lines. Guy lines are ropes that connect the tent’s corners to stakes in the ground, which helps hold it in place and prevents damage during high winds.
A good rule of thumb is to use a heavy-duty rope and make sure you have plenty on hand—enough for each stake in your setup.
If you don’t have enough rope, find something else that will work: Twine can work well for this purpose as long as it’s strong enough not to break when pulled tight around all four stakes at once; otherwise, simply use more than one length of twine if necessary!
Once all four lengths of twine or heavy duty rope are attached firmly (but not too tightly) around each stake so they will stay put even during bad weather conditions like gusty winds or rain showers – take some time now while everything still looks good before putting anything else up inside…
Dealing with issues in your EZ-Up canopy can be frustrating, especially when you’re setting up a big tent. Our pro tips for fixing an EZ-Up canopy provide practical solutions to common problems, ensuring a smooth and successful camping experience.
Use An Old Shoe For A Mallet To Bang Stakes Into Hard Soil
You may not have a rubber mallet, or even a hammer. If you only have a tent stake puller, use that!
If you don’t have anything at all, go outside and find something that’s similar in size and weight to your chosen stake.
It doesn’t have to be heavy—just make sure it won’t break on impact with the ground. A rock works well; so does an old shoe (if it’s light enough).
When facing windy conditions during your camping trip, it’s crucial to keep your tent secure. Discover our simple answer to keeping a tent down in the wind and learn effective techniques to prevent your tent from getting damaged or blown away by strong gusts.
Conclusion
We hope that this article has been helpful to you. If you have any further questions about setting up your big tent, please feel free to contact us.
Further Reading
Here are some additional resources for further reading on setting up tents:
How to Put Up a Dome Tent by Yourself
This article provides a detailed guide on setting up a dome tent single-handedly, including step-by-step instructions and helpful tips for a successful setup.
Learn the basics of tent setup with this comprehensive guide. It covers different types of tents and provides clear instructions on how to assemble and secure them properly.
WikiHow offers a step-by-step guide with visuals on setting up a tent. It includes tips for choosing a suitable camping spot, assembling the tent, and ensuring stability and comfort during your outdoor adventure.
FAQs
Here are some frequently asked questions about setting up tents:
How long does it take to set up a tent?
The time it takes to set up a tent depends on various factors, including the type and size of the tent, your familiarity with the setup process, and any external conditions. Generally, it can take anywhere from a few minutes to half an hour to set up a tent.
What should I do if I can’t find the tent assembly instructions?
If you cannot locate the tent assembly instructions, check the manufacturer’s website. Many manufacturers provide downloadable instructions for their tents. Additionally, you can try searching for the tent model or brand name along with the term “assembly instructions” online to find helpful resources.
How do I ensure my tent is securely staked to the ground?
To secure your tent to the ground, use sturdy tent stakes or pegs. Drive them into the ground at a 45-degree angle, ensuring they are fully inserted and firmly anchored. Additionally, consider using guylines or additional guy ropes for added stability in windy conditions.
Can I set up a tent on any type of ground?
While tents can be set up on various types of ground, it’s important to consider the terrain. Look for a flat and level area that is free from rocks, roots, or sharp objects that could damage the tent floor. Clear the area of any debris that may cause discomfort or interfere with the tent’s stability.
How do I take down and pack a tent properly?
To take down a tent, remove any stakes, detach the rainfly (if applicable), and start collapsing the tent poles. Follow the reverse order of the setup process, folding the tent fabric carefully as you go. Once folded, pack the tent in its storage bag or a separate bag, ensuring it is clean and dry to prevent mildew or damage.

I am Hellen James, a professional handywoman with expertise in improving home and garden spaces by using pergolas, gazebos, and tents.
