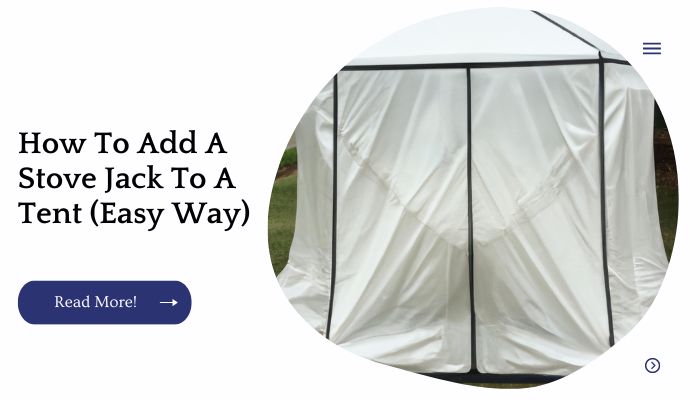
If you’re like me, you love the versatility of a tent. You can use it as a base camp or take it on long backpacking trips. You can fit it in your backpack or car and still have room for other things, too.
Unfortunately, there are some downsides to this versatility: once you’ve got your tent set up, there’s not much else you can do with it (other than get wet).
But if you’re looking for something that’ll let you turn your camping experience into more of an adventure, look no further than adding a stove jack to your tent!
Now I’m not talking about just any old hole punched in the side – we’re going full-on woodpecker here and making sure that our little slice into reality doesn’t compromise structural integrity or reduce protection against insects and rain.
| Takeaways |
|---|
| Adding a stove jack to a tent is a useful modification for enhancing camping experiences. |
| Proper installation of a stove jack is essential for safety and efficiency. |
| Stove jacks are commonly used in canvas tents, but options may be available for synthetic tents as well. |
| The choice of stove jack should consider the tent material, stove type, and size. |
| Following the manufacturer’s instructions and guidelines is crucial for a safe installation. |
| Regular maintenance and inspection of the stove jack are important for safety and longevity. |
Make The Stove Hole
After you’ve determined the location for your stove jack, it’s time to make your hole. We recommend using a 12-inch drill bit with a hammer drill (you can rent one at the hardware store).
If you don’t have access to one of these tools, you can use an electric or manual hand drill and hammer to make your own holes. Make sure that no part of the tent wall overlaps into the stove jack area when set up it should be completely open so that heat can escape freely.
The same goes for ceiling height: if any part of it has anything touching your tent’s roof, this could cause smoke buildup in your new space!
Make sure there is 3 inches between each side of the stove jack opening (the sides where it connects with other walls) and 6 inches between each side (where it connects with floors). Your stove will fit through here comfortably and safely without any issues!
When setting up your tent on a beach, proper anchoring is crucial to ensure stability and prevent it from being carried away by strong winds. Take a look at our guide on how to anchor a tent on a beach for an easy fix that will keep your beach camping experience worry-free.
Turn The Tent Inside Out
This is a pretty simple step, but it’s important to get it right. First, remove all stakes from your tent and lay it on a flat surface so that it looks like an upside down dome.
Next, take your scissors and cut along the seam at the middle of each side of your tent (you can also use a knife or box cutter).
Doing this will allow you to flip over one side at a time and then turn right side out once both sides are separated.
Make sure you have all of your materials handy before starting this part so that they don’t get dirty while working on them outside in whatever conditions may be present at the time.
Create A Sewing Space
Find a place to work. There’s no need to go outside because your tent is the perfect sewing space, but you’ll want to make sure that it is clean and well lit.
The best way to do this is by setting up your sewing machine on an ironing board or table. If you don’t have an ironing board, you can make one out of plywood or foam.
Set up the sewing machine correctly: It’s important that your sewing machine is set up correctly before starting any project so that it runs smoothly and efficiently through all stages of construction, stitching and finishing off seams later on in the process if necessary!
This means having both feet securely attached underneath with screws/bolts (if present), power cord connected firmly into wall outlet (or extension cord if necessary), thread loaded onto spool properly with end knot tied securely above spool holder so tail doesn’t unravel while working with needle – ready for use!
It also means removing any linty dust balls from inside bobbin area first thing before starting so they don’t get stuck inside needle area causing problems later on down road when trying sew multiple layers together etcetera
Which could lead into needing professional repairs done instead costing much less money overall if done now instead waiting until later down road when problems arise due lack preparation beforehand as mentioned above 🙂
Sometimes, you may find yourself in a situation where you can’t use stakes to anchor your tent. Don’t worry, we have a solution for you! Check out our expert advice on how to anchor a tent without stakes to learn alternative methods that will keep your tent secure and stable.
Trace The Stove Jack Template
Now that you have your template, it’s time to trace it onto the fabric. It’s very important that you mark the center of the template.
This will make sure that both sides of your stove jack are symmetrical and lined up correctly with each other.
Once you’ve marked the center, use a pencil to trace around the template on both pieces of fabric (one for each side). Don’t forget to mark a seam allowance!
Cut Fabric Hole For Stove Jack
Make sure to cut the hole large enough for the stove jack to fit through.
Cut a hole in the tent liner.
Cut a hole in the outer tent fabric, just big enough to pass through your stove jack, but not so big that it will flap around when you’re using it (this will create extra room between your inner and outer tents).
If you can’t find any fabric with pre-made grommets or webbing loops at home, buy some needle and thread or fishing line from the store and stitch them into place yourself (you’ll probably want about 20 feet of each).
Glue And Press On Stove Jack Liner
The next step is to glue and press on your stove jack liner. Use a hot gun to create a strong bond between the liner and the outer shell of your tent. This will keep it securely in place, even during heavy winds.
Sew On Stove Jack Liner
Another option is to use a sewing machine to sew on the liner. To do this, sew along the edge of where you want your stove jack to be located with thread that matches or blends well with what you are working with (in my case: black thread).
Then, take another piece of fabric that matches or blends well with what you are working with (in my case: white cotton) and attach it over top of where you sewed around so as not to see any stitching from underneath!
Looking to optimize your grow tent’s environment? Adding CO2 can significantly enhance plant growth and yields. Our comprehensive guide on how to add CO2 to a grow tent explains the process step-by-step, helping you achieve optimal conditions for your plants’ success.
Sew On Stove Jack Liner
Now that you’ve sewn on the stove jack face, it’s time to sew on the liner.
To do this, you’ll need a zipper foot for your sewing machine. This is an optional piece of equipment and not all machines come with one; if yours doesn’t, check Amazon or another retailer for an inexpensive replacement.
The key difference between using a regular foot and a zipper foot is that the latter has two grooves running along its bottom edge: one for guiding fabric into place as you sew (like any other standard presser foot)
And one specifically designed for zippers so that when you get near them, there’s no worry about puckering or stitching overtop of them.
Use this specialized foot to guide your seam in such a way so as not to catch any part of the liner fabric in it while being sewn down – otherwise, if this happens your tent will be left with permanent creases!
| Sewing Steps |
|---|
| Prepare the stove jack liner and tent fabric materials. |
| Place the stove jack liner on the desired location of the tent fabric. |
| Pin the stove jack liner to the tent fabric, ensuring it is centered and aligned properly. |
| Thread the sewing machine with a suitable thread for the fabric type. |
| Sew along the edges of the stove jack liner, using a straight stitch or a stitch recommended by the manufacturer. |
| Remove the pins as you progress in the sewing process. |
| Sew around the perimeter of the stove jack liner to secure it firmly to the tent fabric. |
| Trim any excess fabric or threads for a neat and clean finish. |
| Test the attachment by gently pulling on the stove jack liner to ensure it is securely sewn. |
Make An Inner Cowl For The Stove Jack Liner
An inner cowl is the liner that covers where the stove jack goes, and it can be made from any kind of fabric you choose.
I suggest a cotton canvas, which will hold up well to being folded in on itself repeatedly and washes up nicely.
You’ll need:
- 2/3 yard of fabric (or whatever amount fits your tent)
- Sewing machine or needle and thread if you prefer a hand-sewn inner cowl
Sew On The Outer Cowl For The Stove Jack Liner
You’ll have to sew on the outer cowl for the stove jack liner after sewing on the outer tent fabric. The outer cowl is a flap that covers the stove jack and has to be sewn separately to both your tent and taffeta liners.
Properly adjusting the guide ropes on your tent is essential for maintaining stability and preventing sagging. Our expert answer on how to adjust guide ropes on a tent provides valuable tips and techniques to ensure your tent is securely anchored and properly tensioned.
Sew On Outer Tent Fabric To The Tent Liner And Taffeta
Now that the stove jack has been added, it’s time to sew on the outer tent fabric. This is an important step because you want your stove to be completely enclosed by a layer of material so that it’s protected from the elements and doesn’t catch fire when you’re cooking.
Sew on Outer Tent Fabric to the Tent Liner and Taffeta: You can use an overlock machine if you have one, or just use a sewing machine with a zig-zag stitch and wide thread.
Start by placing one corner of your outer tent fabric right side down where you want it (the right side should face outward) and pinning it in place at least every inch or two.
Then stitch around all four sides leaving about a 6″ gap for turning later on each side. Next turn under 1/4″ all around each edge then fold over again another 1/4″ before stitching across once more through all layers – this last bit helps prevent fraying.
| Sewing Steps |
|---|
| Prepare the outer tent fabric, tent liner, and taffeta materials. |
| Align the edges of the outer tent fabric, tent liner, and taffeta. |
| Pin the materials together to hold them in place during sewing. |
| Sew along the edges using a suitable stitching technique (e.g., straight stitch, zigzag stitch). |
| Remove the pins as you progress in the sewing process. |
| Continue sewing until all sides are securely attached. |
| Trim any excess fabric or threads for a clean finish. |
| Test the attachment by gently pulling on the fabric to ensure it is secure. |
Reinforce All The Seams With A Zipper Foot
If you’re sewing a tent with a zipper, this is definitely the best way to get a clean, professional look.
The zipper foot is a specialty presser foot that will allow you to sew over an edge with a zipper. They are available at most sewing machine dealers and online retailers.
If you don’t have one on hand, don’t worry! If your sewing machine doesn’t have one built-in, there are many types of feet that work well with zippers as well! You can try using the straight stitch or even the all-purpose foot if it has an opening in the middle of it.
Slip Stich Or Blind Hem Your Way Around The Flap
If you’ve never done this before, take a look at this tutorial on how to blind hem stitch. You’ll need a sewing needle and thread.
The stitches are small and tight so it’s best to use a smaller needle than what would normally be used for the fabric weight you’re working with (we found that an 80/11 needle worked well).
The opening will now be closed off with a few knotted stitches at each end of the flap (one left side of flap and one right side of flap). This prevents any fraying from happening around the edges of your tent door opening as well as giving it a nice finished look!
Anchoring a canopy tent is crucial to keep it secure and stable, especially in outdoor events or camping. Our expert answer on how to anchor a canopy tent offers valuable insights and techniques to ensure your canopy tent stays in place, even in challenging conditions.
Check The Flap Fit On Your Hooded Rainfly
Now that you’ve cut the flap, it’s time to check the fit. You want the flap to go all the way over your stove jack, so if you’re not sure about how big it should be, cut out a test piece and try sewing it onto your tent or rainfly. It may take a few tries before you get it right!
| Checklist Item |
|---|
| Ensure the rainfly flap fully covers the hood of the tent. |
| Verify that the rainfly flap overlaps the hood to provide sufficient protection against rain and wind. |
| Check for any gaps or loose areas where water or wind could enter. |
| Confirm that the rainfly flap attaches securely to the tent, using hooks, clips, or fasteners. |
| Adjust the tension of the rainfly flap to achieve a snug fit without excessive sagging or pulling. |
| Test the rainfly flap by simulating rain or windy conditions to ensure it provides adequate protection. |
Finish Up Any Other Details Like Velcro Or Grommets
After you have all of your pieces sewn together and the flap is attached, you can finish up any other details like velcro or grommets. I added some velcro to the flap on my tent so that I could close it when it was raining.
If you want to add a storm flap that extends across the front of your stove jack, please see this tutorial by Tentsmiths for instructions on how to do so.
Conclusion
If you’re going to be camping in cold weather, you might want to add a zipper or cinch cord around the tent flap.
This will help keep out drafts and provide an extra layer of insulation from the cold air outside. You can also add grommets or Velcro around the edges of your hooded rainfly so that they overlap when closed which creates another barrier against the chill.
And finally, if using a stove jack requires drilling into your floor material, it may be worthwhile investing in some extra thick felt padding before sewing up your final product!
Further Reading
Here are some additional resources for further reading on installing stove jacks in tents:
CanvasCamp: How to Install a Tent Stove Jack: Learn step-by-step instructions on how to properly install a stove jack in your tent, ensuring a safe and efficient setup.
Life in Tents: How to Install a Stove Jack Flashing Kit on a Canvas Tent: Discover a comprehensive guide that explains how to install a stove jack flashing kit on a canvas tent, providing valuable insights for a secure and leak-free installation.
Tim Tinker: DIY Ultralight Stove Jack for Hot Tents: Explore a DIY approach to creating an ultralight stove jack for hot tents, allowing you to customize and adapt your tent for a stove without compromising weight or functionality.
FAQs
Here are some frequently asked questions about installing stove jacks in tents:
How do I choose the right stove jack for my tent?
When selecting a stove jack for your tent, it’s essential to consider the material and design of your tent, as well as the type and size of the stove you plan to use. Look for stove jacks specifically designed for your tent model or material, ensuring proper fit and compatibility.
Can I install a stove jack on any type of tent?
Stove jacks are commonly used in canvas tents, as canvas provides better heat resistance and durability. However, some synthetic tents may also have stove jack options available. It’s important to check your tent’s specifications or consult with the manufacturer to determine if a stove jack can be installed.
What tools and materials do I need to install a stove jack?
The specific tools and materials needed for stove jack installation may vary depending on the tent and stove jack kit you choose. However, common requirements typically include a stove jack, seam sealer, adhesive, a measuring tape, a sharp knife or scissors, and a heat-resistant sealant.
How can I ensure a safe installation of a stove jack in my tent?
To ensure a safe installation, it is crucial to follow the manufacturer’s instructions and guidelines provided with your stove jack kit. Pay attention to proper positioning, sealing, and securing of the stove jack to prevent any fire hazards or potential leaks.
Are there any maintenance or safety precautions I should be aware of after installing a stove jack?
After installing a stove jack, it’s important to regularly inspect and maintain it. Check for any signs of wear, damage, or loose connections. Additionally, always follow proper safety precautions when using a stove inside your tent, such as ensuring proper ventilation, using a heat-resistant stove mat, and keeping flammable materials away from the stove area.

I am Hellen James, a professional handywoman with expertise in improving home and garden spaces by using pergolas, gazebos, and tents.
