
Transform your outdoor space effortlessly with a sloped pergola roof. Elevate both aesthetics and functionality as we guide you through the seamless process of adding a stylish slope. From boosting ventilation to efficient rainwater runoff, discover the expert advice you need for this DIY project.
Explore various techniques and materials, ensuring compliance with building codes. Whether modifying an existing structure or building anew, our insights will help you create a pergola that not only stands out but also stands strong against the elements.
| Takeaways |
|---|
| Adding slope to a pergola roof helps with water drainage and prevents pooling. |
| Proper design and installation techniques are important for adding slope to a pergola roof. |
| Consider using materials like polycarbonate sheets or metal roofing panels for the sloped roof. |
| It’s crucial to ensure compliance with local building codes and regulations. |
| Adding slope to a pergola roof can extend its lifespan and improve its functionality. |
Inviting Open Roof Pergolas: Elevate Your Outdoor Living
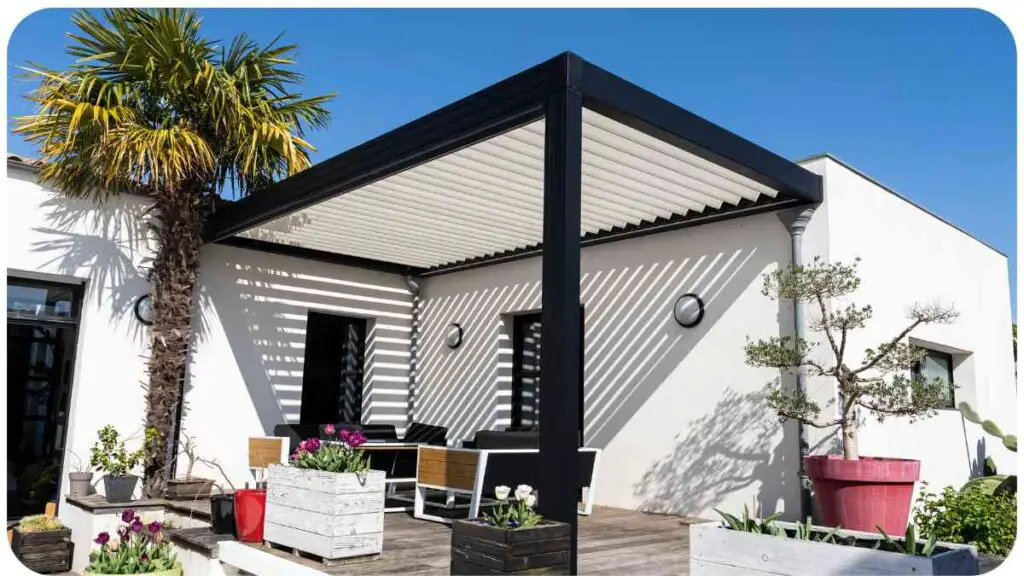
Open roof pergolas offer a charming retreat for garden enthusiasts, providing an ideal space for relaxation, family gatherings, or delightful barbecues with friends. These versatile structures seamlessly blend with nature, making them perfect for those who cherish outdoor experiences.
Tailor your open roof pergola to your preferences, choosing between a sloped design or level sides. Whether you seek a contemporary touch or prefer a traditional aesthetic, our showroom boasts an array of open roof pergola styles, including convenient Carport Pergola Kits. Find the perfect fit to enhance your outdoor oasis and create lasting memories.
When adding a roof to an existing pergola, it’s important to consider the structural integrity and design. Our comprehensive guide on how to add a roof to an existing pergola provides step-by-step instructions and expert advice to help you create a functional and visually appealing outdoor space.
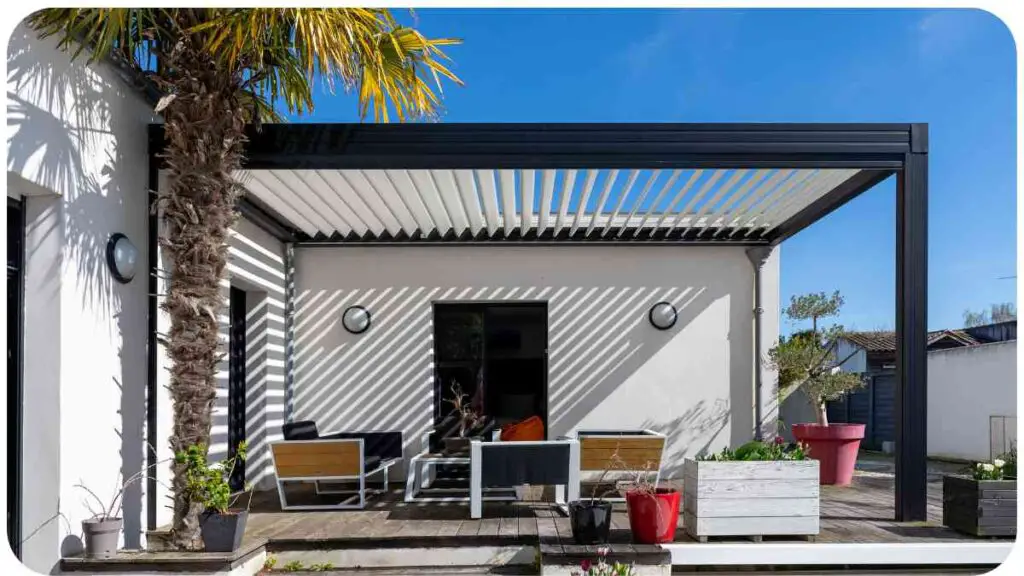
Crafting a Tailored Slope: Bolting Your Pergola Roof with Precision
Creating a slope for your pergola roof becomes a seamless endeavor with the strategic use of bolts. This versatile method, applicable to various materials, provides a customizable pitch for your outdoor haven. While the installation process demands time and precision, the end result offers ample options for adjusting your roof’s incline to perfection.
Here’s how it works: Attach two 2x4s at an angle and secure them in place using durable bolts or screws. The outcome is a meticulously crafted slope, tailored to your desired direction whether it’s an upward or downward pitch.
This method accommodates pergola supports crafted from wood or metal, offering flexibility to suit your material preferences and ensuring a structurally sound and aesthetically pleasing outdoor space.
Enhancing Elegance: Aluminum Lattice Panels for Effortless Pergola Slope
Achieving a graceful slope for your pergola roof is effortlessly accomplished with the use of aluminum lattice panels. Not only are they a simple solution, but they also offer versatility in both installation and functionality. These panels serve a dual purpose, functioning as an effective cover or shade for your pergola while adding a touch of sophistication.
Installation Guide:
- Measure and Cut: Begin by measuring from each side of the corner posts to determine the required size of the lattice panels. Ensure that the width allows for a 1-inch space on each side of the desired cutting area, as illustrated in the accompanying diagram.
- Precision is Key: Use precision in cutting the lattice pieces according to the measured dimensions. This meticulous approach ensures a seamless fit that contributes to both aesthetic appeal and functional efficiency.
- Customization Options: Explore the opportunity to personalize your pergola further by painting or staining the lattice panels. Match them to your house’s color scheme for a harmonious blend that enhances the overall visual appeal of your outdoor space.
Adding slope to your pergola roof can help with rainwater drainage and create a more visually appealing design. Check out our expert advice on how to add slope to a pergola roof and learn the techniques to achieve an efficient and stylish roofing solution.
Elevating Comfort: Pergola Transformation with a Shade Sail
Introducing a canopy shade sail to your pergola is a brilliant solution for adding both style and relief from the sun’s rays. With materials ranging from durable canvas to modern polycarbonate, you have the flexibility to tailor the shade to your specific needs.
Choosing the Right Material: The material selection depends on your preferences for rain protection and budget considerations. Canvas offers traditional charm and reasonable protection, while polycarbonate provides a contemporary touch with enhanced durability.
Attachment Methods: Clips vs. Screws: When securing your canopy shade sail to the pergola, you face a choice between two primary methods: clips or screws. Each method has its advantages, and the decision should align with your specific requirements.
- Clips for Quick Setup: Utilizing clips ensures a swift and straightforward installation. While quick and easy, keep in mind that clips may be less secure during heavy rains. This option is ideal for temporary placements or situations where simplicity is a priority.
- Screws for Stability: Opting for screws provides enhanced stability, making the attachment more secure. However, this method involves drilling into the wood, adding a level of permanence to the installation. It’s a preferable choice for long-term setups or areas with frequent wind and rain exposure.
Considering Exposure and Longevity: Assess the wind and rain exposure at your site before deciding on the attachment method. For permanent installations or areas prone to adverse weather conditions, screws offer the stability needed for lasting durability. On the other hand, if your pergola shade is temporary or requires frequent adjustments, clips provide a convenient alternative.
With this thoughtful approach to material and attachment methods, you can transform your pergola into a shaded sanctuary that perfectly aligns with your aesthetic preferences, budget, and the unique conditions of your outdoor space.
| Brand |
|---|
| Sunjoy |
| Garden Winds |
| Coolaroo |
| Aleko |
| Sojag |
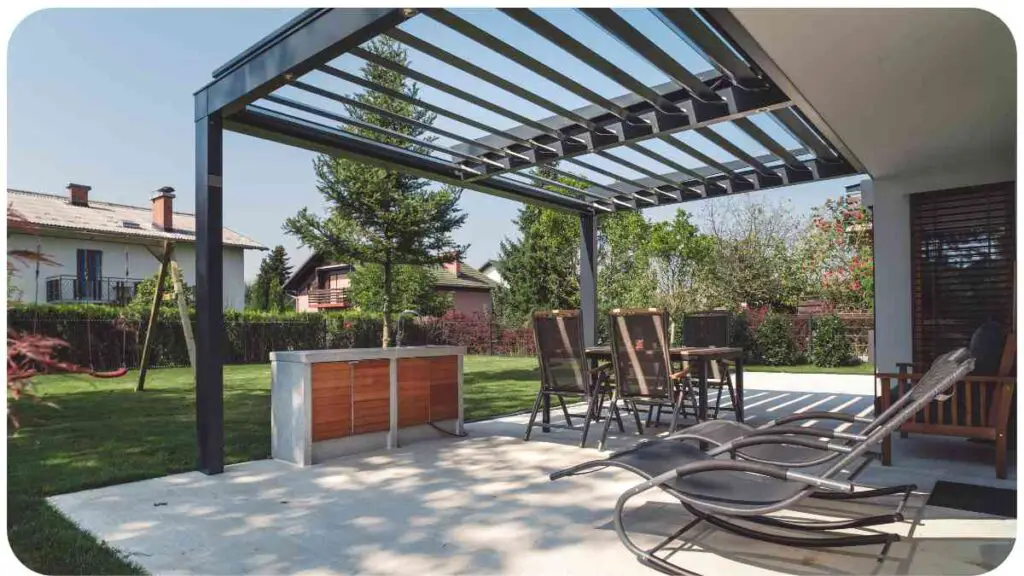
Architectural Brilliance: Practical and Aesthetic Benefits of Angled Rafters in Pergolas
Integrating angled rafters into your pergola design isn’t just about aesthetics; it’s a strategic choice that adds both character and functionality to your outdoor haven. Whether crafted from wood, metal, or plastic, angled rafters bring versatility to your pergola roof.
Aesthetic Appeal and Practical Functionality:
- Curved Roof Design: Angled rafters serve as a delightful aesthetic option, introducing shape and character to your pergola roof. Create a visually striking curved roof that not only enhances the overall design but also serves a practical purpose.
- Rainwater Deflection: One of the practical uses of angled rafters is their ability to deflect rainwater away from your home’s foundation. This feature ensures that water runoff is directed away, preventing potential damage and maintaining the structural integrity of your outdoor space.
- Weather Resistance for Sunroofs: Sunroofs, often designed with angled rafters, benefit from enhanced weather resistance. By avoiding direct exposure to rain and snow, these rafters contribute to the longevity and durability of the pergola structure. This protection becomes crucial during inclement weather conditions, such as heavy rainfall or strong winds from an eastward direction.
Strategic Placement for Weather Protection: Consider the strategic placement of angled rafters, especially when dealing with sunroofs. Their orientation shields them from direct exposure to the elements, minimizing the risk of weather-related damage. Unlike other parts of your home that may face occasional challenges, sunroofs with angled rafters remain resilient and less vulnerable.
Incorporating angled rafters into your pergola not only enhances its visual appeal but also adds a layer of protection, ensuring that your outdoor space remains both stylish and structurally sound. Embrace the combination of aesthetics and practicality as you design a pergola that stands the test of time and weathers the elements with grace.
Fortify Your Structure: The Strength and Stability of Double Posts in Pergola Design
When it comes to supporting a pergola roof, awning, gazebo, or even a patio cover with seating, the choice of posts plays a crucial role in ensuring strength and rigidity. Double posts emerge as a powerful solution, offering enhanced stability compared to their single counterparts.
Key Advantages of Double Posts:
- Strength and Rigidity: Double posts boast superior strength and rigidity, making them a robust choice for supporting various outdoor structures. Whether it’s the weight of a pergola roof or the additional load of an awning with seating, double posts provide the structural integrity needed for long-lasting stability.
- Versatility for Patio Covers: If your project involves building a patio cover that incorporates seating, opting for double posts is a wise decision. The increased strength minimizes the risk of sagging or instability, ensuring a secure and reliable outdoor space.
- Minimal Additional Cost: While the use of double posts may incur a slightly higher cost, the investment is minimal compared to the benefits gained in terms of increased strength and stability. The added expense is well worth considering, especially when the project requires extra security and durability.
Considerations for Your Project:
- Pergola Roof Support: Double posts shine in scenarios where the primary focus is on supporting the weight of a pergola roof. Their enhanced load-bearing capacity makes them ideal for ensuring the longevity of the structure.
- Enhanced Security for Seating Areas: When your patio cover includes seating areas, the additional load necessitates a robust support system. Double posts provide the necessary reinforcement, creating a secure and comfortable environment for outdoor gatherings.
- Long-Term Benefits: While the initial cost may be slightly higher, the long-term benefits of increased strength and durability justify the investment. Consider double posts as a strategic choice to future-proof your outdoor project and enjoy a pergola or patio cover that stands strong against the test of time.
If you’re looking to anchor a pergola to a concrete slab, our detailed guide on how to anchor a pergola to a concrete slab is here to help. Discover the best methods and tools for a secure and durable installation, ensuring your pergola stands strong for years to come.
Crafting Elegance: Adding a Graceful Slope with Slanted Beams to Your Pergola Roof
Elevate the aesthetic appeal of your existing pergola by incorporating slanted beams to create a stylish and functional slope. This DIY approach requires precision and careful measurements, transforming your outdoor space with a touch of architectural sophistication.
Step-by-Step Guide: Adding Slanted Beams to Your Pergola Roof
- Measure Existing Roof Length:
- Begin by measuring the length of your existing pergola roof. This initial step ensures accuracy in determining the dimensions for your slanted beams.
- Mark Starting Point for Slanted Beam:
- Mark the desired starting point for the slanted beam on your pergola roof. This strategic placement will influence the overall slope and visual appeal.
- Determine Beam Length from Peak:
- Measure the distance from the peak of your roof down to the point where you want the slanted beam to reach. This measurement is crucial for achieving the desired slope.
- Cut 2×4 Lumber at 45-Degree Angles:
- Using a hacksaw or circular saw, cut two pieces of 2×4 lumber at 45-degree angles. Ensure these pieces are long enough for each end of your pergola’s gable slope.
- Secure Pieces in Place:
- Install the cut pieces in the designated locations and secure them firmly with screws or nails (or both). This forms the foundational structure for your slanted beams.
- Fill Gaps with Additional 2x4s:
- Fill any gaps between the installed pieces with additional 2x4s cut at 45-degree angles. Secure these pieces with screws or nails (or both) on both sides to ensure a seamless and secure fit.
- Repeat and Secure:
- Repeat the process until all gaps are filled, and each piece is securely in place. This meticulous approach guarantees a stable and visually pleasing result.
Unleashing Durability and Style: Corrugated Steel Roofing for Pergolas
Corrugated metal roofing stands out as a popular and robust choice for transforming your pergola into a resilient and visually striking outdoor haven. Widely embraced for both commercial and residential applications, corrugated steel roofing panels offer a perfect blend of durability and aesthetic appeal.
Key Features of Corrugated Steel Roofing:
- Durability and Longevity: Corrugated steel roofing is renowned for its durability, standing strong against various weather conditions. This robust material ensures a long-lasting solution for your pergola, requiring minimal maintenance over time.
- Versatility for Residential and Commercial Use: Whether enhancing the charm of your residential outdoor space or adding a stylish touch to a commercial setting, corrugated steel roofing panels adapt seamlessly to diverse applications.
- DIY-Friendly Installation: Many homeowners opt for DIY installation of corrugated steel paneling, leveraging its relatively easy installation process. The DIY approach provides a cost-effective solution and empowers homeowners to take charge of their pergola project.
Consulting with Experts for Optimal Results: While the DIY route is accessible, consulting with experts is advisable to ensure a seamless integration of corrugated steel roofing with your home’s style and purpose. Experts can provide valuable insights into design considerations, ensuring that your pergola not only withstands the elements but also complements the overall aesthetics of your property.
Considerations for Design Harmony:
- Style Alignment: Ensure that the chosen corrugated steel roofing aligns with the architectural style of your home. This harmony enhances the visual appeal of your outdoor space.
- Purposeful Design: Tailor the design of your pergola to serve a purpose, whether it’s providing shade, shelter, or an aesthetically pleasing focal point. Corrugated steel roofing can adapt to various design goals with its versatile profile.
| Roofing Material |
|---|
| Galvanized Steel |
| Galvalume Steel |
| Color Coated Steel |
| Stainless Steel |
| Weathering Steel |
Architectural Finesse: Enhancing Pergola Design with Thoughtful Rafter Tails
Rafter tails emerge as a key design element, imparting both style and structural support to your pergola roof. These extensions at the ends of each rafter play a pivotal role in adding a slant to the roof and contributing to the overall aesthetic appeal of your outdoor haven.
Materials for Rafter Tails:
- Wooden Elegance: Opting for wood as a material for rafter tails aligns seamlessly with a predominantly wooden pergola. You can choose pre-cut pieces from a 2×6 or 2×8 board, or unleash your creativity by crafting custom-sized pieces using saws or axes.
- Metal Modernity: For a contemporary touch, consider using metal for your rafter tails. The sleek and durable nature of metal adds a modern flair to your pergola design, creating a striking contrast or complementing other metal elements in your outdoor space.
Functional and Aesthetic Roles:
- Slanting the Roof: Rafter tails are instrumental in adding a slant to the pergola roof, enhancing its visual appeal and ensuring effective water drainage. This design feature not only serves an aesthetic purpose but also contributes to the functionality of the structure.
- Support for Rafters: Rafter tails can double as support structures, especially at the top beam of your pergola. This additional reinforcement enhances the stability of the rafters, ensuring that your pergola stands strong against external elements.
Crafting and Installation:
- Wooden Craftsmanship: If using wood, precision is key in crafting rafter tails. Cut them to the desired size and shape, ensuring a snug fit against two adjacent rafters. This snug fit aids in holding them securely in place during installation.
- Metal Mastery: For metal rafter tails, consider professional assistance to ensure accurate cutting and seamless integration. Metalworking expertise ensures that the final result aligns with your design vision while meeting structural requirements.
Incorporating well-designed rafter tails into your pergola not only elevates its visual appeal but also contributes to its longevity and stability. Whether opting for the warmth of wood or the modernity of metal, thoughtful consideration of rafter tails adds a touch of architectural finesse to your outdoor space.
Transform your existing deck into a stunning outdoor oasis by adding a pergola. Our expert advice on how to add a pergola over an existing deck provides valuable insights and practical tips to help you create a harmonious blend of shade, style, and functionality in your outdoor living space.
Versatile Comfort: Embracing Convenience with a Retractable Pergola Canopy Shade Cover
Elevate your outdoor experience with a retractable pergola canopy shade cover, a dynamic addition that seamlessly combines style and functionality. Crafted from a flexible fabric stretched over the pergola, this canopy brings unparalleled versatility to your outdoor space.
Key Features of a Retractable Pergola Canopy:
- Fabric Elegance: The canopy is made of a high-quality fabric that not only provides shade but also adds a touch of elegance to your pergola. Choose a fabric that complements your outdoor aesthetic and withstands varying weather conditions.
- Retractable Convenience: The defining feature of this canopy is its retractable nature. When not in use, the fabric can be smoothly retracted, offering an unobstructed view of the sky or allowing more sunlight to filter through.
- Manual or Automated Operation: The retractable pergola canopy can be operated both manually and with modern automation. Enjoy the convenience of opening and closing the canopy effortlessly by hand or opt for a remote control system for added ease.
Benefits of a Retractable Canopy:
- Adaptive Sun Protection: Adjust the canopy according to your sun protection needs. Whether you prefer full shade, partial coverage, or an open sky, the retractable feature allows you to adapt to changing weather conditions and personal preferences.
- Preservation of Views: Retract the canopy when you want an unobstructed view of the surrounding landscape. This feature is particularly advantageous in settings with scenic views, allowing you to enjoy the beauty of your surroundings without compromise.
- Extended Outdoor Seasons: With a retractable canopy, your outdoor space becomes more adaptable to different seasons. Bask in the warmth of the sun during cooler months by retracting the canopy, and provide shaded comfort during hotter seasons.
Manual vs. Automated Operation:
- Manual Ease: Operating the retractable canopy manually provides a hands-on, tactile experience. A simple pull or push allows you to control the coverage based on your immediate preferences.
- Automated Luxury: Opting for automated operation introduces a new level of luxury and convenience. With the touch of a button on a remote control, you can effortlessly adjust the canopy, offering a modern and sophisticated outdoor experience.
Elevate Your Outdoor Haven: Deck Upgrade Ideas for Enhanced Comfort and Style
Transform your deck into a stunning outdoor retreat with thoughtful upgrades that not only enhance aesthetics but also elevate the overall outdoor experience. Here are key tips to beautify and maximize the potential of your deck:
1. Refined Railings for Safety and Elegance: Consider adding railings around the perimeter of your deck to achieve a seamless blend of safety, privacy, and elegance. The choice of railings can range from simple and functional designs to more elaborate and decorative options. This upgrade not only enhances the visual appeal of your outdoor living space but also provides a secure and stylish enclosure.
2. Illuminating Ambiance with Deck Lighting: Enhance the inviting atmosphere of your deck, especially during the evening, by incorporating strategic lighting elements. Install lighting fixtures above the deck area to create a warm and welcoming ambiance. Deck lighting not only adds a touch of sophistication but also ensures visibility for nighttime activities, fostering an enjoyable and safe outdoor environment.
Additional Deck Upgrade Ideas:
- Built-in Seating: Integrate built-in seating elements into your deck design to optimize space and create cozy seating areas. Whether incorporating benches along the edges or constructing built-in sofas, this upgrade enhances comfort and functionality.
- Composite Decking: Consider upgrading to composite decking for a durable and low-maintenance alternative. Composite materials resist fading, staining, and mold, ensuring a long-lasting and visually appealing deck surface.
- Outdoor Kitchen: Elevate your deck’s functionality by incorporating an outdoor kitchen. Install a grill, countertops, and storage to create a dedicated space for cooking and entertaining, enhancing the overall outdoor experience.
- Fire Pit or Fireplace: Introduce a focal point and warmth to your deck with the addition of a fire pit or fireplace. This feature not only extends the usability of your deck into cooler seasons but also adds a cozy and inviting element.
- Outdoor Audio System: Enhance the ambiance with an outdoor audio system. Install speakers strategically to create a harmonious atmosphere, allowing you to enjoy music or other audio elements while relaxing on your deck.
- Deck Privacy Screen: Increase privacy and define your deck space by incorporating a deck privacy screen. This can be achieved through the use of trellises, lattices, or decorative panels, providing a sense of seclusion and tranquility.
- Hot Tub or Spa: Elevate relaxation by incorporating a hot tub or spa into your deck design. This luxurious addition transforms your deck into a private oasis, offering a therapeutic and enjoyable retreat.
| Upgrade Idea |
|---|
| Outdoor lighting |
| Built-in seating |
| Composite decking |
| Outdoor kitchen |
| Pergola or shade structure |
| Fire pit or fireplace |
| Deck railing options |
| Outdoor audio system |
| Deck privacy screen |
| Hot tub or spa |
Secure Elegance: Enhancing Pergola Stability with Wire Rope Attachment to House Wall
For a robust, durable, and easy-to-install solution, wire rope emerges as the optimal choice when attaching your pergola roof to your house wall. Renowned for its versatility in construction projects, wire rope offers a secure method that goes beyond conventional options. Here’s why wire rope stands out as the best option for ensuring stability and customization in attaching your pergola roof:
Key Advantages of Using Wire Rope:
- Strength and Durability: Wire rope is engineered for strength, making it ideal for supporting heavy objects such as a pergola roof. Its durability ensures a reliable and long-lasting attachment, capable of withstanding various environmental conditions.
- Versatility in Construction: The versatility of wire rope extends beyond pergola applications, showcasing its adaptability in diverse construction projects. From holding substantial loads to providing stability during seismic events, wire rope is a trusted choice in construction.
- Customizable Slope: One of the standout features of wire rope is its ability to offer customizable slope adjustments. This flexibility allows you to tailor the slope at each end of the pergola structure, aligning with your specific needs and design preferences.
Installation Considerations:
- Professional Expertise: While wire rope offers ease of installation, seeking professional expertise is recommended to ensure a secure and accurate attachment. Professionals can assess the specific requirements of your pergola and house wall, providing precise installation that aligns with safety standards.
- Slope Customization: Work closely with professionals to customize the slope according to your preferences. The ability to tailor the slope ensures that the pergola roof not only enhances aesthetics but also optimizes functionality.
- Secure Attachment Points: Identify and reinforce secure attachment points on both the pergola roof and the house wall. Properly secured anchor points contribute to the overall stability and reliability of the wire rope attachment.
Safety and Longevity:
- Comprehensive Stability: Wire rope, when installed correctly, offers comprehensive stability, securing the pergola roof to the house wall with confidence. This stability is essential for ensuring the safety of the structure and its occupants.
- Long-lasting Performance: The inherent durability of wire rope translates into long-lasting performance. By choosing wire rope for your pergola attachment, you invest in a solution that withstands the test of time, requiring minimal maintenance.
A Guide to Building Your Own Louvered Pergola Roof
Immerse yourself in the satisfaction of creating a louvered pergola roof tailored to your vision. This step-by-step guide empowers you to craft a functional and aesthetically pleasing addition to your outdoor space, providing adjustable shade and a touch of architectural finesse.
Materials and Tools:
- 2×4 Lumber: Acquire high-quality 2×4 lumber for the frame, louvers, and support components.
- 3/8-inch Hinges: Choose durable hinges to facilitate the adjustable louvers.
- 1/2-inch Deck Screws: Opt for corrosion-resistant deck screws for secure fastening.
- Drill with Bits: Ensure you have a drill with appropriate bits for pilot holes and screw installation.
- Saw (Circular or Miter): A saw is essential for cutting lumber to the desired lengths and angles.
- Level and Square: These tools guarantee precision during the assembly process.
- Measuring Tape: Accurate measurements are crucial for a seamless construction.
- Pencil or Marker: Marking lumber for cutting and assembly steps.
Step-by-Step Construction:
1. Design and Planning:
- Sketch your desired louvered pergola design, considering dimensions and spacing.
- Plan the angle of the louvers for optimal shade control.
2. Frame Assembly:
- Construct the pergola frame using the 2×4 lumber, ensuring it fits the intended space.
- Use a level and square to ensure accuracy in assembly.
3. Louver Preparation:
- Cut the 2×4 lumber to the desired length for louvers.
- Determine the angle for louvers, typically 45 degrees, and cut accordingly.
4. Louver Installation:
- Attach louvers to the frame using the 3/8-inch hinges.
- Ensure consistent spacing between louvers for a polished appearance.
5. Adjustable Mechanism:
- Create an adjustable mechanism by connecting the louvers with additional 2×4 pieces.
- Test the louvers to ensure smooth and controlled movement.
6. Securing Support Beams:
- Add support beams to enhance stability and reinforce the structure.
- Use deck screws to securely fasten support components.
7. Installation Considerations:
- Choose an appropriate location for your louvered pergola, considering sunlight and aesthetics.
- If attaching to an existing structure, ensure proper support and secure attachment points.
8. Optional Finishing Touches:
- Stain or paint the louvered pergola to enhance durability and match your outdoor aesthetics.
- Consider adding outdoor-friendly fabric or drapes for additional shade and style.
9. Maintenance Tips:
- Regularly inspect hinges and moving parts for any signs of wear.
- Apply protective coatings to prevent weather-related damage.
Attaching a pergola to a deck requires careful planning and proper techniques. Explore our comprehensive guide on how to anchor a pergola to a deck to learn the necessary steps, tools, and considerations for a secure and beautiful pergola attachment.
Rafter Brackets For Your Pergola Roof Pitch Design Ideas
Rafter brackets are a great way to support your pergola and help it weather the elements. They will also help you design and build a roof that’s perfect for you, no matter how steep or shallow your incline may be.
Rafter brackets are available in many different sizes and shapes, so if you’re installing rafters on top of an existing structure (such as an existing deck), they’re easy to find at any hardware store or home improvement store.
If, however, this is your first time building something like this and want it done right the first time around—don’t worry! We’ve got some tips for using them effectively too:
Set up all necessary tools before beginning work since there isn’t much room for error during installation.
These tools should include pliers/wrench sets (for tightening nuts), nails/screws/drill bits (for attaching boards together), tape measurers (to measure distances between surfaces), levels/string lines (to ensure everything stays level).
Get yourself familiarized with all safety precautions regarding electrical wiring before starting any project involving electricity usage because mistakes here could lead not only major tragedies but also costly ones too!
For example: never touch anything live when standing next to exposed wires; always wear protective gear such as rubber gloves when working with sharp objects such as blades or saws; always keep important documents stored away securely somewhere outside where they may not get destroyed by rainwater etcetera…
Conclusion
In conclusion, our comprehensive exploration of pergola roof options aims to spark inspiration and guide you towards crafting the perfect outdoor sanctuary. From sloped designs to louvered roofs, each concept offers unique benefits and aesthetic appeal.
As you consider the various options presented, remember to align your choices with your personal preferences and budget constraints. Whether you prioritize functionality, durability, or visual appeal, there’s a solution tailored to meet your needs.
Ultimately, the versatility of pergola roof designs empowers you to transform your outdoor space into a haven of comfort and style. Explore the possibilities, experiment with different materials and configurations, and embark on a journey to create a pergola roof that reflects your individual taste and enhances your outdoor living experience.
With careful planning and thoughtful execution, your pergola roof will not only provide shelter and protection but also serve as a captivating centerpiece for outdoor gatherings and relaxation.
Embrace the creative process, embrace the possibilities, and embark on your pergola roof project with confidence and enthusiasm. Here’s to the transformation of your outdoor oasis into a cherished retreat that delights and inspires for years to come.
Further reading
Yard Gears Guide – How to Add Slope to a Pergola Roof: This comprehensive guide provides step-by-step instructions on adding slope to a pergola roof, ensuring proper water drainage and preventing pooling.
Roofing Query – How to Add Slope to Pergola Roof: Discover effective techniques and expert tips for adding slope to a pergola roof, ensuring functionality and durability in different weather conditions.
From House to Home – How to Put a Roof on a Flat Pergola: Learn how to transform a flat pergola into a covered outdoor space with a roof. This article offers insights into different roof options and installation methods.
And here’s the markdown format for the “FAQs” section:
FAQs
How to add slope to a pergola roof?
Adding slope to a pergola roof involves several steps, including adjusting the rafters, installing a slope board, and ensuring proper water drainage.
Can a flat pergola be modified to have a sloped roof?
Yes, a flat pergola can be modified to have a sloped roof. By following specific techniques and using appropriate materials, you can achieve a sloped design for better water runoff.
What is the purpose of adding slope to a pergola roof?
Adding slope to a pergola roof helps prevent water pooling and promotes effective water drainage during rain or snow. It ensures the pergola remains structurally sound and extends its lifespan.
What are the common materials used for creating a sloped roof on a pergola?
Common materials used for creating a sloped roof on a pergola include polycarbonate sheets, metal roofing panels, and shade cloth. The choice of material depends on factors such as aesthetics, budget, and desired level of protection.
Are there any specific building codes or regulations to consider when adding slope to a pergola roof?
Building codes and regulations may vary depending on your location. It is advisable to consult with local authorities or obtain necessary permits to ensure compliance with any specific requirements for adding slope to a pergola roof in your area.

I am Hellen James, a professional handywoman with expertise in improving home and garden spaces by using pergolas, gazebos, and tents.
