
Are you struggling to anchor your tent on concrete? Fear not! In this guide, we unveil a plethora of techniques to ensure your tent stands strong on hard ground.
Whether camping or preparing for a storm, discover budget-friendly methods without compromising stability.
| Takeaways |
|---|
| Anchoring a tent on concrete requires proper techniques and equipment. |
| Securing a tent on concrete ensures stability and prevents it from being blown away. |
| Concrete weights, anchor plates, and other specialized anchors are effective options for anchoring on concrete. |
| Alternative methods like sandbags or water weights can be used to anchor a tent on concrete without drilling. |
| Following expert advice and guidelines will help ensure a successful tent anchoring on concrete. |
Use Stakes: Secure Anchoring on Concrete
When anchoring your tent to concrete, stakes emerge as the most straightforward solution. Crafted from durable metal, these tools are specifically designed for hammering into solid ground.
Accessible at local home improvement stores or even your nearby grocery store’s camping section, stakes offer convenience and reliability.
However, exercise caution to preserve your tent fabric. Before hammering, ensure the absence of moisture in the ground, as damp conditions may facilitate easier sinking, reducing resistance during later extraction—a potential safety concern. Employ stakes judiciously for a hassle-free and secure tent anchoring experience on concrete surfaces.
When planning your beach camping trip, don’t forget to secure your tent properly. Our comprehensive guide on how to anchor a tent on the beach provides valuable tips and techniques to ensure your tent stays put, no matter the sandy conditions.
Tie the Tent Securely: Stability Matters
Tie the tent to something. When you put up a tent, you want it to be secure and stable. Use a rope to tie one end of your tent to a tree or car bumper.
Make sure that if you tie the tent to anything that moves around in the wind, like a car or boat trailer, make sure there are no sharp edges on those moving parts (like tires) that can cut through the ropes and tear them apart during high winds.
Stabilize Your Tent: Rocks and Sandbags on Concrete
Achieving stability for your tent on concrete mirrors the approach used on grass. Employ rocks or sandbags to weigh down the edges until your tent is securely anchored.
Strategically position large rocks at each corner of the tent, creating designated pockets for sandbag placement.
This ensures even weight distribution, enhancing the anchoring effect. With your tent now firmly secured, relax and enjoy the assurance that your makeshift home, from foundation to roof, stands resilient in your backyard. Employ this practical technique for a worry-free camping experience on concrete surfaces.
Stakes not an option? No problem! Discover effective techniques for anchoring your tent without stakes in our informative article on solving the challenge of anchoring a tent without stakes. Find alternative solutions that will keep your tent secure, even on concrete surfaces.
Sleeping Bag Anchoring: Clever Tent Stability
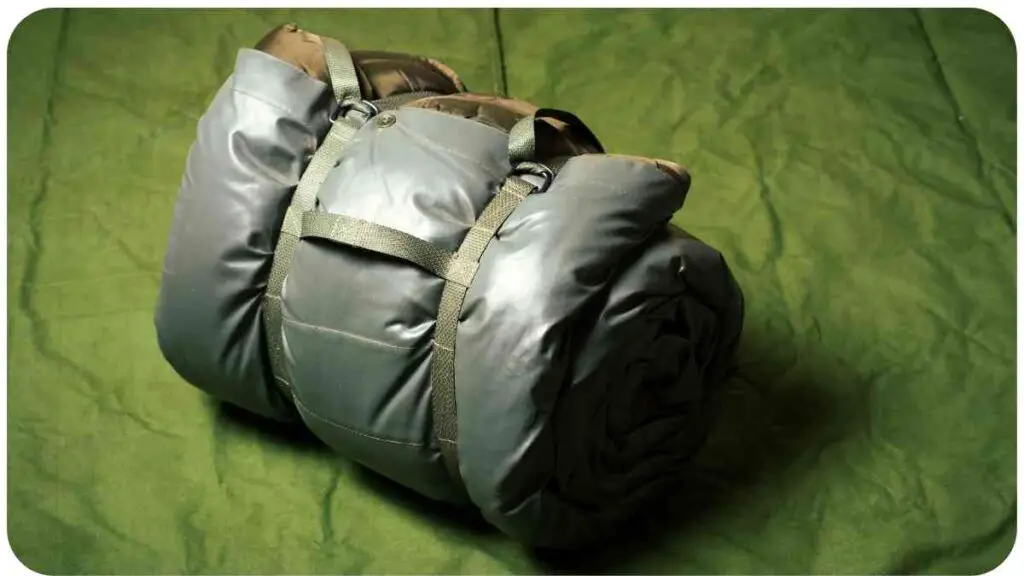
Enhance your tent’s stability using a sleeping bag and a reliable rope.
Begin by securing the rope around one of your sleeping bags, fastening it with a carabiner. Loop the rope over a sturdy object, such as a rock or tree stump, and pull it tight until the tent achieves tautness against the sleeping bag.
This ingenious method serves as a versatile solution, especially when other anchoring options are unavailable on concrete surfaces. Leverage the combination of a sleeping bag and rope for a secure and adaptable approach to anchoring your tent.
| Brand | Description |
|---|---|
| Sea to Summit | Lightweight sleeping bag anchor system |
| Therm-a-Rest | Sleeping bag straps for secure attachment |
| Nemo | Innovative sleeping bag anchors and fasteners |
| Big Agnes | Tent and sleeping bag integration for stability |
| Kelty | Sleeping bag attachment loops and straps |
Reinforce with Sand: Plastic Tent Pegs on Concrete
Reinforce the anchoring strength of your plastic tent pegs on concrete by incorporating sand.
Follow these simple steps for effective reinforcement:
- Utilize a funnel or a Ziploc bag to introduce sand into each plastic tent peg hole.
- Ensure tight packing to eliminate any air gaps or pockets between the sand and the inside of the peg.
- Alternatively, opt for rocks instead of sand, prioritizing their weight to prevent displacement.
DIY Rebar Tent Pegs: Economical and Sustainable
Crafting your own tent pegs from rebar offers a simple and cost-effective solution, maximizing the utility of your camping gear while promoting sustainability by repurposing leftover materials from DIY projects.
Follow these steps to create your DIY rebar tent pegs:
- Acquire Rebar:
- Obtain rebar from hardware stores, typically priced at around $6 per 10ft section.
- Prepare the Rebar:
- Cut the rebar to your desired length, aiming for a typical tent peg length of about 4ft.
- Use a grinder or angle grinder tool to remove any sharp edges, reducing the risk of injury during installation.
- Exercise caution with the angle grinder tool to prevent sparks, especially indoors where sparks can ignite nearby materials; consider wearing eye protection for added safety.
Anchoring your tent is crucial for a safe and enjoyable camping experience. Explore our easy-to-follow guide on anchoring a tent to learn essential techniques and equipment recommendations that will help you set up a stable and secure shelter wherever you camp.
Suction Cups or Plastic Anchors: Concrete Attachment Solution
For tents lacking a dedicated pole for concrete attachment, consider utilizing suction cups or plastic anchors to secure your shelter.
Follow these steps for a straightforward installation:
- Drill Holes in the Concrete:
- Drill holes into the concrete surface where you intend to anchor your tent.
- Ensure precision to accommodate the plastic anchors securely.
- Acquire Plastic Anchors:
- Purchase plastic anchors, readily available at home improvement stores.
- Plastic anchors typically come with installation instructions for convenience.
- Installation Process:
- Insert bolts through the drilled holes, securing them with plastic anchors.
- Follow the provided instructions to ensure proper installation.
- Opt for an installation location free from grass or dirt cover during tent setup.
| Brand | Description |
|---|---|
| Command | Suction cups with strong holding power |
| Gorilla | Heavy-duty suction cups for secure attachment |
| 3M | Reliable suction cups for various applications |
| EZ-Ancor | Plastic anchors designed for easy installation |
| Toggler | Plastic anchors with high weight-bearing capacity |
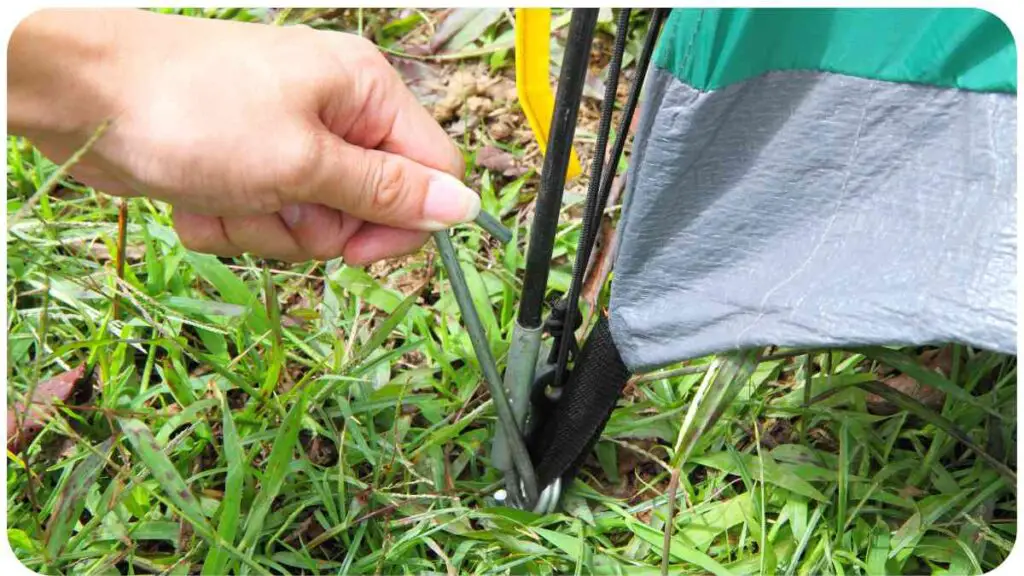
Indoor Tent Stakes: Grounded Stability for Your Shelter
Tent stakes serve as essential tools for maintaining your tent’s stability on the ground, creating a secure anchor by penetrating the soil. Available in diverse sizes, shapes, and materials, these stakes may be crafted from metal, plastic, or wood, featuring a hook-shaped end for easy penetration.
Here’s how to effectively use indoor tent stakes:
- Select Your Setup Area:
- Choose the area where you plan to set up your tent.
- Mark the locations for each stake using string or rope, especially if not marked on the floor.
- Measure and Prepare:
- Determine the desired distance between each side of the tent.
- Consider the depth each stake needs to reach based on whether you’re setting up on sand or grass.
- Insert the Stakes:
- Place one end of each stake into its corresponding hole at one corner of your chosen site.
- Leave enough stake exposed above ground level for easy hammering with a mallet or hammering device.
- Secure and Adjust:
- Ensure the exposed portion allows for smooth hammering without obstructions.
- Slightly loosen these corners to prevent excessive movement during setup, maintaining overall stability.
Planning a beach adventure? Don’t let a windy day ruin your tent setup. Our expert advice on anchoring a tent in sand offers practical tips and strategies to keep your tent grounded and provide you with a worry-free beach camping experience.
Anchor with Household Heaviness: Books and Bricks
Utilize substantial household items, such as books and bricks, to anchor your tent securely without compromising its integrity or the floor.
Follow these guidelines for effective anchoring:
- Select Appropriate Items:
- Choose heavy objects like books and bricks that provide ample weight without posing a risk of damage to the tent or floor.
- Exercise Caution:
- Be mindful of potential accidents; avoid inadvertently dropping heavy items on yourself during the anchoring process.
DIY Weight Bags for Concrete Anchoring
For outdoor enthusiasts camping on concrete, prioritize tent safety with this simple DIY solution:
- Prepare a Plastic Bag:
- Obtain a plastic bag suitable for the task.
- Fill with Sand or Rocks:
- Fill the plastic bag with either sand or rocks, depending on availability and preference.
- Secure to Tent Base:
- Tie the filled bag securely around the bottom part of your tent.
- Precision is not crucial at this stage; excess rope can be easily trimmed later.
- Strategically Place Weight Bags:
- Position the weight bags under the intended tent setup area, ensuring they remain discreet once the tent is erected.
| Brand | Description |
|---|---|
| Sandbags | Traditional option for adding weight to secure items |
| Ziploc | Versatile bags for filling with weights |
| Duck | Durable bags with strong adhesive backing |
| Flex Tape | Heavy-duty tape that can create weight bags |
| Command Strips | Damage-free hanging solution with weight capability |
Heavy Duty Magnets for Robust Tent Anchoring
For heavier tents that require extra anchoring strength, consider utilizing heavy-duty magnets strategically. The weight of your tent will guide the number and placement of magnets for secure anchoring.
Follow these steps for effective use:
- Determine Tent Weight:
- Weigh your tent on a scale to ascertain its total weight.
- Keep a scale handy, preferably in the garage, for convenient and accurate measurements.
- Evaluate Magnets Need:
- If your tent weighs more than 10 pounds, opt for extra strong magnets.
- Determine the number of magnets required based on the tent’s weight.
- Strategic Placement:
- Place the heavy-duty magnets at strategic points around the base of each tent leg.
- Ensure secure attachment to enhance overall stability.
Cinder Blocks or Bricks Anchoring: Sturdy Tent Foundation
Ensure a solid tent foundation by anchoring it to the ground using cinder blocks or bricks. Follow these steps for a secure setup:
- Prepare Your Materials:
- Gather cinder blocks or bricks, bolts, washers, and nuts.
- Drill Holes in the Surface:
- Drill holes in the concrete or chosen surface large enough to accommodate the bolts.
- Secure Bolts in Place:
- Insert a bolt through the drilled hole, positioning it underneath the intended tent leg placement.
- Ensure the bolt is deep enough to prevent sinking into the ground when pressure is applied.
- Use Washers and Nuts:
- Secure the bolt in place by attaching a washer and nut at each end.
- Tighten the nuts firmly against both sides of the tent legs for stability.
Looking to anchor your tent on a platform or raised surface? We’ve got you covered. Learn from our experience and discover effective techniques for anchoring a tent on a platform. Our step-by-step guide will ensure your tent stays securely in place, providing a stable and comfortable camping environment.
Temporary Adhesive Strips: Drill-Free Tent Anchoring
For a drill-free tent anchoring solution on concrete, consider using temporary adhesive strips, such as Velcro. Follow these steps for a hassle-free setup:
- Acquire Velcro Strips:
- Obtain Velcro strips suitable for outdoor use.
- Attach to Tent:
- Affix one end of the Velcro strip to your tent, ensuring a secure connection.
- Prepare Wooden Hooks:
- Paint a small piece of wood with outdoor-use paint.
- Attach the other end of the Velcro strip to this wooden piece, creating makeshift hooks.
- Place on Concrete Surface:
- Temporarily attach your tent to the concrete surface using these Velcro hooks.
| Brand | Description |
|---|---|
| Command | Damage-free hanging solution |
| Scotch | Reliable and strong adhesive strips |
| 3M | Trusted brand for temporary attachments |
| Gorilla | Heavy-duty adhesive strips |
| Velcro | Reusable hook and loop fastening system |
Concrete Anchoring with Bolts: Secure and Precise Setup
For a secure and precise tent anchoring solution on concrete, follow these steps using bolts:
- Drill a Hole:
- Utilize a masonry bit to drill a hole in the concrete at your chosen anchor point.
- Exercise caution during this step to ensure safety.
- Place the Bolts:
- Insert bolts into the holes created in the previous step.
- Confirm proper alignment and length to allow them to run through your tent’s stake loops without interference with the framework.
Conclusion
We trust that this guide has provided valuable insights into anchoring your tent securely on concrete surfaces. As you proceed, it’s crucial to assess your tent’s ability to withstand varying weather conditions, such as snow and rain. Place some weight on your tent to simulate real-life conditions and ensure its stability.
Remember, when removing stakes, exercise caution to prevent breakage. Applying excessive force can compromise their integrity.
With these considerations in mind, you’re well-equipped to enjoy your camping adventures with confidence, knowing your tent is anchored safely and securely. Embrace the outdoors responsibly and make lasting memories amidst nature’s beauty.
Further Reading
Here are some additional resources that provide further insights and information on anchoring canopies on concrete:
Canopy Anchor Ideas: Explore creative and effective ideas for anchoring canopies in various settings, including concrete surfaces. Learn about different anchor options and techniques to secure your canopy safely.
How to Anchor a Canopy on Concrete: Discover step-by-step instructions and tips on properly anchoring a canopy on concrete. This guide provides practical advice and recommended tools to ensure your canopy remains secure in outdoor events.
How to Hold Down a Canopy Tent on Concrete: Learn different methods and products to effectively hold down a canopy tent on concrete surfaces. This article offers insights into anchor weights, straps, and other techniques to prevent your canopy from being blown away.
FAQs
How can I anchor a canopy on concrete without drilling?
Anchoring a canopy on concrete without drilling can be achieved using alternative methods such as sandbags, water weights, or heavy-duty adhesive tapes designed for temporary installations.
What are the recommended anchor options for securing a canopy on concrete?
Popular anchor options for securing canopies on concrete include concrete weights, anchor plates, sandbags, and screw-in ground anchors. The choice depends on the canopy size, location, and personal preference.
How do I ensure the stability of my canopy on a concrete surface during strong winds?
To enhance the stability of your canopy on a concrete surface during strong winds, consider using additional anchor points, reinforcing guy lines, or using wind-resistant canopy designs specifically engineered to withstand gusts.
Can I use tent stakes to anchor a canopy on concrete?
Tent stakes are typically designed for softer ground and are not suitable for anchoring canopies on concrete. It is recommended to explore alternative anchor options like weights or specialized concrete anchors.
Are there any regulations or permits required for anchoring a canopy on concrete in public spaces?
Regulations and permit requirements for anchoring canopies on concrete in public spaces may vary depending on local ordinances and event regulations. It is advisable to check with the relevant authorities or event organizers for any specific guidelines or permits needed.

I am Hellen James, a professional handywoman with expertise in improving home and garden spaces by using pergolas, gazebos, and tents.
