Canopy tents are a great way to add shade and shelter to your outdoor space, but they can be difficult to clean if you don’t take the proper precautions.
It’s important that you paint your canopy tent correctly, as any mistakes could lead to peeling or flaking paint.
If you’re painting a canopy tent for the first time and don’t know where to start, this guide will help guide your process from start to finish!
| Takeaways |
|---|
| Painting a canopy tent allows for personalization and refreshing its appearance. |
| Proper preparation of the canopy tent is essential before painting. |
| Choosing the right paint and tools is crucial for achieving a successful paint job. |
| Following proper painting techniques, such as applying multiple thin coats, ensures a durable and long-lasting finish. |
| Protecting the painted canopy tent from harsh weather conditions helps maintain its appearance. |
Using Correct Paint
There are a number of factors to consider when choosing the right paint for your canopy tent. When you do your research, keep these things in mind:
Find a high-quality outdoor paint. You’ll want to use something specifically designed for canvas, like Behr’s Premium Fade Resistant Paint.
This is because canvas is very porous, so you will want to make sure that the paint adheres well to it and if you’re painting over existing fabric (like stripes) then you’ll want your new color choice to be equally resistant!
Make sure it’s UV resistant. While this may seem like an obvious requirement, not all outdoor paints are truly UV resistant.
This can cause problems down the road as they fade and chip away more quickly than expected; but if you choose correctly and invest in a good quality product from the start then it won’t matter!
When it comes to painting a canopy tent, it’s essential to have a sturdy frame. Learn how to repair a canopy tent frame easily and ensure your tent is in top condition before applying a fresh coat of paint.
Clean The Tent
Wash the tent with a mild soap solution. Use a soft brush to clean the canopy, making sure to get into all of the nooks and crannies.
Wipe down the frame with a damp cloth.
Clean the zippers using an old toothbrush or paintbrush dipped in a small amount of mild soap solution.
Rinse your hands thoroughly after you finish cleaning your canopy tent!
Prepare The Work Area
Cover the ground with drop cloths.
Use a drop cloth under the tent. This will protect your floor from any drips or paint splatter that may occur during painting.
You can also use newspaper and plastic as an alternative to canvas, but it’s not recommended for long-term use because newspaper tends to get torn up over time and plastic is slippery when wet (which means it’s hard for you to move around).
Put down a drop cloth on the ground outside. This will help keep any paint spills contained so they don’t end up all over your lawn or sidewalk!
Cover The Ground
Cover the ground. If you’re using a tarp, place it over the grass and secure it in place with tent pegs. If you’re using a plastic sheet, lay it out on top of your tent to protect it from paint splatters.
Keep everything clean and dry! This is an important step because any dirt or moisture left on your tent can cause problems when painting.
Anchoring your shade canopy properly is crucial for stability and safety. Discover the easy steps to anchor a shade canopy and keep your canopy securely in place, providing a reliable foundation for your painting project.
Preparing The Canopy
Before painting, it’s important to make sure the tent is clean and dry. Dust and dirt can be removed with a cloth and vacuum cleaner, but mild detergent can also be used for a deeper cleaning if needed.
Rinse the fabric with clean water after cleaning, then let it dry completely before moving on to the next step of painting.
| Checklist Item |
|---|
| Clean the canopy |
| Inspect for damages or wear |
| Repair any tears or holes |
| Ensure all zippers are working |
| Check for proper frame setup |
| Test canopy stability |
| Apply waterproofing if needed |
Wear Protective Clothes And Mask
Wear protective clothes and mask:
Wear long sleeves, pants, and a hat to protect your skin from splashes.
Put on rubber gloves.
Use a respirator for your mouth and nose. In addition to protection from chemicals that you might breathe in, it’s also helpful to keep dust out of your mouth and nose while you work.
With goggles on, you should be able to see well enough to avoid accidentally brushing against the sides of the tent or puncturing holes through which rain could seep inside and soak everything inside (and possibly ruin some of your other belongings).
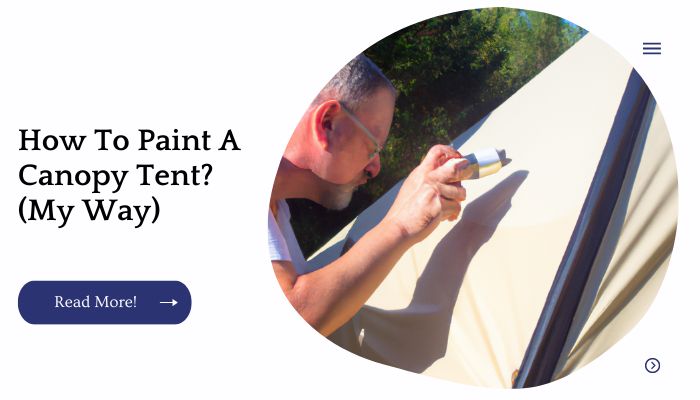
Use A Paint Sprayer Or Roller
Use a paint sprayer or roller. Depending on the size of your tent, you can use one of these two tools to cover it in paint. A paint sprayer is great for large areas, while a roller is best for smaller areas.
Spray or roll on the new color. To apply your chosen shade of latex house paint, either use a sprayer or roll it onto your canopy tent with a painter’s pole brush.
The roller will help to get into all the nooks and crannies, so consider doing this step first before applying more coats of paint if needed (see below).
Apply another coat if desired to make sure it’s completely covered and wait 30 minutes before using again!
Before painting a canopy tent, it’s important to know how to set up the canopy frame correctly. Check out our comprehensive guide on installing a canopy frame to ensure a stable and well-prepared structure for your painting endeavor.
Use Painter’s Tape To Mask Off Sections You Don’t Want To Spray
Use painter’s tape to mask off sections you don’t want to paint. Use painter’s tape to mask off areas where you don’t want the paint to bleed on the canopy.
You can also use it at corners or anywhere else where overspray from your spray gun might land.
Don’t Apply Too Much Paint At Once
This is probably obvious, but it’s important to keep in mind when you start painting your canopy tent.
The reason for this is that if you apply too much paint at once, you risk getting paint on areas where it shouldn’t be, like the top of your hand or even inside of your mouth (Yikes!).
If you have any excess paint on your brush, wipe it off onto a paper towel before moving on to another part of the canvas so as not to waste any materials or get messy before finishing up.
Don’t paint when there’s too much sun or heat.
Again with this one being obvious: You want to make sure that whatever conditions are outside aren’t too hot or cold for painting because those temperatures can dry out and harden up your canvas faster than expected!
| Tip | Recommendation |
|---|---|
| Apply thin coats | Avoid applying too much paint at once |
| Use even strokes | Maintain consistent and smooth coverage |
| Allow proper drying time between coats | Follow the paint manufacturer’s guidelines |
| Consider brand-specific instructions | Check paint brand recommendations, if applicable |
| Apply additional coats if necessary | Achieve desired color and finish |
Spray A Light Coat
Now that the canopy is dry, it’s time to spray a light coat of paint. You don’t want to make this layer too thick; just spray enough so that you don’t see the original color underneath.
You should also avoid spraying more than two coats of paint on your tent, as doing so will cause it to become stiff and brittle over time.
Apply A Second Coat When First Is Dry
When the first coat of paint is dry, apply a second coat. You will have to wait until the first coat has dried before applying this one or else they might not stick together. How long you should wait depends on what kind of paint you are using and how good it is. If you are using a high quality brand, it will take longer than if you were using an economy brand. For example:
- Premium latex paints may require 24-48 hours for drying time before applying a second layer
- Acrylics typically dry within an hour
Once your tent is completely dry from both coats of paint, lay down some drop cloths to protect the floor in case there are any drips or spills while painting (we recommend having someone help hold up one side while spraying).
Use a damp cloth to wipe away dust that has accumulated on your canopy since its last cleaning session (you did clean it right?).
Preparing for a successful painting project involves proper handling and setup of your camping canopy. Learn how to hang a camping canopy securely, creating an ideal workspace for painting your canopy tent and achieving professional results.
Wait For 30 Minutes To Cure The Paint
After 30 minutes, the paint should be dry. The paint will still be tacky for a while and sticky for a while.
This is normal; it’s hard to paint something and then have it be completely not-sticky. But you can still get it off your hands by washing them with soap and water.
Wash Your Tent After The Event
To clean your canopy tent, you need to wash it with a mild detergent and rinse it thoroughly. After washing and rinsing there are two steps that you can do to ensure that the tent is perfectly clean. First, let the fabric dry in the sun by laying out all its pieces on a flat surface outdoors or you can use a clothesline if you have one. The next step is storing your tent neatly away from moisture and dirt until your next event.
| Tent Type | Recommended Cleaning Frequency | Cleaning Method |
|---|---|---|
| Nylon Tents | After each event | Hand wash with mild soap and water, rinse thoroughly |
| Canvas Tents | After each event | Spot clean with mild soap and water, air dry |
| Polyester Tents | After each event | Machine wash on gentle cycle with mild detergent |
| PVC Tents | After each event | Wipe clean with a damp cloth, air dry |
| Pop-up Tents | After each event | Spot clean with mild soap and water, air dry |
Set Up The Tent Again
Once you’ve finished cleaning and painting your canopy tent, it’s time to set it up again. This is where many people find themselves getting frustrated: the instructions in their manual are confusing and it seems like there are a million parts.
Don’t worry! Take your time and follow the instructions slowly. If you have questions about anything, call or email the manufacturer of your specific tent model they’ll be happy to help out.
When setting up your tent again after painting, check for any damage done by cleaning or repainting.
Use a flashlight if needed (it’s always good practice when working with any kind of machinery).
You’ll want to make sure that everything is connected properly so that your canopy won’t fall apart during use or while being transported later on!
Repairing any surface imperfections is crucial before painting your canopy tent. Discover effective techniques to repair hairline cracks in a concrete patio to ensure a smooth and durable surface, providing an excellent base for your paint application.
Store It Away Neatly In A Place Protected From Moisture And Dirt
When you’re done painting, store it away neatly in a place protected from moisture and dirt. You can hang the tent on a hook or a hanger if you have one, but make sure to put a sheet or pillowcase over the canopy before storing it so as not to dirty it.
If you don’t have access to these items, wrap your canopy in plastic wrap instead. This will protect the canvas from getting damaged while also keeping it clean and dry.
Conclusion
Painting a canopy tent can be difficult. If you want to make sure that your paint job lasts for years, it’s important that you apply the right type of paint, use the right equipment and follow all of our tips on how to get started.
Further Reading
Here are some additional resources you may find helpful:
Can You Paint a Pop-Up Tent?: Discover the possibilities of personalizing your pop-up tent with a fresh coat of paint and learn the necessary steps for a successful painting project.
Can You Paint a Canvas Tent?: Find out how to add a touch of creativity to your canvas tent by painting it. Learn about suitable paints and techniques to ensure a vibrant and durable finish.
Craft Fair Tutorial: Pimp Your EZ-Up: Explore creative ways to enhance your EZ-Up tent for craft fairs and events. Get inspired by innovative ideas and techniques to transform your tent into an eye-catching display.
FAQs
Can I paint my canopy tent?
Yes, you can paint your canopy tent to personalize it or give it a fresh new look. However, it’s important to follow proper preparation and painting techniques to achieve the best results.
What type of paint should I use for my canopy tent?
For painting a canopy tent, it’s recommended to use outdoor-specific paints that are suitable for the tent’s material. Acrylic paints or fabric paints designed for outdoor use are often good options.
How do I prepare my canopy tent for painting?
To prepare your canopy tent for painting, start by cleaning the surface thoroughly and ensuring it’s dry. Remove any dirt, debris, or old paint. You may need to sand or prime the surface depending on the material and condition of the tent.
What tools and equipment do I need for painting a canopy tent?
Typically, you’ll need brushes or rollers suitable for the chosen paint type, drop cloths or tarps to protect the surrounding area, painter’s tape for masking off areas, and cleaning supplies for surface preparation. It’s also recommended to have a well-ventilated area for painting.
How can I ensure a durable and long-lasting paint finish on my canopy tent?
To achieve a durable and long-lasting paint finish on your canopy tent, follow the manufacturer’s instructions for the paint you’re using. Apply multiple thin coats, allowing sufficient drying time between each coat. It’s also advisable to protect the painted surface from harsh weather conditions and consider using a clear sealant for added protection.

I am Hellen James, a professional handywoman with expertise in improving home and garden spaces by using pergolas, gazebos, and tents.
