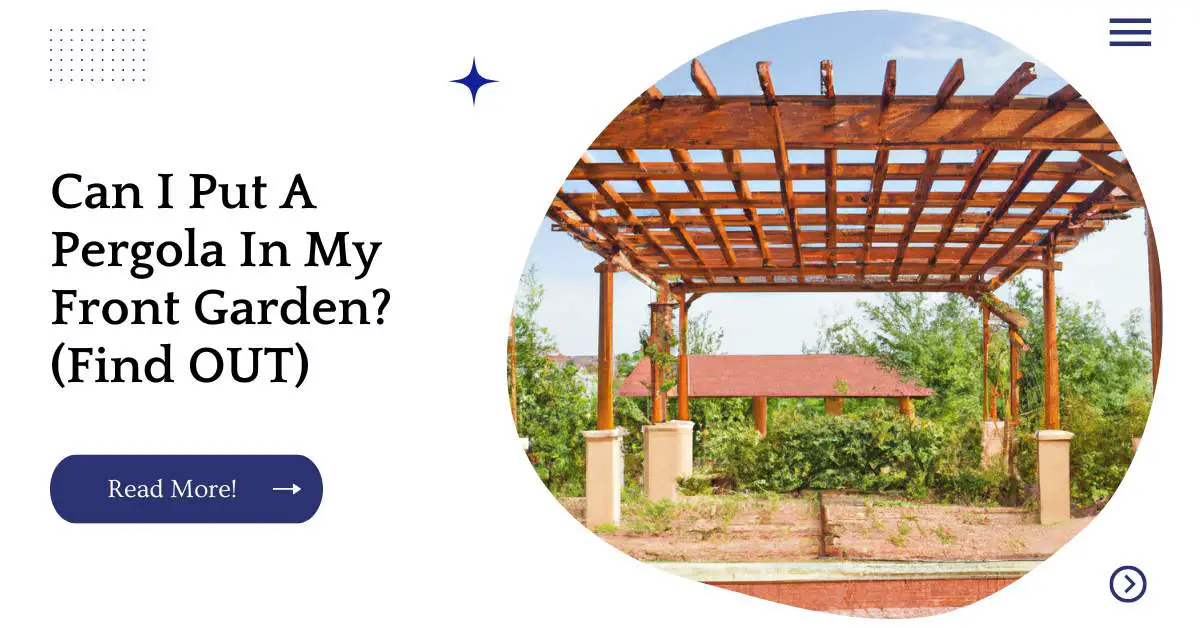
Pergolas are a great way to spruce up your outdoor space. They can be attached to the side of your house or built as an addition in your front or back garden, and they can provide a shady spot for relaxing on hot days or provide a sheltered spot for growing vegetables.
Pergolas come in all shapes and sizes, so it’s easy to find one that matches the size of your garden and budget.
If you want to build one yourself but aren’t sure where to start, here’s how:
| Takeaways |
|---|
| Pergolas can generally be installed in front gardens, but it’s important to consider local regulations and planning permission requirements. |
| The placement of a pergola in a front garden can enhance the aesthetic appeal and functionality of the outdoor space. |
| Factors to consider when putting a pergola in a front garden include size, height, structural integrity, and compatibility with the overall landscape design. |
| The use of appropriate materials and anchoring methods is crucial to ensure the stability and durability of the pergola. |
| Consulting with professionals and checking local regulations can help ensure a successful and compliant installation of a pergola in a front garden. |
Get Your Materials
Materials for your pergola:
Wood for the frame. You can use pressure-treated lumber or any other type of wood, but remember that if you choose to use pressure-treated lumber, it must be stained or painted within a year so that the chemicals don’t seep into your soil and harm plants around it.
You’ll need 2x4s for the main structural supports and 2x2s for support beams in certain places. You will also need some scrap pieces of lumber to connect everything together once it’s all cut up!
Nails or screws (depending on what you’re using) to secure the frame together once built out (and screws/nails again when attaching benches).
If using nails, make sure they aren’t too long as they could poke through into other parts of your garden bed if not careful!
Be aware that screws are going into hardwood so should take care not to overdo it when drilling holes – there’s no point creating weak points in them where rot easily sets in later down line…
If you’re wondering whether you can put a tent over a pergola, our comprehensive guide on putting a tent over a pergola will provide you with valuable insights and considerations for creating a versatile outdoor space.
Choose Your Design
Your chosen pergola design will have a big impact on your garden’s appearance, so make sure it fits in with the style of your property.
If you’ve got an old-fashioned cottage, perhaps consider choosing something that’s reminiscent of classic Georgian architecture such as a round arbour or trellis archway.
For example, this could be made from wood and stone and decorated with climbing plants to create a more natural look.
On the other hand, if you’re building a new home or adding an extension then consider modern materials like aluminium or steel for maximum durability.
These materials also tend to be more affordable than traditional wood varieties due to their reduced weight; therefore they won’t cost much more than timber in terms of installation cost either! In addition, both these materials are weatherproof which means they can withstand all kinds of weather conditions without any problems whatsoever.”
Cut The Pergola Rafters
The rafters are the support beams that connect the posts and beams together. To cut them, use a circular saw to mark each rafter at the correct length and then cut them down to size.
You’ll want to make sure you mark each piece correctly so that it fits in with all of your other pieces when you’re putting it together.
Install Joist Hangers And Rafter Tails
When you’re ready to install the rafters, make sure that you have the joist hangers and rafter tails in place.
You can use a level to check for levelness and adjust accordingly. Once all of the parts are in place, it’s time to assemble them and secure them with nails or screws.
Discover the possibilities of adding a plastic roof to your pergola by exploring our informative article on putting a plastic roof on a pergola. Find out how this modification can enhance the functionality and aesthetic appeal of your pergola.
Set Up The Ledger Board And Corner Posts
Now you’re going to install the ledger board and corner posts. The ledger board is a horizontal piece of framing that will support your pergola on the ground, while the corner posts are vertical supports to keep it in place.
To get started, measure and cut two 24-foot-long 2×6 joists from pressure-treated lumber (also called common lumber or dimensional wood).
These will serve as your ledger boards. Next, cut two 12-foot boards for your corner posts as well as two 4×4s for braces.
Make sure all of these pieces are slightly longer than 24 feet so that when you attach them together with hurricane ties, they don’t extend past either end of your frame by more than 1/8 inch each side (this helps prevent cracking).
Attach one end of each 24 foot long 2×6 beam to both sides at an angle using 3 inch deck screws (or lag screws if you’re attaching into concrete).
Then attach a 12 foot long 2×6 beam across both ends using 6 inch deck screws/lag screws again making sure not too far overhang either side by more than 1/8th inch each side after being attached together with hurricane ties
Cut The Posts To Size And Install Them
Now that your posts are cut to length, it’s time to assemble them. To do this, you will need to:
- Insert the screws into the pilot holes using a screwdriver and make sure that they are straight.
- Insert one side of each post into its corresponding bracket and then secure them with another screw from above (if you like).
- Repeat with the other set of posts on either side of your pergola.
| Method | Description |
|---|---|
| Quick-Set Concrete | Secure the posts in the ground using Quick-Set Concrete for a stable foundation. |
| Post Anchors | Install post anchors to provide support and secure the posts in place. |
| Dig and Pour | Dig holes, pour concrete, and set the posts for a durable installation. |
| Adjustable Post Base | Utilize adjustable post bases to ensure accurate height and alignment during installation. |
| Post Brackets | Attach post brackets to the surface and secure the posts for an above-ground installation. |
Attach The Posts To The Frame Using Hurricane Ties
Attach the posts to the frame using hurricane ties. These are metal brackets that you can easily attach to your wood and then use to screw in the posts. To install them, use a power drill and a level to make sure they’re straight.
The next step is leveling out your pergola so it’s flat on top, using stakes or other weights as needed to keep things steady while you work.
Once everything is leveled out, you have one last step: attaching the roof panels! You may want an extra set of hands for this part it’ll be much easier if someone helps hold down each panel while you screw them into place (or secure them with nails).
Once all 6 are up there should be no gaps between any of them; just make sure everything is aligned properly before driving any nails/screws into place!
Curious about placing a pergola in your grassy front garden? Our detailed guide on putting a pergola in grass offers valuable tips and considerations to ensure a successful installation while preserving the beauty of your garden.
Attach Your Rafters To Your Ledger Board And Corner Posts
You will then need to attach your rafters to your ledger board and corner posts. You can do this with hurricane ties, which are nails that go through both pieces of wood. Alternatively, you can use a nail gun if you have one handy.
This will make the structure more durable in windy areas or climates where there is heavy snowfall or freezing temperatures.
| Method | Description |
|---|---|
| Simpson Strong-Tie® Connectors | Use specialized connectors from Simpson Strong-Tie® for secure rafter attachment. |
| Lag Screws | Attach rafters to the ledger board and corner posts using lag screws for a strong connection. |
| Joist Hangers | Utilize joist hangers to securely attach rafters to the ledger board and corner posts. |
| Metal Brackets | Install metal brackets to provide structural support and fasten rafters to the ledger board and corner posts. |
| Timberlok® Screws | Use Timberlok® screws for easy and secure rafter attachment to the ledger board and corner posts. |
Add Braces Above Each Of Your Beams For Additional Support
In order to add a brace, first measure the distance between the beam and your structure. Next, cut your brace to this length and nail it into place with galvanized nails that have been coated with a rust inhibitor.
If you don’t want a support beam directly above or below your pergola, then use braces beneath each of the beams for added stability.
The brace should be at least 6″ from each beam and at least 2″ from other supporting structures such as walls or foundations (this will ensure that no one can trip over them).
Braces should also be at least 1″ away from any other supporting structures so that they do not interfere with how well they hold up against heavy winds or snow loads while still maintaining their structural integrity.
Add A Second Layer Of Beams For More Support
If you want to ensure that your pergola will be sturdy, you can add a second layer of beams for additional support. This will also make it much easier to build the pergola if you are inexperienced at carpentry or if the area is large.
To do this, simply attach two beams together with nails and a sledgehammer. Then, place them in between the other beams so that they are perpendicular to them and directly across from each other. You can then nail these together as well using plenty of nails and glue (if desired).
Now that your pergola is more stable, you should consider adding some form of roofing material on top of it so that water does not seep through into your home’s foundation through cracks between wood planks due to rain or snowfall conditions over time while also protecting passersby from falling debris should anything fail within its structure during use–which could cause serious injury or even death if someone were struck by something falling from an overhead beam!
Transform your rooftop deck into an inviting outdoor oasis by adding a pergola. Check out our article on putting a pergola on a rooftop deck for expert tips and insights on creating a stylish and functional space.
Installing Builders Felt!
Now, you are ready to cover your pergola roof with a canvas or polycarbonate roofing. You can do this by installing builders felt over the top of the rafters and nailing it down securely with nails.
You should choose a material that matches your garden aesthetic so that it blends in well with the rest of your garden surroundings.
For example, if you have an old wooden shed at the bottom of your garden, then try using timber-look beams on top of your new pergola!
This type of material is easy to install and remove if you want an open air feel throughout summer months; however, we would recommend using other types of roofing materials if there is any chance rain could fall directly onto people sitting underneath (such as during storms).
| Method | Description |
|---|---|
| Adhesive | Builders Felt is secured using adhesive for a strong bond. |
| Stapling | Builders Felt is attached using staples for a secure installation. |
| Nail Fixing | Builders Felt is fixed in place using nails for added stability. |
| Torch-on | Builders Felt is heat-applied using a torch for a watertight seal. |
| Self-adhesive | Builders Felt with a self-adhesive backing simplifies installation. |
Covering The Roof Of The Pergola With A Canvas!
Canvas is a great material for covering the roof of your pergola, since it’s easy to install, durable and waterproof, breathable and easy to clean. Canvas can also be easily removed for repairs or other maintenance work.
Here are some things you should look out for when choosing canvas:
The gauge (thickness) of the canvas – Thicker gauges will last longer but will provide less flexibility in your design. If you want something that will last forever then go with a thicker gauge, however if you want something which is more flexible then consider going thinner so you can play with different shapes and styles over time without having any problems.
The weave type – There are many types of fabric weave including plain dyed fabrics that don’t have any patterns printed on them or heavily textured fabrics which may include designs such as stripes or checks etcetera
Looking to maximize your greenhouse’s potential in July? Our comprehensive guide on what to grow in a greenhouse in July provides a list of suitable crops and helpful tips to ensure a successful and bountiful harvest during the summer season.
Conclusion
If you want to make your garden more beautiful, then a pergola is the best option for you. Just follow the instructions given above and get ready to enjoy your new pergola in your front garden!
Further Reading
Pergola Planning Permission: Explore the guidelines and regulations surrounding pergola planning permission to ensure compliance and a smooth installation process.
Planning Permission for Pergolas: Learn about the requirements and considerations when it comes to obtaining planning permission for your pergola construction project.
Decks and Pergolas: A Perfect Combination: Discover the benefits and design possibilities of incorporating a pergola with a deck, creating a harmonious outdoor space for relaxation and entertainment.
And here’s the markdown representation of the “FAQs” section:
FAQs
Can I install a pergola without planning permission?
Yes, in many cases, you can install a pergola without planning permission, especially if it meets certain criteria such as size, height, and location.
Do I need to check local regulations before installing a pergola?
Yes, it’s important to check local regulations and building codes before installing a pergola to ensure compliance and avoid any legal issues.
What materials are commonly used for pergola construction?
Popular materials for pergola construction include wood, metal, and vinyl. Each material has its advantages in terms of durability, aesthetics, and maintenance requirements.
How can I secure a pergola in my front garden?
To secure a pergola in your front garden, you can use methods like anchoring it to the ground with concrete footings or attaching it to existing structures like the house or a concrete slab.
Can I attach a pergola to my existing deck?
Yes, it is possible to attach a pergola to an existing deck. However, it’s important to ensure proper structural support and consult with a professional to ensure the safety and stability of the structure.

I am Hellen James, a professional handywoman with expertise in improving home and garden spaces by using pergolas, gazebos, and tents.
