Are you looking to add a personal touch to your outdoor spaces or enhance the aesthetics of your home interior? DIY concrete stones offer a versatile and budget-friendly solution for crafting custom-made decor elements.
In this guide, we’ll explore the art of creating DIY concrete stones using plastic bags as molds. Whether you’re a seasoned DIY enthusiast or a novice crafter, you’ll find valuable tips and techniques to bring your creative vision to life.
| Takeaways |
|---|
| 1. DIY concrete stones offer a versatile and budget-friendly solution for crafting custom-made decor elements. |
| 2. Plastic bags can serve as convenient and cost-effective molds for shaping concrete stones. |
| 3. Proper preparation, mixing, and curing are essential for achieving durable and visually appealing concrete stones. |
| 4. Safety should be a top priority when working with concrete, including wearing protective gear and following proper handling procedures. |
| 5. With creativity and enthusiasm, you can personalize your concrete stones to enhance the aesthetics of your home or garden. |
2. Understanding DIY Concrete Stones
Materials Needed
Before diving into the crafting process, let’s gather the essential materials and tools:
Sealing your canopy ensures longevity and protection against elements. Learn how to seal a canopy effectively with simple DIY techniques, maintaining its durability for prolonged outdoor use.
| Materials | Tools |
|---|---|
| Concrete mix | Mixing container |
| Plastic bags | Trowel |
| Water | Protective gear |
| Concrete pigment | Gloves |
| Release agent (optional) |
Benefits of DIY Concrete Stones
Crafting your own concrete stones offers several advantages:
- Customization: You can create unique designs tailored to your preferences.
- Cost-Effectiveness: DIY concrete stones are often more affordable than pre-made options.
- Creative Outlet: Express your creativity and style through personalized projects.
- Sustainability: Reduce waste by repurposing plastic bags as molds.
3. Preparing Your Workspace
Before getting started, it’s crucial to set up a suitable workspace and gather all necessary tools and supplies.
Cleaning the Area
Begin by clearing and cleaning the area where you’ll be working. Remove any debris or obstacles that could interfere with the crafting process. A clean workspace not only ensures better results but also reduces the risk of accidents.
Anchoring a pergola to a concrete patio requires precision and stability. Discover how to anchor a pergola to a concrete patio effortlessly, ensuring a secure structure for your outdoor space enhancement project.
Gathering Tools and Supplies
Take inventory of the tools and supplies needed for the project. Ensure that you have everything on hand before starting to avoid interruptions. Here’s a checklist of essential items:
- Mixing container: Choose a sturdy container large enough to accommodate the amount of concrete mix you’ll be using.
- Trowel: A trowel is essential for mixing and spreading the concrete mixture.
- Protective gear: Wear gloves, safety goggles, and a dust mask to protect yourself from potential hazards.
- Release agent (optional): A release agent can help prevent the concrete from sticking to the plastic bags, making it easier to remove the finished stones.
4. Mixing the Concrete
Achieving the right consistency is key to creating durable and visually appealing concrete stones.
Choosing the Right Concrete Mix
Selecting the appropriate concrete mix is crucial for the success of your project. Opt for a high-quality mix designed for outdoor use, as it will provide durability and weather resistance. Follow the manufacturer’s instructions regarding water-to-concrete ratio to ensure optimal results.
Adding Pigment for Color
Enhance the visual appeal of your concrete stones by adding pigment to the mix. Concrete pigments are available in a variety of colors, allowing you to customize your creations to match your desired aesthetic. Mix the pigment thoroughly with the concrete to achieve uniform coloring.
Repairing cracked or broken windows is crucial for maintaining your home’s integrity. Explore quick and effective solutions in this guide on fixing cracked or broken windows, ensuring a safe and comfortable living environment.
5. Forming the Stones
Once you have prepared the concrete mixture, it’s time to shape it into stones using plastic bags as molds.
Using Plastic Bags as Molds
Plastic bags provide a convenient and cost-effective solution for creating molds of various shapes and sizes. Here’s how to use them effectively:
- Choose sturdy plastic bags: Select durable plastic bags that can withstand the weight and pressure of the concrete mixture without tearing.
- Prepare the bags: Open the plastic bags and arrange them in the desired shape and size for your concrete stones. You can use multiple bags to create larger stones or experiment with different shapes and configurations.
- Apply release agent (optional): If desired, spray or brush a release agent on the inside of the plastic bags to prevent the concrete from sticking.
Filling the Bags with Concrete
Once the plastic bags are prepared, it’s time to fill them with the concrete mixture:
- Pour the concrete: Carefully pour the mixed concrete into each plastic bag, ensuring that it fills the entire space evenly.
- Compact the mixture: Use a trowel or your hands to compact the concrete mixture and eliminate any air bubbles or voids. Press the mixture firmly into the corners and edges of the bags to ensure a smooth finish.
- Level the surface: Smooth out the surface of the concrete mixture using a trowel or flat object. This will create a uniform surface for your finished stones.
6. Curing and Finishing
Proper curing and finishing are essential for ensuring the strength and longevity of your concrete stones.
Allowing for Proper Curing Time
After filling the plastic bags with concrete, allow them to cure properly before proceeding with the finishing touches:
- Cover the bags: To prevent the concrete from drying out too quickly, cover the plastic bags with a plastic sheet or damp cloth. This will help maintain moisture levels during the curing process.
- Wait for the cure: Depending on the type of concrete mix used and environmental conditions, the curing time may vary. Typically, allow the concrete to cure for at least 24 to 48 hours before proceeding.
- Remove the plastic bags: Once the concrete has cured sufficiently, carefully remove the plastic bags from the molds. Gently peel away the plastic to reveal the concrete stones underneath. If you applied a release agent, the bags should come off easily without sticking to the concrete.
- Inspect for imperfections: Take a close look at the surface of the concrete stones for any imperfections or rough edges. Use sandpaper or a concrete rub stone to smooth out any rough spots and achieve the desired finish.
Illuminate your gazebo space with enchanting LED lighting solutions. Discover creative ideas and practical tips for illuminating your gazebo space beautifully with LED lighting, adding ambiance and charm to your outdoor gatherings.
Finishing Touches
With the plastic bags removed and any imperfections addressed, it’s time to add the final touches to your concrete stones:
- Seal the surface (optional): For added durability and weather resistance, consider sealing the surface of the concrete stones with a concrete sealer. Apply the sealer according to the manufacturer’s instructions and allow it to dry completely.
- Add decorative elements (optional): Get creative and personalize your concrete stones by adding decorative elements such as embedded pebbles, mosaic tiles, or stamped designs. Press these embellishments into the surface of the concrete while it’s still wet for a secure bond.
- Arrange the stones: Once the finishing touches are complete, arrange the concrete stones in your desired location. Whether you’re creating a garden pathway, patio, or indoor flooring, arrange the stones in a pattern that complements your space.
- Enjoy your handiwork: Step back and admire your DIY concrete creations. Not only have you saved money by making your own stones, but you’ve also added a personal touch to your home or garden decor.
7. Creative Ideas and Inspiration
Looking for inspiration for your next concrete stone project? Here are a few creative ideas to spark your imagination:
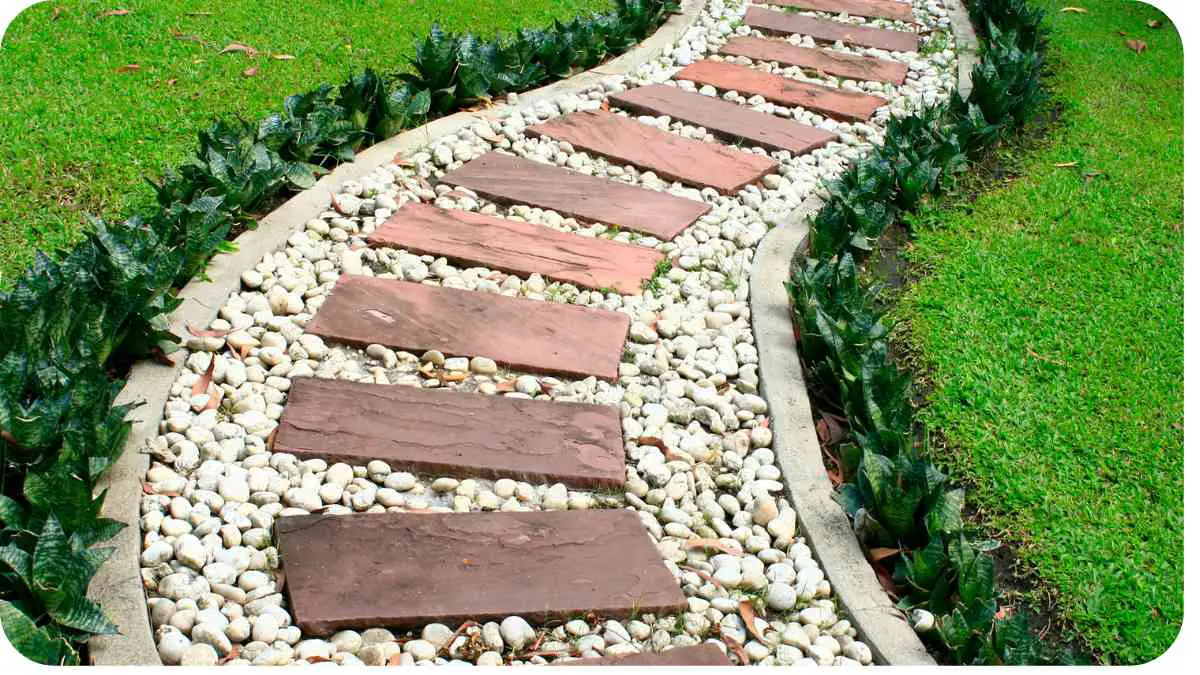
Stepping Stones for Garden Paths
Create whimsical garden pathways by crafting custom stepping stones with unique designs and patterns. Incorporate decorative elements such as leaf imprints, mosaic tiles, or embedded trinkets to add visual interest to your garden landscape.
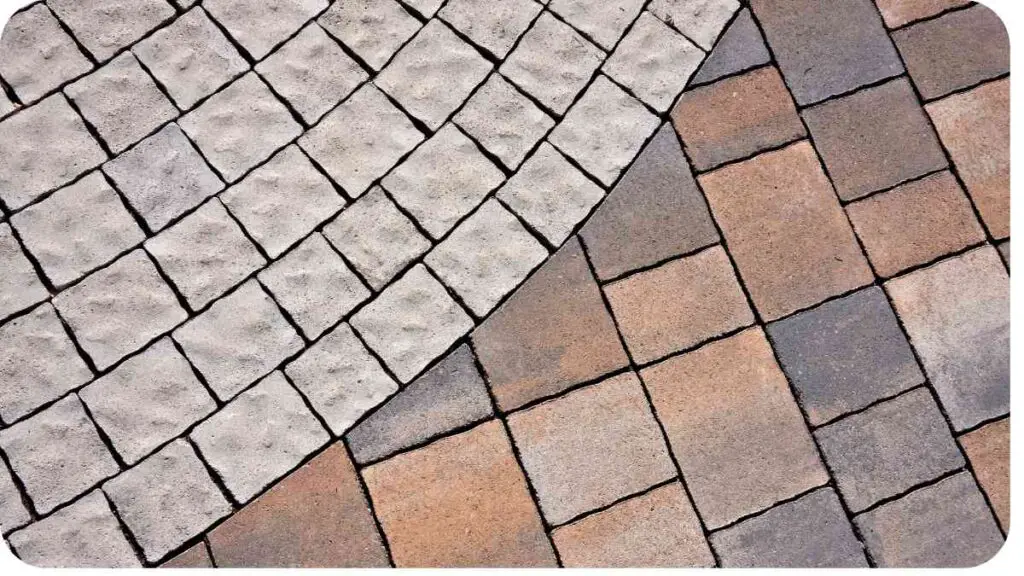
Decorative Pavers for Outdoor Spaces
Enhance the aesthetics of your outdoor living areas by using DIY concrete pavers as patio or deck accents. Experiment with different shapes, sizes, and colors to create a custom look that complements your outdoor decor.
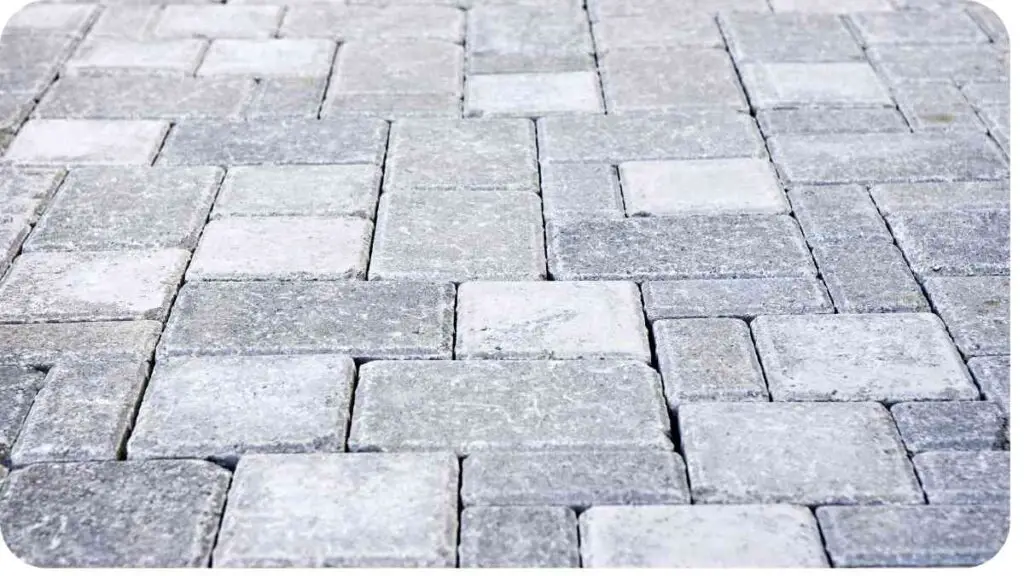
Customized Concrete Tiles for Indoor Flooring
Make a statement indoors by installing custom concrete tiles as flooring in your home. From sleek and modern to rustic and textured, concrete tiles offer endless design possibilities for kitchens, bathrooms, and living spaces.
Troubleshooting Common Issues
While crafting DIY concrete stones can be a rewarding experience, it’s not uncommon to encounter challenges along the way. Here are some common issues and troubleshooting tips:
Cracks in Concrete Stones
- Possible Causes: Cracks in concrete stones can occur due to factors such as improper mixing of the concrete, insufficient curing time, or rapid drying.
- Troubleshooting Tips:
- Ensure proper mixing: Follow the manufacturer’s instructions for mixing the concrete and avoid adding too much water, which can weaken the mixture.
- Allow for adequate curing time: Make sure to allow the concrete stones to cure for the recommended duration before removing them from the molds.
- Control moisture levels: Keep the concrete stones moist during the curing process by covering them with a plastic sheet or damp cloth.
Uneven Texture or Surface
- Possible Causes: Uneven texture or surface irregularities can result from improper filling or compacting of the concrete mixture, as well as uneven curing conditions.
- Troubleshooting Tips:
- Ensure thorough mixing and compacting: Take care to thoroughly mix the concrete and compact it evenly within the plastic molds to minimize air pockets and voids.
- Level the surface: Use a trowel or flat object to smooth out the surface of the concrete mixture before allowing it to cure.
8. Safety Precautions
Working with concrete requires careful attention to safety to prevent accidents and minimize health risks. Here are some essential safety precautions to keep in mind:
Protective Gear and Equipment
- Wear gloves: Protect your hands from contact with concrete and potential skin irritation by wearing sturdy gloves.
- Safety goggles: Shield your eyes from splashes or airborne particles by wearing safety goggles.
- Dust mask: Prevent inhalation of concrete dust by wearing a dust mask or respirator.
- Long sleeves and pants: Cover exposed skin to minimize contact with wet concrete and potential skin irritation.
Handling Concrete Mix Safely
- Follow manufacturer’s instructions: Always read and follow the manufacturer’s instructions and safety guidelines when handling concrete mixtures.
- Avoid inhaling dust: Minimize exposure to concrete dust by working in well-ventilated areas and using dust suppression methods such as wetting down surfaces.
- Clean up spills promptly: Clean up any spills or splatters of wet concrete immediately to prevent slips and falls.
Now, let’s delve into some crucial safety practices and tips to ensure a smooth and secure DIY concrete stone crafting process.
Protective Gear and Equipment
When working with concrete, prioritizing your safety is paramount. Here’s what you need:
- Wear Gloves: Concrete can be harsh on the skin. Protect your hands from irritation and potential chemical burns by wearing sturdy gloves.
- Safety Goggles: Shield your eyes from splashes and airborne particles that may arise during the mixing and pouring process. Safety goggles provide essential eye protection.
- Dust Mask or Respirator: Concrete dust can pose respiratory hazards. Wear a dust mask or respirator to prevent inhalation of airborne particles, especially during mixing and sanding.
- Long Sleeves and Pants: Concrete can stain and irritate the skin upon contact. Wear long sleeves and pants to minimize skin exposure and potential irritation.
Handling Concrete Mix Safely
Concrete mix contains various chemicals and compounds that require careful handling. Follow these guidelines:
- Read Manufacturer’s Instructions: Before starting, carefully read and adhere to the manufacturer’s instructions and safety guidelines provided on the concrete mix packaging.
- Minimize Dust Exposure: Concrete dust inhalation can lead to respiratory issues. Work in well-ventilated areas, and consider using dust suppression techniques such as wetting down surfaces to minimize dust generation.
- Avoid Skin Contact: Concrete mix can cause skin irritation and burns. Avoid prolonged skin contact by wearing gloves and protective clothing. In case of skin contact, wash the affected area thoroughly with soap and water.
- Clean Up Spills Promptly: Accidental spills of wet concrete should be cleaned up immediately to prevent slips and falls. Use absorbent materials such as sawdust or sand to soak up the spill, then dispose of it properly.
Additional Safety Considerations
- Sturdy Footwear: Wear closed-toe shoes or boots with slip-resistant soles to protect your feet from dropped tools or heavy materials.
- Secure Workspace: Ensure your workspace is well-lit, clutter-free, and free from tripping hazards. Secure loose items and tools to prevent accidents.
- First Aid Kit: Keep a first aid kit nearby with basic supplies in case of minor injuries such as cuts or abrasions.
By prioritizing safety and following these precautions, you can minimize the risk of accidents and ensure a safe and enjoyable DIY concrete stone crafting experience.
9. Conclusion
Creating DIY concrete stones using plastic bags as molds is a rewarding and versatile craft project that allows you to unleash your creativity while adding unique accents to your home or garden. With the right materials, tools, and techniques, you can produce custom-made concrete stones that enhance the aesthetics of any space.
Whether you’re designing garden pathways, patio accents, or indoor flooring, DIY concrete stones offer endless possibilities for customization and personalization. By following the steps outlined in this guide and incorporating safety precautions, you can successfully embark on your concrete crafting journey with confidence.
So, roll up your sleeves, gather your supplies, and let your imagination run wild as you embark on the exciting adventure of DIY concrete stone crafting. With a little creativity and a lot of enthusiasm, you’ll soon be marveling at your handcrafted creations gracing your home or garden.
Further Reading
Here are some additional resources to explore for more information on DIY concrete stone crafting:
- Concrete in Bag Walkway: Discover step-by-step instructions for creating a beautiful walkway using concrete-filled bags. This resource provides detailed insights and tips for achieving professional-looking results.
- Ziploc Bag Concrete Garden Path: Learn how to use Ziploc bags as molds to create stunning concrete garden paths. This article offers creative ideas and practical techniques for crafting unique outdoor decor elements.
- DIY CONCRETE: How To Make Stepping Stones: Explore a comprehensive guide to making stepping stones using DIY concrete techniques. This instructable provides detailed instructions and inspiration for creating personalized stepping stones for your garden or walkway.
FAQs
How long does it take for concrete stones to cure?
Concrete stones typically require 24 to 48 hours to cure fully. However, curing time may vary depending on factors such as environmental conditions and the type of concrete mix used.
Can I customize the color of my concrete stones?
Yes, you can customize the color of your concrete stones by adding pigment to the concrete mix. Concrete pigments are available in various colors, allowing you to create unique and personalized designs.
Do I need to use a release agent when using plastic bags as molds?
Using a release agent is optional but can help prevent the concrete from sticking to the plastic bags, making it easier to remove the finished stones. Alternatively, you can use non-stick cooking spray as a release agent.
How do I prevent cracks in my concrete stones?
To prevent cracks in concrete stones, ensure proper mixing of the concrete, adequate curing time, and control moisture levels during the curing process. Avoid adding too much water to the concrete mix, as excess water can weaken the mixture and lead to cracking.
What safety precautions should I take when working with concrete?
When working with concrete, it’s essential to wear protective gear such as gloves, safety goggles, and a dust mask to minimize exposure to chemicals and airborne particles. Additionally, work in a well-ventilated area, and avoid prolonged skin contact with wet concrete.

I am Hellen James, a professional handywoman with expertise in improving home and garden spaces by using pergolas, gazebos, and tents.
