Polyurethane is one of the most useful materials for covering and insulating your greenhouse. It’s durable, it can be applied in a number of different ways and it’s easy to work with.
However, there are some things that you need to know before you start applying polyurethane to your greenhouse:
| Takeaways |
|---|
| Greenhouse coverings can be applied using polyurethane material. |
| Polyurethane provides excellent insulation and UV resistance for greenhouse covers. |
| Proper installation techniques are crucial for effectively covering a greenhouse with polyurethane. |
| Polyurethane-covered greenhouses can benefit from increased durability and weather resistance. |
| Regular maintenance and inspection are necessary to ensure the longevity of polyurethane greenhouse covers. |
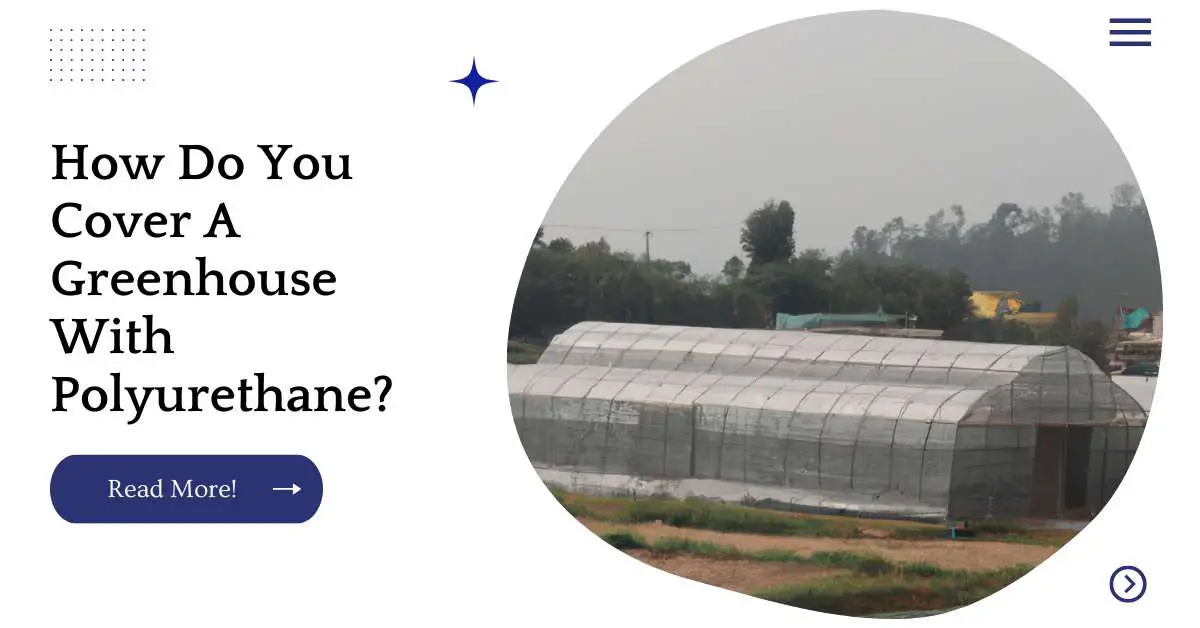
Using polyurethane with a Greenhouse
Polyurethane is a great way to protect your greenhouse. If you want to protect it from the elements, polyurethane is a great way to do so.
Polyurethane is also a good material for protecting your greenhouse against sunlight and ultraviolet rays, which can damage plants in the greenhouse if they’re not protected.
When it comes to reinforcing a canopy top, it’s important to use the right techniques. Our expert tips on how to reinforce a canopy top will provide you with easy-to-follow methods for enhancing the durability and stability of your canopy structure.
Getting the Job Done
If you want to use a paint roller, here’s what you should know:
Roll the polyurethane onto your greenhouse in a thin coat. Apply it in layers, allowing each layer to dry for 24 hours before applying another. If you put on too much polyurethane at once and it pools on top of itself, it will be more difficult to smooth out with a second coat.
Let the polyurethane sit for at least 24 hours before using your greenhouse again—this will give time for its fumes to dissipate and help prevent any lung irritation or other adverse reactions by people who breathe them regularly (like children).
It also allows time for any remaining moisture inside the surface of your greenhouse structure (which would cause mildew) or on its walls (which could drip down onto plants below) to evaporate fully away from whatever surface has been coated by this new material.*
| Tool | Purpose |
|---|---|
| {Brand Name} Paint Sprayer | Efficiently applies paint or coating to large areas. |
| {Brand Name} Roller | Provides smooth and even application on walls and ceilings. |
| {Brand Name} Paintbrush | Ideal for precise and detailed painting tasks. |
| {Brand Name} Putty Knife | Used for filling cracks and smoothing surfaces. |
| {Brand Name} Sandpaper | Helps in sanding and preparing surfaces for painting. |
| {Brand Name} Caulking Gun | Applies caulk to seal gaps and joints. |
Tools to Use and Mistakes to Avoid
You will need a razor knife, pneumatic sprayer and hose, rough sandpaper, a heat gun and an electric sander. You can use these tools to cover your greenhouse with polyurethane, but there are some things you should avoid doing or using when doing this project.
Here they are:
- Do not use an electric paint roller or brush to apply the polyurethane because it tends to be too thick and it won’t spread evenly over your greenhouse frame.
- Avoid using any solvent-based products that might dissolve some types of plastics (like PVC). If you don’t know if something is solvent-based or not then don’t take the chance!
Looking to attach a canopy to a chuppah? Our comprehensive guide on how to attach a canopy to a chuppah offers step-by-step instructions and valuable insights to help you create a beautiful and secure canopy setup for your special event.
Applying Polyurethane
When applying polyurethane, you’ll want to use a roller. Apply the polyurethane in the direction of the grain of your wood; this will help you avoid bubbles and lumps that could show up later on.
You should also make sure that you’re not putting on too much polyurethane at once; if it’s thick enough, you can wipe off any excess with a rag or paper towel before it dries. If there’s too little, however, just apply another coat until it looks good.
Finally, don’t let your wood dry with even a tiny bit of dried-on polyurethane still on its surface—this is where most of those bubbles come from!
Preparing it for Application
You should always clean your greenhouse before applying polyurethane. Make sure to remove any debris or dirt from the surface first, as this could cause issues when painting.
To cover the greenhouse with polyurethane, use a paint roller and roll it over the surface of your greenhouse in order to get an even coat on everything. Then use a clean cloth to wipe off any excess that has been applied so far so that there are no drips or streaks left behind (you don’t want those).
After you’ve done this once, wait 1 hour before doing it again! This will give time for previous coats of polyurethane to cure and dry out enough before applying another one so that they do not stick together when you go over them with another layer later on down the line during this process
| Step | Description |
|---|---|
| Clean | Remove dirt and debris from the surface. |
| Sand | Use sandpaper or a sander to smooth the surface. |
| Prime | Apply a primer to enhance adhesion and durability. |
| Mix | Thoroughly mix the product according to instructions. |
| Test | Perform a small test application to check compatibility. |
| Apply | Use a brush, roller, or sprayer to apply the product. |
| Dry | Allow sufficient drying time before further steps. |
| Repeat | Apply additional coats if needed for desired results. |
Prepping your Greenhouse for the Polyurethane
Before you begin the process of applying polyurethane, you must prep your greenhouse. This means cleaning it thoroughly and removing any loose paint or rust.
In order to wash the walls with soap and water, use a hose on low pressure to get rid of dirt and debris. The cleaner your greenhouse is before applying polyurethane, the better it will look once done!
Unlocking a canopy may seem tricky, but with our expert tips on how to unlock a canopy, you’ll discover simple and effective techniques to release the mechanisms and safely open up your canopy for various outdoor activities.
Making Your Own Polyurethane for Coating a Greenhouse
Polyurethane is a type of synthetic resin that comes in several forms, including liquid, powder and film. It can be used as a coating or sealant on many materials to help preserve them from damage.
The best way to apply polyurethane for greenhouse coverings is by using an airless sprayer. This will ensure that you get even coverage throughout the entire surface area without any drips or runs down it.
You should always make sure that you are wearing protective eye goggles whenever applying this product because it can cause irritation if it gets into your eyes and cause damage if inhaled during application.
In addition, never apply polyurethane when it’s raining or about to rain because water can affect its ability to bond with whatever material you’re covering with it
Creating the Base Mix
You’ll need to mix the polyurethane with a hardener. If you don’t, it will never dry and become solid—it will just sit there in an opaque liquid or semi-solid state.
To avoid air bubbles as well as drips, uneven coverage, runs and streaks on your piece of furniture or greenhouse:
Use a clean mixing container (you might want to wear old clothes for this step). Fill half way with hardener and stir until dissolved. Do not add more than recommended by manufacturer; the ratio should be about 1 part hardener for every 10 parts polyurethane.
Add more hardener until mixture is thick enough to scoop out easily but still flows easily from brush tip when tilted sideways at around 90 degrees from vertical position (this will take about 5-10 minutes).
You can test how thick/fluid your mix is by dipping one side of brush into mix then lifting straight up slowly—if paint starts dripping off sides then add more hardener; if paint stays put then reduce amount added until it drips slightly after being tilted 90 degrees upwards slowly–this should ensure even application across whole surface area
| Component | Purpose |
|---|---|
| Peat moss | Provides moisture retention |
| Perlite | Enhances drainage |
| Vermiculite | Improves soil aeration |
| Composted bark | Adds organic matter |
| Coconut coir | Increases water holding capacity |
Making the Topper Mix
Now that you have your supplies ready, it’s time to mix up the polyurethane. The ratio for making a topper is 1:1:1 (polyurethane/hardener/solvent).
You will need enough of this mixture to cover at least 10 square feet of greenhouse top, so make sure you are thinking ahead when calculating how much you are going to use.
Once your polyurethane has been mixed together, pour it into whatever container or containers you bought from the hardware store.
Folding a pop-up canopy doesn’t have to be a hassle. Our easy guide on how to fold a pop-up canopy walks you through the step-by-step process, providing useful tips and tricks to neatly fold and store your canopy for future use.
Final Considerations of Building Your Own Polyurethane
Polyurethane is a great choice for covering your greenhouse because it’s durable, waterproof and easy to apply.
Polyurethane comes in different grades and thicknesses depending on what you need your greenhouse to be used for, so it’s important to choose the right one for the job.
Pros:
- Durability—Polyurethane will last longer than other types of materials and can withstand extreme weather conditions like rain or snow
- Waterproof—The material is water resistant so rain won’t penetrate through your coverings when they are installed correctly
Cons:
- Price—It’s more expensive than other options on this list such as aluminum foil but still affordable if you’re looking at doing all the work yourself
If you own a Coleman canopy and need guidance on folding it properly, our easy tips on how to fold a Coleman canopy will make the process a breeze. Follow our instructions to ensure a compact and organized storage solution for your Coleman canopy.
Conclusion
There are many things to consider when using polyurethane to cover your greenhouse. For example, you need to be sure that the surface is clean and dry before applying it, so that there’s no chance of dust or dirt getting stuck in between layers of this material.
Also remember that the material needs at least three days for proper curing time before being exposed to sunlight again; otherwise it might discolor over time as well as lose some effectiveness against UV rays which will damage plants inside!
Further Reading
Here are some additional resources that you may find helpful for further reading on the topic of greenhouse covering materials and installation:
Tunnel Vision Hoops: Guide to Installing a Greenhouse Top Cover: Learn valuable insights and step-by-step instructions for installing a top cover on your greenhouse, ensuring proper protection and insulation.
Greenhouse Emporium: Best Greenhouse Covering Materials: Discover a comprehensive guide to the best materials for greenhouse coverings, including information on their durability, light transmission, and insulation properties.
Bootstrap Farmer: Best Way to Install Plastic to Greenhouse: Explore the best practices for installing plastic coverings on your greenhouse, with insights on securing, stretching, and maintaining the integrity of the plastic film.
FAQs
Here are some frequently asked questions related to greenhouse covering materials and installation:
How do I choose the right greenhouse covering material?
The choice of greenhouse covering material depends on factors such as climate, budget, durability, light transmission, and insulation requirements. Consider factors like polycarbonate, polyethylene, or glass, and their respective properties to make an informed decision.
How often should I replace the greenhouse cover?
The lifespan of a greenhouse cover varies depending on the material used, exposure to weather conditions, and maintenance. However, on average, greenhouse covers may need replacement every 5 to 10 years to ensure optimal performance and protection.
What are the benefits of using polycarbonate for greenhouse covering?
Polycarbonate is a popular choice for greenhouse coverings due to its high durability, light transmission properties, and resistance to impact and UV radiation. It provides excellent insulation and can withstand harsh weather conditions.
How should I prepare the greenhouse structure before installing the cover?
Before installing the greenhouse cover, ensure that the structure is properly assembled, level, and secure. Make any necessary repairs or adjustments to ensure a stable and sturdy foundation for the cover.
What are some common methods for attaching greenhouse covers?
Greenhouse covers can be attached using various methods, such as using clips, channels, or tapes designed for specific materials. Some covers may require additional reinforcement or fastening systems, depending on the chosen material and greenhouse design.

I am Hellen James, a professional handywoman with expertise in improving home and garden spaces by using pergolas, gazebos, and tents.
