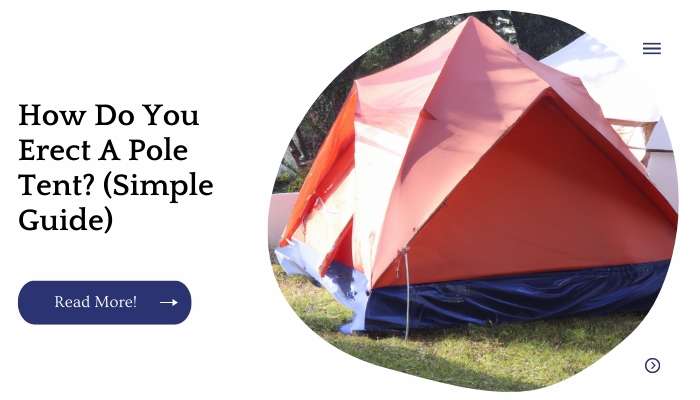
A pole tent is a great option for anyone who wants to protect their guests from the sun and rain. There are many different styles of pole tents, but they all work in the same way: four poles connected by sleeves on top of tall stakes that hold up an outer cover (usually canvas).
The main difference between them is how you set up the frame and what kind of material you use for your outer cover.
In this article, we will discuss how to erect a pole tent step-by-step so that you can get started with yours!
| Takeaways |
|---|
| Erecting a pole tent requires careful planning and preparation. |
| Properly securing the tent’s poles and stakes is essential. |
| Following a step-by-step guide can simplify the setup process. |
| Consider using additional reinforcement for added stability. |
| Unlocking the canopy and checking for any issues is important. |
Mark Where The Poles Go With Spray Paint
Spray paint is a great way to mark the positions of your tent poles. This will make it easier to position the pole and know where each piece goes when you start assembling the tent.
Use a tape measure to measure from the ground to the top of your pole tent and mark this on some scrap paper or cardboard so that you know exactly how high off the ground each pole needs to go.
When marking out where all four poles go, use spray paint or marking pens so that they make a visible mark in case there’s any confusion later on when setting up your tent (and there likely will be).
When it comes to folding a pop-up canopy, simplicity is key. Our easy guide on how to fold a pop-up canopy provides step-by-step instructions and helpful tips to make the process hassle-free.
Lay Out All Poles And Parts
You’ll want to lay out all the parts and make sure they’re in good condition before you begin. Check to see if anything is missing or damaged, such as a pole bent out of shape or missing tent stakes.
You’ll also need to ensure that everything is the correct length and size, such as a tent pole being too long and therefore needing extra stakes or guy lines attached at certain points along its length. Once you’ve verified that everything is ready, you can move on with erecting your tent!
Install Stakes Into The Ground
That’s it, you’re done! Congratulations on erecting your tent. Now that you know how to erect a pole tent, try using it for other things like:
- Family picnics
- Birthday parties
- Weddings (if you don’t mind spending hundreds of dollars)
| Step | Description |
|---|---|
| Step 1 | Gather the stakes and necessary tools for installation. |
| Step 2 | Identify the desired location for stake placement. |
| Step 3 | Position the stake vertically above the chosen spot. |
| Step 4 | Use a hammer or mallet to drive the stake into the ground. |
| Step 5 | Ensure the stake is firmly secured and upright. |
Install Top Rail On Top Of Stake
Next, you’ll install the top rail onto your stake. To do this, place the top rail on top of your stake and slide it down until it goes into place. Then secure it with a sleeve and bungee cord.
This next step can be tricky if you haven’t done it before, but we’ll walk you through each step:
Planning a special event that requires a canopy attached to a chuppah? Learn how to securely attach a canopy to a chuppah frame with our comprehensive guide on canopy attachment to a chuppah.
Install Bottom Rail On Top Of The Stake
The next step is installing the bottom rail on top of the stakes. It’s important to make sure that you are installing a level bottom rail. You can use a level and a straight edge to check if your stake is level or not.
Once you have determined that your stake is level, attach the bottom rail with screws along its full length until it reaches the ground.
The last thing you want when setting up your tent is for there to be gaps between where your tent meets with the ground. This will allow bugs and debris into your event space!
Assemble The Pole Sections
To assemble your pole tent, simply tighten the nuts on each section. You can use a wrench or pliers if you are comfortable doing so.
If not, it’s fine to use a hammer as well. When tightening the nuts, be sure that the arrow on the end of each pole section is pointing in an upward direction.
| Step | Description |
|---|---|
| Step 1 | Gather the pole sections |
| Step 2 | Connect the pole sections together |
| Step 3 | Ensure a secure fit between the sections |
| Step 4 | Check for proper alignment and stability |
| Step 5 | Verify that all pole sections are securely assembled together |
Place Poles In The Ground Pole Holders.
Before you do anything, make sure the ground is level and solid. You can use a tarp to protect the floor of your tent from potential scratches.
Next, place the pole in its holder. Make sure that it’s straight and that it’s placed in the right direction (this should be obvious).
You should also make sure that nothing else is touching your pole such as another tent or tree branches on top of your tent and finally, make sure that there isn’t anything touching your tent like someone standing on it or even just sitting nearby!
For added stability and longevity of your canopy top, reinforcement is crucial. Discover our easy tip for reinforcing a canopy top to ensure your pole tent withstands various weather conditions and usage.
Connect The Four Tent Poles (Side Poles) To The Top Rail Using A Sleeve
When you’re connecting the four tent poles (side poles) to the top rail, it’s important to make sure they are aligned correctly.
Use a hammer to connect sleeves to each of the four tent poles so that they form an even rectangle. Make sure that each sleeve is tight and in line with each other.
Attach Rafter Poles to Top Rail Using Sleeves
Once the rafters are in place, you’ll need to attach the top rail of each pole tent. You can do this by using a sleeve between the rafter poles and top rail; this is what keeps it all together. The sleeve has teeth on it for gripping into place and making sure everything stays put during use.
| Step | Description |
|---|---|
| Step 1 | Position the rafter poles and top rail for alignment. |
| Step 2 | Insert the rafter poles into the sleeves on the top rail. |
| Step 3 | Ensure a secure fit by pushing the poles firmly into the sleeves. |
| Step 4 | Double-check the alignment and stability of the attached poles. |
| Step 5 | Verify that all poles are securely fastened to the top rail. |
Stake Down Guy Ropes After Erecting Tent
Once your tent is up, you need to stake down the guy ropes. These ropes will help keep your pole tent stable and in place as it stands. If not secured properly, a pole tent can fall over in strong winds or when guests bump into them.
The guy ropes are tied securely to the ground with stakes that are hammered into the earth with a mallet or hammer.
You can find stakes at any hardware store; they usually come in packs of 10 or more for about $5-$10 per pack depending on brand and type of stake you choose (properly-sized metal stakes will last longer than plastic ones).
Unlocking a canopy can sometimes be tricky, but with our expert tips on unlocking a canopy, you’ll have no trouble getting your pole tent ready for setup and enjoying outdoor events.
Erecting A Pole Tent Is Easy Once You Have Practiced A Few Times
Before erecting your tent, it’s important to understand the risks involved. Make sure you practice in a safe environment and take all necessary precautions.
Practice makes perfect, so don’t get frustrated if it takes you a few tries to get everything right. The following instructions will help you erect a pole tent safely and efficiently:
Read through the instructions carefully before beginning your project.
Lay out all of your equipment on the ground next to where you want your tent set up so that everyone knows what they need in order for each step to go smoothly later on.
This way no one has any questions about where things should go or what they’re supposed to do when it’s time for them to start working on their own part of setting up this new piece of outdoor furniture!
Is your EZ-Up canopy in need of repair? Our pro tips on fixing an EZ-Up canopy will guide you through common issues and provide solutions to ensure your canopy is in top shape for your next adventure.
Conclusion
Now you know how to erect a pole tent. It’s simple, but it does take some time and effort. The most important thing is to make sure that you have everything you need before starting the process, so you don’t hit any snags along the way. If you do run into problems, try asking one of our team members for advice!
Now get out there and enjoy your tent!
Further Reading
Here are some additional resources for further reading on tent assembly and setup:
How to Assemble a Tent: WikiHow provides a comprehensive guide with step-by-step instructions and illustrations on assembling tents for various camping needs.
How to Set Up a Tent: Family Handyman offers a detailed tutorial on setting up tents, including tips for choosing a suitable campsite and efficiently assembling different types of tents.
Tent Set-Up: Expert Advice: REI’s expert advice article covers essential tips and techniques for tent setup, including guidance on site selection, stake placement, and rainfly attachment.
FAQs
Here are some frequently asked questions about tent assembly and setup:
How long does it take to assemble a tent?
The time it takes to assemble a tent can vary depending on the type of tent and your familiarity with the setup process. Generally, it can take anywhere from 10 minutes to 30 minutes or more.
What are the essential components of a tent setup?
The essential components of a tent setup typically include the tent body, poles, stakes, rainfly, and guylines. These components work together to provide structure, stability, and protection from the elements.
How do I choose a suitable campsite for tent setup?
When selecting a campsite, look for level ground free from rocks, roots, and other potential hazards. Consider factors like proximity to water sources, shelter from wind, and access to necessary facilities.
How do I properly stake a tent?
To stake a tent, insert the stakes at a 45-degree angle into the ground, ensuring they are secure. Place stakes at each corner of the tent, along the edges, and at guylines if applicable.
What should I do if I encounter difficulties during tent assembly?
If you encounter difficulties during tent assembly, refer to the tent’s instruction manual or setup guide. Take your time, double-check each step, and ask for assistance if needed.

I am Hellen James, a professional handywoman with expertise in improving home and garden spaces by using pergolas, gazebos, and tents.
