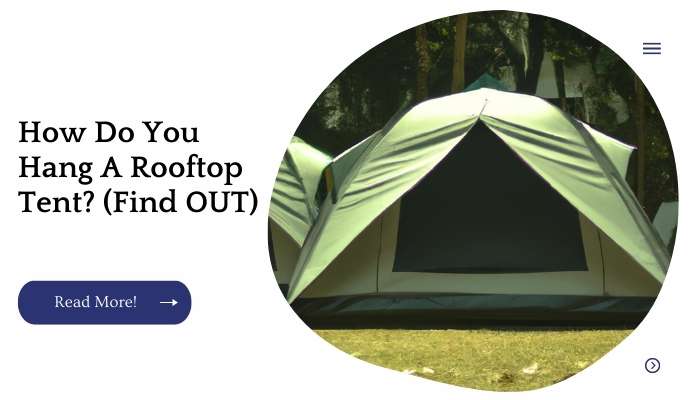
Rooftop tents are great for getting out of the elements and into your own private space, but setting one up can be a challenge. With the right tools and some patience, though, you’ll have yours installed in no time.
| Takeaways |
|---|
| Proper installation is crucial for safely hanging a rooftop tent. |
| Follow step-by-step instructions and expert tips for a secure and enjoyable camping experience. |
| Ensure the rooftop tent is securely attached to the vehicle’s roof rack. |
| Consider the weight and load capacity of your vehicle and roof rack. |
| Regularly inspect and maintain the tent’s hardware and components for optimal performance. |
Start by Making Sure Your Car Can Carry the Load
First, you need to make sure that your car can carry the load. Check your roof rack to see if it supports a tent and whether or not it has been designed to support the extra weight of a rooftop tent.
Also check your spare tire, as this may be used instead of a roof rack to carry the tent if necessary.
If you have a sunroof, ensure that it is locked down with latches so that it doesn’t accidentally open when driving around at high speeds with an open-air rooftop vehicle on top of your car!
When it comes to hanging a rooftop tent, proper installation is crucial for safety and comfort. Our comprehensive guide on how to hang a rooftop tent provides step-by-step instructions and expert tips to ensure a secure and enjoyable camping experience.
Identify a Suitable Location on Top of the Car
Level, secure location: The ideal place to mount your rooftop tent is a level, secure surface. This can be achieved by using the car’s rack or roof bars if they are available at that location. Mounting points may include any of the following:
The top of a car’s rack, which is typically provided with mounting slots that fit over crossbars on your vehicle.
The top of a vehicle’s roof rails, which are metal rails that run along either side of some cars’ roofs and provide attachment points for accessories such as cargo carriers and bike racks.
Any other flat area on top of your vehicle’s roof (this includes hatches).
| Vehicle Make/Model | Suitable Location |
|---|---|
| Subaru Outback | Roof Rack Crossbars |
| Jeep Grand Cherokee | Roof Rails |
| Honda CR-V | Roof Rack |
| Toyota Highlander | Roof Rack Crossbars |
| Ford Escape | Roof Rails |
Be Sure the Roof is Square to the Vehicle
Since your goal is to hang the tent in a level position, you must ensure that the roof is square with the vehicle.
A common mistake people make when installing these tents is just making sure it’s level with the ground, but this only works if there is an even surface on both sides of your vehicle.
If there isn’t an even surface on both sides of your vehicle (like if one side has a steep driveway), then you will have to use some ingenuity and ingenuity to get around this issue. One option would be using a laser level or measuring tape.
The other option would be using a sheet of plywood as seen in this video:
If all else fails and no one has invented any way for us humans to install our own tent yet, we can always go back into pre-human times back to when we were apes!
| Vehicle Make/Model | Roof Alignment |
|---|---|
| Ford F-150 | Square |
| Toyota Camry | Not Square |
| Chevrolet Silverado | Square |
| Honda Civic | Not Square |
| Jeep Wrangler | Square |
Position the L-Brackets That Will Support the Tent
To position the L-Brackets that will support the rooftop tent, you must first ensure they are not in the way of your car’s door. Be sure to also check that they do not interfere with your windscreen wipers.
You may need to take some measurements before installing these brackets, but once you have them positioned correctly, it should be easy for you to mount them on either side of the car’s roof rack so that one is behind each wheel.
Whether you’re attaching a canopy to a chuppah for a special occasion or event, the process requires attention to detail. Our guide on how to attach a canopy to a chuppah offers valuable insights and techniques to create a beautiful and secure setup.
Attach the Gooseneck and Safety Straps
Attach all of the straps first, then attach the goosenecks.
The safety straps will have a Binder Clip attached in order to secure them to each other and onto your vehicle. This is for added security during your journey!
Secure the Billet Knobs and Channel Mounts
At this point, you should have a rooftop tent that is supported by the channel mounts on the roof and held in place by your billet knobs. To make sure they stay secure, you’ll want to tighten them with a wrench.
| Components | Description |
|---|---|
| Billet Knobs | High-quality, durable knobs for secure attachment |
| Channel Mounts | Sturdy mounts for easy and reliable installation |
Set Up and Tighten the Adjustable Foot Plates
Now that you have the tent on the car, it’s time to attach the foot plates. This step is pretty simple, but there are a few things to keep in mind.
First, make sure that everything has been tightened down and that nothing is loose or will come loose during your trip. You don’t want your tent flying off your car!
Second, make sure that when you attach the foot plates to your car (if necessary), they are not going through gas lines or anything else important inside the body of your vehicle.
Thirdly, take care not to put any undue stress on these connections by overloading them with too much weight when attaching them to each other (don’t worry—we’ll talk about this more later).
Finally, don’t forget about safety! Always wear protective eyewear when operating tools like drills around vehicles so you can see clearly enough not only what needs fixing but also whether someone else might need help if something goes awry while working under duress conditions like driving at highway speeds while trying out new equipment outdoors.”
To prolong the lifespan of your canopy top and enhance its durability, reinforcing it is essential. Our easy tip guide on how to reinforce a canopy top provides effective methods and practical advice to ensure your canopy withstands various weather conditions.
Assemble and Attach the Tent to the Mounting Legs
After you have finished the first seven steps, it’s time to assemble and attach the tent to your mounting legs.
Make sure that you have assembled all of the parts correctly, including attaching all four legs to their long pole. Once all of this is done, you can move onto assembling your rooftop tent.
The first step in this process is to check that everything is square by measuring diagonally from corner-to-corner with a tape measurer and making sure that both measurements are equal (or close enough).
Next up is leveling—if any part of your tent isn’t level, it won’t stand up properly and may tip over when used!
Finally, make sure everything is tight by pulling hard on each cord until it feels snug enough for you not worry about losing any parts while driving around town or while camping.
When it comes to securing a greenhouse from strong winds, implementing the right strategies is crucial to protect your investment. Explore our guide on how to secure a greenhouse from the wind to learn effective methods and best practices for ensuring the stability and safety of your greenhouse.
Install Front and Rear Braces
Now that you’ve installed the tent, it’s time to do some work on the car.
- Attach the lower brackets to both sides of your vehicle with a pair of bolts and nuts.
- Attach the load bars to each side of your vehicle with a pair of bolts and nuts.
- Attach the front and rear braces to each side of your vehicle with a pair of bolts, washers, and nuts.
Insert Load Bars and Attach Bottom Brackets
The last step before you can hit the road is to insert the load bars into their brackets, which are attached directly to the underside of your tent.
Once inserted, these will act as your suspension system when you hoist up your tent on top of your car or truck.
The load bars are then attached to each other with metal clips for extra security as well as being connected at one end with a metal hook that connects to a metal plate at the back of your vehicle’s roof rack (or trailer) so that they form an “X” shape and remain securely in place while driving.
Folding a pop-up canopy properly is not only convenient but also helps in preserving its functionality. Our easy guide on how to fold a pop-up canopy demonstrates the correct techniques and offers useful tips to simplify the process and save you time and effort.
Conclusion
At that point, the tent is ready to be used and you can enjoy the outdoors in your own personal space. If you need more information or would like help with your rooftop tent install, please feel free to contact us at any time.
Further Reading
Here are some additional resources you can explore to learn more about rooftop tents:
Thule: How Do Rooftop Tents Work? A Complete Guide: Thule provides a comprehensive guide that explains the functionality and features of rooftop tents, including setup, maintenance, and considerations for choosing the right one.
4×4 Outside: The Ultimate Guide to Installing and Using a Rooftop Tent for the First Time: This guide offers detailed instructions and tips for first-time users of rooftop tents, covering installation, safety, and essential accessories.
GentleTent: Rooftop Tent Roof Load: GentleTent discusses the important topic of rooftop tent roof load, providing insights into weight limitations, distribution, and considerations for a safe and comfortable camping experience.
FAQs
Here are some frequently asked questions about rooftop tents:
How do I choose the right size rooftop tent for my vehicle?
The size of the rooftop tent depends on your vehicle’s roof rack capacity and the number of occupants. Consider the dimensions, weight, and sleeping capacity of the tent to ensure it fits your vehicle and meets your camping needs.
Can I leave a rooftop tent on my vehicle while driving?
It is generally not recommended to leave a rooftop tent on your vehicle while driving. The added height and weight can affect the stability and aerodynamics of the vehicle, potentially compromising safety. It is best to remove and secure the rooftop tent before hitting the road.
Are rooftop tents waterproof?
Most rooftop tents are designed to be water-resistant or waterproof. However, the level of waterproofing can vary among different models. It’s important to check the manufacturer’s specifications and consider additional measures like seam sealing and using a rainfly for enhanced protection against rain.
How do I set up and pack down a rooftop tent?
Setting up and packing down a rooftop tent typically involves unfolding or extending the tent, securing it to the roof rack, and adjusting the support poles and ladder. Detailed instructions can be found in the tent’s user manual or through instructional videos provided by the manufacturer.
Can I use a rooftop tent on any vehicle?
Rooftop tents are compatible with many types of vehicles, including SUVs, trucks, and some cars. However, it is essential to ensure that your vehicle’s roof rack is suitable for carrying the weight of the tent. Check the manufacturer’s recommendations and consult your vehicle’s manual to determine compatibility.

I am Hellen James, a professional handywoman with expertise in improving home and garden spaces by using pergolas, gazebos, and tents.
