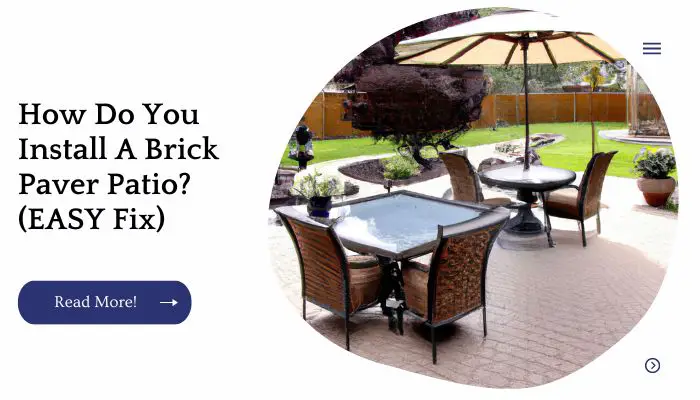
Pavers have been a popular option for patios and walkways for decades, and they come in a wide range of styles.
They’re durable, easy to maintain, and can be installed just about anywhere. If you’re interested in installing pavers on your patio or walkway, here’s how:
| Takeaways |
|---|
| Properly prepare the area before starting the installation. |
| Ensure the base is level and compacted to provide a stable foundation. |
| Use edge restraints to keep the pavers in place and prevent shifting. |
| Lay the pavers in the desired pattern, starting from one corner and working outward. |
| Fill the joints between pavers with sand or polymeric sand and compact it to ensure stability. |
| Use a plate compactor to firmly settle the pavers into the base and create a smooth surface. |
| Consider sealing the pavers to enhance their durability and protect against stains. |
| Regularly maintain the patio by sweeping, cleaning, and addressing any necessary repairs. |
Make Sure The Surface Is Level
Your patio surface should be level, so that the bricks will lay flat and even. If the surface isn’t level, you can use shims to add height under bricks in areas that are too low or remove excess dirt from areas that are too high.
To check for level:
- Lay a straight 2×4 across your patio surface and make sure it is perfectly horizontal (take along a bubble level to double check).
If your floor is not perfectly level, there are two things you can do:
Remove excess dirt from low areas and add small amounts of concrete mix over high spots until they reach the correct height; or 2)
Use leveling blocks under low portion of pavers to raise them up (make sure they don’t stick out more than 1/2 inch above other pavers).
Looking to create a beautiful outdoor space on a budget? Our guide on building a cheap covered patio provides you with practical tips and cost-effective solutions to bring your patio dreams to life without breaking the bank.
Mark The Area Where You’ll Be Laying Pavers
- Use a tape measure to mark the area.
- Use a laser level to mark the area.
- Stake out the perimeter of your patio with wooden stakes and string, then dig out those areas using a shovel or spade.
- You can also use a chalk line to create straight lines for laying pavers in an irregular shape or pattern, such as when creating an archway or around trees and bushes in your yard (see Resources).
| Step | Description |
|---|---|
| 1. | Measure and outline the desired area for the paver installation. |
| 2. | Use marking tools such as spray paint or chalk to mark the boundaries of the designated area. |
| 3. | Ensure the marked area is level and free from any obstacles or debris. |
| 4. | Double-check the dimensions and shape of the marked area to ensure accuracy. |
| 5. | Consider using string or stakes to create straight lines and guide the paver installation. |
| 6. | Make necessary adjustments to the markings if needed, ensuring they align with your desired design. |
| 7. | Take into account any additional factors, such as sloping or drainage requirements, while marking the area. |
| 8. | Once satisfied with the markings, proceed with the next steps in the paver installation process. |
Install A Barrier
This step is crucial for a successful project. Use a polyethylene sheet to protect the grass from the base, and use another one to protect the base from the grass.
Make sure to overlap these sheets by at least 3 inches in every direction. You may want to add more than one layer of protection just so you can be extra-sure that your patio won’t cause any damage to your lawn or driveway.
Dig Out The Area Where You’ll Be Laying Pavers
Dig out your patio area. Use a shovel to remove the grass and dirt from where you’ll be laying pavers.
Make sure that you have plenty of room for all of your paver pieces, as well as for any walkway area or extra space you might want to include in your design.
Go over the soil again with an edger or spade to make sure it’s flat and level throughout the entire area.
Lay Down A Base
A base is a layer of material beneath the pavers that helps support them and evenly distribute their weight.
You’ll need to lay down a base for your patio, but before you do so it’s important to make sure that it is level. This will prevent any paver from sinking or shifting in its placement.
The most common kind of base material is concrete, which can be poured into place or laid with aggregate added on top.
The use of concrete has many benefits: it’s strong enough to hold up pavers without sinking into the ground; it provides good drainage and keeps water away from your patio; and it can be colored and textured to match your existing patio materials or improve their appearance overall (e.g., using colored concrete instead of plain gray).
If you’re planning to install patio floor tiles, we’ve got you covered! Check out our step-by-step guide on laying patio floor tiles for expert advice and helpful tips to ensure a successful installation.
Adjust For Slope And Water Drainage
Before you pour your patio, you’ll need to adjust for slope and water drainage. Slope refers to the difference in height between two points on a surface (think of it like grades on a hill). A flat surface has zero slope.
If you’re installing pavers on an existing patio that’s already been poured, then your job is done! But if this is a new project, check that your building site slopes away from the house at least 2% for every 10 feet of run-off distance.
Why? To prevent water from pooling up at one end of the patio and causing problems with cracking or freezing during cold spells.
If you have a steeply sloped yard (more than 5%), use landscaping fabric underlayment as well as pin gravel or crushed stone beneath each paver before adding another layer of sand atop it all.
This will help drain excess water away from where it can cause damage over time due to freezing temperatures or high heat levels present year round here in Texas.”
| Step | Description |
|---|---|
| 1. | Assess the existing slope of the area and determine the desired slope for proper water drainage. |
| 2. | Use a leveling tool, such as a laser level or string level, to measure and mark the slope across the installation area. |
| 3. | Identify the high and low points of the area and plan for the necessary adjustments to achieve the desired slope. |
| 4. | Prepare the base by adding or removing soil and compacting it to create a level and uniform surface. |
| 5. | Utilize specialized tools like adjustable pedestals or leveling systems, such as those offered by {Brand Name}, to fine-tune the slope and ensure even paver installation. |
| 6. | Regularly check the slope during the installation process, making necessary adjustments as needed. |
| 7. | Consider incorporating a drainage system, such as a channel drain or permeable paver system, to efficiently manage water runoff. |
| 8. | Test the drainage by simulating water flow and ensuring it effectively moves away from the paver surface. |
Make Sure Your Base Is Level
Before you lay your pavers, make sure your base is level. You can use a wooden stake and level to check for straight lines or a laser level (the latter will be more accurate) to make sure the entire base is at an equal height.
Install Pavers
Now you’ve got your mortar, it’s time to install the pavers. First, apply the mortar with a trowel and carefully lay out your pattern of bricks.
Be sure to leave space between each one so that nothing will be touching each other when they’re dry this will help prevent cracks later on in their life span.
Once all of your bricks are laid out, mix up some sand with water (about 1:1) and use this mixture to fill in any gaps between pavers that may have formed during installation.
If you want extra assurance that everything will stay put after drying overnight (and I strongly recommend doing so), grab some duct tape and secure each brick down with it until morning comes around.
The tape keeps them from shifting along flat surfaces while also protecting them from moisture from rain or damp ground underneath them–but more importantly for our purposes here today! It prevents ants from getting into the joints between pieces where they might cause damage later on down the road.”
Installing a patio door on concrete can be a challenging task, but with our easy-to-follow instructions and practical tips, you’ll have it done in no time. Explore our comprehensive guide on installing a patio door on concrete to make the process seamless and hassle-free.
Create Patterns With Your Bricks Or Stones
The easiest way to create a pattern is to install the bricks or stones in a grid-like formation. You can make it as simple or complex as you like, depending on how much time, money and effort you have to spare.
If you want something more elaborate, take inspiration from nature and use a brick paver patio as your canvas. Find some examples of brick patios that look like waves crashing against the shoreline or even more abstract patterns such as stars or flowers. Then, start laying down the bricks in their designated spots following that design until it’s complete!
Fill In Gaps Between Bricks With Sand
Once you’ve laid down the sand and your pavers, you’ll need to fill in any gaps between the bricks with more sand.
This is a process called screeding, and it’s best done with a trowel or putty knife. Use these tools to spread the sand until it fills in all of those little spaces along the perimeter of your patio.
Don’t worry if there are some rough spots where you’ve got a lot of extra sand on one side you can use a broom later on to sweep away excess material (and make sure that none of it gets onto your pavers).
| Step | Description |
|---|---|
| 1. | Ensure the paver surface is clean and free of debris before proceeding. |
| 2. | Prepare the appropriate type of sand for filling the gaps between bricks, such as polymeric sand or jointing sand. |
| 3. | Pour the sand onto the paver surface, ensuring it covers all the gaps uniformly. |
| 4. | Use a broom or brush to sweep the sand into the gaps, ensuring it fills them completely. |
| 5. | Gently tap the pavers with a rubber mallet to further settle the sand and ensure it fills any remaining voids. |
| 6. | Continue sweeping and tapping until all gaps are filled and the sand is evenly distributed. |
| 7. | Remove any excess sand from the surface by sweeping diagonally across the pavers. |
| 8. | Lightly mist the paver surface with water to activate the binding properties of the sand, if using polymeric sand. |
| 9. | Allow the sand to fully settle and cure according to the manufacturer’s instructions before resuming regular use of the paver surface. |
Apply Polymeric Sand To Joints (Optional).
Polymeric sand is a sand that is mixed with a bonding agent. It is used to fill the joints between pavers. It can be applied in layers, with one layer allowed to dry before applying another layer.
When used on its own, polymeric sand can be applied with a trowel or broom and then tamped down into place using a wooden stick or rubber mallet. In some cases, you may need to apply more than one layer of polymeric sand before your patio is completely filled in and level with the tops of all pavers.
Is your wood patio in need of a makeover? Discover our easy guide on redoing a wood patio to learn effective techniques for reviving your outdoor space and creating a stylish and inviting atmosphere.
Prep Concrete And Apply Sealant (Optional)
If you’re using a concrete sealer, apply it to joints and all sides of the pavers. Apply sealant on top of the pavers as well as underneath them. Finally, apply some to ends as well for additional protection against erosion.
Apply Sealant To Brick Pavers (Optional)
If you’d like a protective layer of sealer on your new patio, apply it as soon as the concrete has cured and it’s dry enough to walk on without sinking into the surface.
Follow the instructions on your sealer product carefully it may be different from any other kind of paint! Apply two coats of sealer with an adequate amount of drying time between each coat, following all manufacturer instructions carefully.
Sealers like this are usually water-based and not toxic for kids or pets, so if you have small ones who might want to play on the brick paver patio after it’s finished but before it gets sealed, remember that they may still get stained by anything they touch (including dirt) while playing on top of them during construction; try making sure that they don’t go near any unfinished surfaces until they’ve been sealed completely and completely dried out first
Dealing with hairline cracks in your concrete patio? Don’t worry, we’ve got you covered! Our informative article on repairing hairline cracks in a concrete patio offers practical solutions and expert tips to restore the integrity and aesthetics of your patio surface.
Conclusion
Installing a brick paver patio is not difficult, but it can take some time and effort. The most important thing to keep in mind is that you need to be patient when laying out the bricks so that everything comes together nicely.
With a little patience and some good planning, you’ll have a gorgeous new patio in no time!
Further Reading
Here are some additional resources for further reading on installing paver patios:
The Spruce: How to Install Pavers: This comprehensive guide provides step-by-step instructions and tips for installing pavers, ensuring a successful patio installation.
Better Homes & Gardens: DIY Paver Patio: Learn how to create a stunning paver patio with this DIY guide, which covers everything from planning and design to installation techniques.
Family Handyman: Paver Patio Base: Discover a time-saving and back-saving technique for creating a solid paver patio base, as explained in this helpful article.
FAQs
Here are some frequently asked questions about installing paver patios:
How long does it take to install a paver patio?
The installation time for a paver patio can vary depending on the size and complexity of the project. On average, it may take several days to a week to complete the installation, including preparation, base installation, paver laying, and finishing touches.
Do I need to hire a professional for paver patio installation?
While hiring a professional can ensure a high-quality and efficient installation, many homeowners successfully install paver patios themselves. It depends on your level of experience, the complexity of the project, and your willingness to learn and follow instructions.
What tools and materials do I need to install a paver patio?
Some essential tools and materials for paver patio installation include a shovel, level, rubber mallet, plate compactor, paver edging, gravel, sand, and the pavers themselves. Additionally, safety equipment such as gloves and safety glasses is recommended.
How do I prepare the ground for a paver patio?
Proper ground preparation is crucial for a successful paver patio installation. It involves removing existing vegetation, excavating the area to the desired depth, compacting the soil, and adding a layer of gravel and sand for the base.
How do I maintain and care for a paver patio?
To keep your paver patio in good condition, regular maintenance is necessary. This includes removing debris, sweeping or rinsing the surface, re-sanding the joints, and addressing any weeds or stains promptly. Sealing the pavers can also provide added protection and enhance their appearance.

I am Hellen James, a professional handywoman with expertise in improving home and garden spaces by using pergolas, gazebos, and tents.
