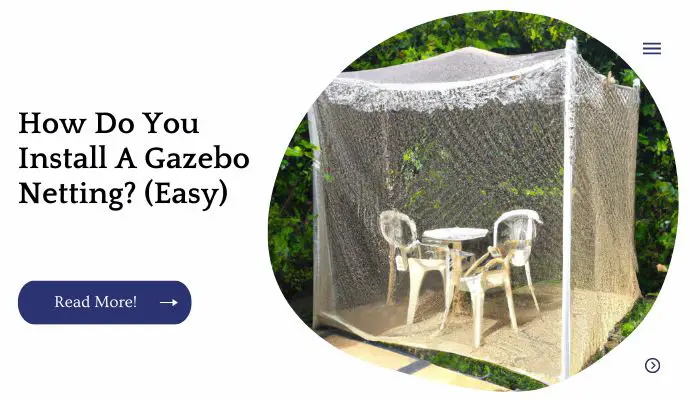
If you’re looking for a little extra privacy or want to keep those pesky critters out of your backyard, installing a gazebo netting is the way to go.
Gazebo nets are designed to fit any gazebo and can be installed in just a few minutes. We’ll show you how easy it is to install your own!
| Takeaways |
|---|
| Installing gazebo netting can be made easy with the right approach. |
| Proper measurement of the gazebo openings is crucial for determining the size of netting needed. |
| Gazebo netting is commonly made from durable materials like polyester or nylon. |
| DIY installation of gazebo netting is possible with basic handyman skills, but professional assistance is an option. |
| Regular cleaning and maintenance of gazebo netting will help prolong its lifespan. |
| Consider temporary removal or additional protection for gazebo netting during extreme weather conditions. |
Measure The Netting To Fit Your Gazebo
When you have the gazebo netting measured to fit your gazebo, take it home and lay it out on a flat surface.
If you are using lighter weight netting, such as polypropylene or polyethylene, make sure that the entire piece is unrolled so that it doesn’t stretch when installed.
If your gazebo has a curved top or bottom edge (such as some wooden structures), measure those areas separately from the straight sides of the structure.
Once you have all of these measurements in hand, here’s how to install each piece:
If you’re looking to make a gazebo, our simple guide provides step-by-step instructions and helpful tips. Follow our guide on how to make a gazebo to create your own outdoor sanctuary.
Secure The Netting To The Rod Rings
Once you’ve got the netting over your rod rings, secure it by tying a piece of string or rope through all four corners.
You can also use an elastic band if you don’t have access to anything else. If you’re using a knot, make sure to tie the ends securely so that they don’t come loose later on.
Secure The Rods With Spring Clips
Once you’ve secured the rods to your structure, it’s time to install the gazebo netting. The best way to do this is with spring clips that can be purchased at most hardware stores.
These clips are made of metal, so they’re strong and durable enough for use in any kind of weather conditions.
To secure them around each rod ring, simply place a spring clip over top of it and feed the netting through it until there’s enough space between them (about 1/2 inch) that they won’t pull apart when you let go of one end while holding onto the other end firmly so nothing moves apart!
Attach The Rods To Corner Post Of Gazebo
To install the rods, you’ll need to attach them to the corner posts. To do this, use a drill and screws to secure the rods in place.
It’s important that you use a level so that your netting will hang evenly over your gazebo.
| Step | Description |
|---|---|
| 1 | Locate the corner post of the gazebo. |
| 2 | Position one end of the rod against the corner post. |
| 3 | Securely attach the rod to the corner post using appropriate hardware. |
| 4 | Ensure the rod is level and tightly fastened to the corner post. |
| 5 | Repeat the process for the remaining corner posts. |
| 6 | Double-check the stability and secureness of the attached rods. |
Install The Next Ring On The Left Side Of The Gazebo
To install the next ring on the left side of the gazebo, you will need to repeat Steps 1 through 3. The only difference is that you will place this ring on top of your first right-side ring.
Make sure that all four sides have even spacing between each ring. The best way to do this is by beginning with your longest piece first and working toward your shortest pieces last.
This makes it easier for you to make adjustments at any point during installation if necessary.
Securing your gazebo to concrete is essential for stability and safety. Our simple guide on anchoring a gazebo to concrete provides proven methods to ensure your gazebo stays in place even in strong winds.
Install Rod With Netting On Right Side Of Gazebo
First, install the rod with netting on the right side of your gazebo. Then, attach it to the bottom of the gazebo and finally to the top of it.
Install Second Rod On Right Side Of Gazebo
- Install the right side of the gazebo by inserting a screwdriver into one of the top holes and twisting it until it’s tight.
- Repeat this step on your second rod, making sure that they are straight and even with each other.
- Use a tape measure to determine where you will insert your final screw through both rods, then install another nut onto each post inside the gazebo so that they’re ready when you reach them later in this process.
Install Third Rod Set On One Side
Now you will install the third rod set on one side of the gazebo. To do this, follow these steps:
Attach one end of the rope to the left side of the gazebo. You will use this rope to attach your first rod set to both sides of your gazebo at once.
2a. If you want to attach your second rod set only on one side, skip step 2b and go directly to step 3a (or just 2a if you’re attaching it only on one side).
2b is for attaching it on both sides; I’m going with option 2a because my gazebo’s too big for two sets of rods and I don’t need them facing opposite directions (which would happen with option 2b).
| Step | Description |
|---|---|
| 1 | Position the third rod set on one side of the installation area. |
| 2 | Align the rod with the designated mounting points. |
| 3 | Secure the rod tightly using the provided hardware. |
| 4 | Ensure the rod is level and properly aligned. |
| 5 | Repeat the process for the remaining sides if applicable. |
| 6 | Double-check the stability and secureness of the installed rod set. |
Install Third Rod Set On Opposite Side
First, gather your materials and tools. You will need the following:
- A hammer or mallet
- Two pieces of 1/8″ diameter steel rod, cut to the same length as your first rod set. If you have a piece of metal that is already straight and long enough to use, great—you can skip this step.
- A power drill with a Phillips-head bit (or a screwdriver if you don’t have one)
- Two pairs of pliers
Once you have everything together, place one pair of pliers on each end of your first piece of steel rod. With both sets of pliers in place on each end, stretch out the middle section so it’s taut but not too tight.
Then tighten down that middle section by placing two screws through pre-drilled holes at either end where the ends meet in the middle (as shown above).
Repeat for second piece of steel rod before connecting them together using nuts and bolts or rivets as necessary (again shown above).
Missing instructions for your gazebo? Don’t worry! We’ve got you covered. Check out our tips on putting up a gazebo without instructions to help you successfully assemble your gazebo.
Install Horizontal Rods Into Netting Tabs
Attach the horizontal rods to the tabs on each post cap by sliding them into place, then tightening screws until they are secure.
Repeat this process with all four vertical posts, inserting each rod into a corresponding tab at the top of your gazebo, and then twisting counterclockwise until it is locked in place by tightening screws with a screwdriver or similar tool (if necessary).
Protect your gazebo from strong winds with our proven methods for securing. Discover effective ways to secure a gazebo from wind and enjoy a sturdy and stable outdoor space.
Attach Netting To Hook At Top Of Each Post Cap
Hooks are at the top of each post cap. These hooks attach to the gazebo frame, holding it together and giving it structure. They’re attached to the frame with a wire or cable.
To attach your netting: Take some twine from your roll and tie it around one end of one looped end of your rope (if you have a different type of rope, follow manufacturer’s instructions).
Tie this around another part of that looped end so that there is no space between them; this will form an eyelet shape with two lines coming out from where they cross over each other above where they’re tied together in order to prevent any possible fraying later on down the line when using heavier-duty materials like canvas instead of thin nylon strands like what comes with most kits sold today).
| Step | Description |
|---|---|
| 1 | Identify the hook at the top of each post cap. |
| 2 | Secure one end of the netting to the hook, ensuring it is tightly fastened. |
| 3 | Stretch the netting across to the opposite hook and attach it securely. |
| 4 | Repeat the process for the remaining hooks, evenly distributing the netting. |
| 5 | Adjust the tension of the netting as needed to ensure a tight and secure fit. |
| 6 | Trim any excess netting if necessary. |
| 7 | Inspect the installation to ensure the netting is properly attached and secure. |
Installing A Gazebo Netting Is Easy And Fun!
Installing a gazebo netting is easy and fun! It will give you a great sense of accomplishment, especially if you’ve never put up a gazebo netting before. Plus, it’s so small that it can fit into any room.
You don’t need to be afraid of installing a gazebo netting because it’s not hard to do at all! In fact, it’s one of the easiest things to do in life as long as you read this article beforehand and follow our instructions carefully to avoid making mistakes.
We’ve also included photos that show how we did it so that when we say something needs “screwing” or “nailing” or “hammering” or whatever else might sound fancy-sounding but really isn’t very helpful (especially if you’re trying not make any mistakes)
Then those terms won’t confuse anybody who might otherwise want learn more about installing these nets themselves without spending hundreds dollars on professional help just so they could finish quickly without worrying about making mistakes along the way
Installing a gazebo has never been easier! Follow our easy way to install a gazebo and transform your outdoor area. Learn more about the installation process on how to install a gazebo and enjoy your new outdoor retreat.
Conclusion
Installing a gazebo is easier than you might think. The first step is to find an appropriate location for the gazebo.
You should also determine how big you want it to be and how much it will cost you. Once that’s done, all that’s left is measuring out the area where your netting will go and putting in stakes or bolts so that it stays put!
Take a look at our tips below for more information about how to install netting on your own gazebo project.
Further Reading
Here are some additional resources you may find helpful for installing gazebo netting:
How to Add Mosquito Netting to a Gazebo: Learn step-by-step instructions on adding mosquito netting to your gazebo, providing a bug-free outdoor space.
How to Attach a Mosquito Net to a Gazebo: Discover various methods and techniques for attaching a mosquito net to your gazebo, ensuring a peaceful and enjoyable time outdoors.
Creating a Safe Outdoor Space: Installing Gazebo Netting Made Easy: Get valuable tips and insights on creating a safe outdoor space by installing gazebo netting, offering protection from insects and debris.
FAQs
Here are some frequently asked questions about gazebo netting installation:
How do I measure the size of the netting I need for my gazebo?
To measure the size of netting for your gazebo, start by measuring the width and length of each opening where you want to install the netting. Add some extra length for overlapping and attaching the netting securely.
What materials are commonly used for gazebo netting?
Gazebo netting is often made from materials such as polyester or nylon, which are durable, weather-resistant, and provide effective protection against insects.
Can I install gazebo netting myself, or should I hire a professional?
Installing gazebo netting can be a DIY project, especially if you have basic handyman skills. However, if you’re unsure or prefer professional assistance, hiring a skilled installer can ensure a precise and secure installation.
How do I clean and maintain gazebo netting?
Regular maintenance of gazebo netting involves removing any debris, gently washing it with mild soap and water, and allowing it to air dry. Avoid using harsh chemicals or abrasive cleaners that may damage the netting.
Is it possible to use gazebo netting all year round?
Gazebo netting is designed to be used in various weather conditions. However, extreme weather conditions like heavy rain or snowfall may require temporary removal or additional protection to ensure the netting’s longevity.

I am Hellen James, a professional handywoman with expertise in improving home and garden spaces by using pergolas, gazebos, and tents.
