Putting up a gazebo is not as easy as it looks. If you have no experience with building things from scratch and have never put up anything this large before, you are likely to find it difficult.
However, there are many people like you who do not know how to do this but still want the beauty of a gazebo in their backyard or garden.
Luckily for all of us, there are plenty of guides available online that can help us put together this kind of structure without any trouble at all!
In fact, there are so many good ones out there that I’ve decided to write one myself: my guide will teach you everything you need to know about putting up a gazebo without instructions!
| Takeaways |
|---|
| Proper guidance is crucial when putting up a gazebo without instructions. |
| Following step-by-step instructions can simplify the assembly process. |
| Securing a gazebo from wind is essential for its stability. |
| Easy techniques can be implemented to ensure the gazebo’s stability. |
| Anchoring a gazebo to concrete provides a solid foundation. |
| Regular maintenance and care are necessary to keep the gazebo in good condition. |
1. Get A Schematic
The first and most important step is to have a schematic. A schematic will help you to see the parts of the gazebo and how they fit together, which can be very helpful when putting up your gazebo.
It will also help you identify any missing parts, which is especially useful if you’re planning on assembling this yourself instead of hiring someone else to do it for you (though I strongly recommend hiring professionals).
You can find schematics online or in the box that came with your gazebo. If you don’t have one yet, visit [link]
When it comes to building a gazebo roof, proper techniques and advice can make all the difference. Our comprehensive guide on gazebo roof construction provides valuable insights and tips to ensure a sturdy and well-designed roof for your gazebo.
2. Decide Where To Put It
This is the part where you want to carefully consider where you want your gazebo to go. You’ll need to decide on the size of your gazebo and how much space it will take up before selecting a location.
Be sure you have enough room for your structure, but don’t choose an area that is too close to trees or other structures (like power lines), as they can potentially cause damage if they come down during strong winds.
| Location | Description |
|---|---|
| Backyard | Enhance your backyard with a gazebo for outdoor gatherings. |
| Garden | Add a charming focal point to your garden with a gazebo. |
| Poolside | Create a relaxing oasis by placing a gazebo near your pool. |
| Patio | Extend your living space by placing a gazebo on your patio. |
| Deck | Enjoy outdoor living by placing a gazebo on your deck. |
3. Find Out About The Soil Type
You need to find out what kind of soil is under your gazebo. This will affect the type of foundation you need to build, so it’s important to get this right at the beginning.
If you choose a good foundation, then the rest of your gazebo will be more stable and last longer too.
How can you check what kind of soil is underneath? Well, there are two ways:
- Dig down into it with a spade until you hit something solid (like rock). That’ll tell you what’s underneath if nothing’s below that point then no point trying!
- Or look at some old maps from before construction was done in this area; there might be information about different types of soil in those documents which could help give clues about who built this house originally (or why).
Looking for a simple guide to bring your gazebo dreams to life? Our comprehensive instructions will simplify the construction process. Discover the joys of creating your own outdoor oasis by following our step-by-step gazebo construction guide.
4. Prepare The Ground
The ground should be level, so you can begin by checking to see if it is. If not, use some sandbags and logs to create a flat area for your gazebo.
The ground needs to be soft enough that you can dig holes for the posts without them becoming stuck in the soil and unable to be lifted out later on.
If the ground is too hard or rocky, this isn’t feasible; you may have better luck placing your gazebos over landscaping fabric instead of digging holes for the posts (although this will change your design options).
Check the area where you plan on putting up your gazebo carefully before beginning construction so there aren’t any rocks or other obstructions like trees that could interfere with its placement.
5. Set Up Your Gazebo Foundation
Your gazebo has been delivered, and you’re ready to set it up in your yard. This is the final step before enjoying your new outdoor space! But first, there are some things you need to consider:*
Make sure it’s fully assembled.
Check that all parts are included.
Make sure the weight of your gazebo is within recommended limits for where you will be setting it (usually between 100 and 500 pounds).
Check that the ground conditions are suitable for supporting the weight (soil should be firm but not clay-like or rocky).
If necessary, level out a foundation by adding gravel or sand under its legs.
Determine how much wind speed there tends to be in your area; if winds normally exceed 10 mph, consider using guy wires to stabilize your structure.
| Foundation Type | Description |
|---|---|
| Concrete Slab | Provides a sturdy and durable foundation for your gazebo. |
| Ground Stakes | Ideal for temporary or soft ground installations. |
| Gazebo Anchors | Ensures stability and prevents movement, especially in windy conditions. |
| Deck or Patio | Utilize existing deck or patio surfaces as a solid base for your gazebo. |
| Gazebo Footings | Recommended for larger gazebos, offers extra stability and load-bearing support. |
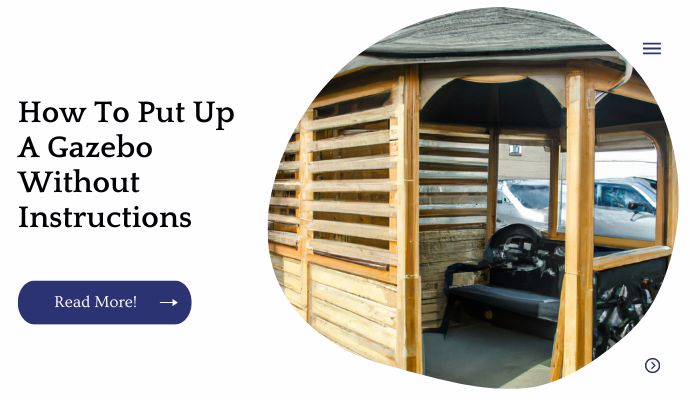
6. Assemble Your Gazebo
Before you start the assembly, make sure that all of the parts are present. If they are not, contact the manufacturer.
Next, use a power drill to screw in any metal pieces of your gazebo while following instructions provided by them. If you have a wooden gazebo and want to assemble it yourself, use a hammer and nails instead of tools.
7. Install The Roof And Trim If Needed
Attach the roof to the gazebo frame using screws and a screwdriver. The roof should be installed first, before you install any other parts of the gazebo.
Use a level to make sure it is straight—it’s important that all sides line up with each other in order for your gazebo to look nice and neat from all angles!
If you have trim pieces around the edges of your roof, use them as guides when attaching them to create a finished edge that looks great!
To ensure your gazebo remains secure even during windy conditions, it’s important to implement proven ways of protection. Our expert tips will help you secure a gazebo from wind effectively. Learn about the best techniques in our informative guide on gazebo wind protection.
8. Get A Gazebo Cover
A gazebo is only as good as its cover. A sturdy, high-quality cover will protect your investment from UV rays and rain. Make sure you get the right size for your gazebo; if it’s too small, it won’t function properly.
In addition to being durable and weather resistant, a good gazebo cover should have several features:
- It should be designed with multiple vents to allow air flow and prevent condensation on cold days.
- It should attach securely so that it doesn’t blow off in high winds or fall off in heavy rains.
- It should be easy to remove for cleaning purposes
9. Pick Up Furniture That Fits In With The Gazebo Design
You want to choose furniture that fits in with the design of your gazebo, but it’s also important that you pick out pieces that can withstand the weather.
If you want to use an outdoor fire pit, make sure it is safe and won’t cause any damage to your yard or house.
You don’t want any fires starting up if there is wind or rain in the area! Other than that, it’s best if you choose furniture that can be used outdoors as well as indoors so they don’t have to go back inside every time it rains or snows (which happens more often than people think).
It’s also good practice not only because it reduces clutter around your home but also because these items won’t break down as quickly when they’re constantly exposed to moisture from rainstorms or humidity levels rising due to heat waves during summer months.”
| Furniture Type | Description |
|---|---|
| Rattan Lounge | Stylish and comfortable seating for a relaxed vibe. |
| Teak Dining | Elegant and durable tables and chairs for dining. |
| Wicker Sofa | Cozy seating option with a contemporary look. |
| Metal Bistro | Compact and charming furniture for small gazebos. |
| Hammock | Perfect for a tranquil and leisurely outdoor space. |
10. Add Plants And Flowers To Improve The Ambience
You can make your gazebo a lot more beautiful and inviting by adding plants and flowers. You’ll want to make sure the plants you choose are suited to your climate, easy to maintain, resistant to pests and diseases, and appropriate for the area where you’re placing them.
If you live in an area with cold winters or high winds, choose hardy trees that won’t break easily during the winter months.
If you live in an area with no snowfall but is prone to heavy rains during certain seasons of the year (such as spring), consider buying flowering shrubs that are resistant against high temperatures so they don’t burn easily in warm weather conditions (like hydrangeas).
Looking for easy ways to reinforce your gazebo’s stability? Our insightful tips will guide you through the process of securing a gazebo with ease. Discover the techniques and methods in our comprehensive article on gazebo stabilization for a worry-free outdoor experience.
11. Install Additional Lighting If Needed
If you have the space, consider installing additional lighting. There are several options for adding more light to your gazebo:
Solar lights can be used as ambient lighting around the perimeter of your gazebo. If you like to add more flair with brighter colors and shapes, choose LED lights that come in many different colors and styles. Be sure to use solar or LED lights whenever possible because they save on energy usage!
If there will be times when it’s dark outside, install timers on all of your lamps so that they’ll turn off automatically after a certain amount of time has passed (this is especially important if you’re using an auto-sensor LED bulb).
It’s also a good idea to set up timers on any other appliances in your backyard as well; this will keep them from running nonstop while people aren’t home or asleep at night!
Be sure not only think about how much light will benefit you but also how much would be too much or even harmful if exposed directly into someone else’s eyesight (especially children).
This means ensuring there are no blind spots where someone could trip over something dangerous lurking underneath bushes/hedges nearby.”
12. Use Solar Powered Lights For A Better Effect
If you want to add some extra flair to your gazebo, consider installing solar powered lights around the area.
These lights will illuminate the gazebo at night and give it a nice glow that will make it look more inviting. Plus, because they’re solar powered and don’t need to be plugged in, they’re environmentally friendly too!
13. Get An Electrician To Install An Electrical Outlet If You Want To Use Electric Appliances There
If you plan to use electric appliances, such as a blender or an electric kettle, in your gazebo, it’s important to have an electrical outlet installed.
If you’re not comfortable with wiring and electricity, find a licensed electrician who can do this for you.
I had my brother-in-law install the electrical outlet for me. He said it was pretty simple and straightforward he only had to run some wires from the house and mount a box to hold the outlet.
It didn’t cost too much either: about $200 for materials (including copper wire) plus $200 for his time ($100/hour).
The actual installation took him two hours total because he needed permission from our landlord first before doing any work on their property!
He was able to finish everything within one day though it would probably take less time if there weren’t any complications along the way (like needing permission from your landlord).
If there are other outlets in use nearby where power lines are also present then no further inspection is necessary unless there is suspicion of high voltage being used at those locations.’
14. Store Cushions In Waterproof Boxes When They Are Not Used
To keep your cushions from getting dirty and mildewy, you should store them in watertight containers. You can use plastic bins or even large Rubbermaid food storage boxes.
If you want to keep things nice and neat, consider putting all your cushions into individual bags before storing them away. This will make them easier to find when it comes time for a party or another event where you want to use them again!
For a solid and reliable foundation, it’s crucial to anchor a gazebo to concrete properly. Our simple guide provides step-by-step instructions on securing your gazebo with ease. Learn how to ensure stability by following our gazebo anchoring guide for a durable structure.
15. Get Someone To Help You Put It Up If You Are Unsure Of How To Do It Yourself
If you are unsure of how to put up the gazebo yourself, then get someone to help you. You can hire an electrician to install an electrical outlet for your lights and fans or a general contractor to put up the gazebo for you.
Conclusion
The bottom line is that it can be done, and you don’t need to be a pro. You just need to follow the steps carefully and stay organized throughout the process.
If you have questions or concerns along the way, don’t hesitate to contact a professional like me!
Further Reading
GazeboShop.co.uk: How to Put Up a Gazebo: A comprehensive guide on assembling and installing a gazebo, providing detailed step-by-step instructions for a successful setup.
GazeboSale.co.uk: Putting Up a Gazebo Without Instructions: Learn how to put up a gazebo even without instructions with this helpful resource, offering valuable tips and techniques for a hassle-free installation.
GardenPatch.co.uk: How to Put Up a Gazebo Without Instructions: Discover useful insights and guidance for setting up a gazebo without instructions. This article provides practical advice and suggestions to make the process easier.
Now, let’s move on to the FAQs section:
FAQs
How long does it typically take to put up a gazebo?
The time required to put up a gazebo can vary depending on various factors such as the size of the gazebo, the complexity of its design, and the number of people involved in the assembly. On average, it can take a few hours to a full day to complete the setup.
What tools and equipment are needed to put up a gazebo?
The tools and equipment needed to put up a gazebo may include a hammer, screwdrivers, wrenches, level, measuring tape, drill (if necessary), and a ladder. It’s essential to check the specific instructions or requirements provided by the manufacturer for the gazebo being assembled.
Are there any safety considerations when putting up a gazebo?
Yes, safety is crucial when putting up a gazebo. Ensure that the area is clear of any obstacles or hazards, follow proper lifting techniques when handling heavy parts, and take necessary precautions to avoid injury. It’s also important to anchor the gazebo securely to the ground to prevent it from being dislodged by wind or other external factors.
Can I assemble a gazebo by myself, or do I need assistance?
While it is possible to assemble a gazebo by yourself, having assistance can significantly simplify the process and make it more efficient. Gazebo assembly often involves handling large and bulky components, and having an extra pair of hands can make the task easier and safer.
How should I maintain and care for my gazebo after installation?
Regular maintenance and care are essential to keep your gazebo in good condition. This may involve cleaning the structure, inspecting for any damage or wear, tightening screws and bolts if necessary, and treating the materials to protect them from the elements. Consult the manufacturer’s guidelines or specific care instructions for your gazebo to ensure proper maintenance.

I am Hellen James, a professional handywoman with expertise in improving home and garden spaces by using pergolas, gazebos, and tents.
