Canopy frames are the foundation of any canopy. They’re what you’ll use to build the structure and provide it with support.
You can buy a frame that comes pre-assembled, or you can choose to install one yourself. In this article, we’ll walk you through how to do both!
| Takeaways |
|---|
| Installing a ShelterLogic canopy can be made easy with the right tips and techniques. |
| Proper preparation and planning are key to a successful installation. |
| Ensure you have the necessary tools and equipment before starting the installation process. |
| Following the manufacturer’s instructions and guidelines is crucial for a safe and secure installation. |
| Anchoring the canopy securely is important to withstand wind and other external factors. |
| Regular maintenance and inspections can help prolong the lifespan of the canopy. |
| Seeking professional assistance may be beneficial for complex installations or if you’re unsure about certain steps. |
| Enjoy the benefits of your ShelterLogic canopy by creating a comfortable and functional outdoor space. |
Assemble The Canopy Frame
The first step is to assemble the canopy frame. The frame comes in two separate parts that need to be assembled. While this might seem like a challenge, it is actually quite simple and shouldn’t take more than 10-15 minutes. The frame is made of steel and is powder coated for rust resistance.
The first part of your Canopy Frame Assembly requires you to attach four legs on both sides along with four caps at each end using double-sided tape or screws (you may use screws if you desire).
Once this has been completed, place one side over the other so that they meet at an angle in the middle, then flip them over so that they match up perfectly.
Use a hammer or mallet tap each leg into place firmly until all 4 legs are secured together tightly without any gaps between them anywhere around the perimeter of your canopy’s base!
Grilling outdoors is a delightful experience, and having a canopy for your grill can enhance it even further. Learn how to make a grill canopy the easy way with our step-by-step guide on building a grill canopy.
Put The Tarp On
You’ll want to make sure that the tarp is in good condition and properly sized for your canopy frame. When you pull it out of the bag, it should be a square shape, with all four sides being equal.
The tarp should also be taut against the frame, not sagging or bunched up anywhere on its surface.
If you have wrinkles or crumples in your tarp, don’t worry you can easily remove them by smoothing out any ripples with your hands or pressing down on the area with a damp towel or sponge while spraying lightly with water from a spray bottle (just be careful not to drip too much water onto any electrical components).
Tighten The Tarp
Tighten the tarp. To properly tighten the tarp, you’ll need to use a rope or bungee cord to pull it tight before securing it in place with stakes.
Make sure that the tarp isn’t too tight; you want it to be snug and secure, but not so much that it causes wrinkles or folds.
If you have one person holding on to the bottom of one side of the shelter while another pushes down on top, this will make it easier for you both to get an idea of how much slack is in your tarp and where they need to adjust accordingly before securing them down with stakes.
| Brand | Product Name | Material | Length | Type | Application |
|---|---|---|---|---|---|
| Bungee | Elastic Ball Bungee Cords | Elastic | 6 inches | Ball-style | Tarp fastening and tensioning |
| Tarp Tie | Tarp Straps | Rubber | Various sizes | Strap-style | Securely fasten tarps |
| Grip-Clip | Tarp Clip | Plastic | N/A | Clip-style | Attach and tighten tarps |
| Ratchet | Ratchet Straps | Nylon/Steel | Various lengths | Ratchet-style | Heavy-duty tarp tensioning |
| Tarp Shark | Tarp Shark Tarp Fasteners | Plastic | N/A | Clip-style | Effortlessly tighten and hold tarps |
Ground Everything Down
With a 2×4 and a mallet or hammer, drive the stakes into the ground until they’re deep enough to keep from pulling out when you go to assemble the canopy.
Using a level, check that each side of your frame is straight and level before moving on to Step 3 below (if one side is higher than another, you can always add another stake under that corner).
Now it’s time for assembly!
When installing a shelterlogic canopy, anchoring it securely is essential to ensure stability and safety. Our comprehensive guide on anchoring a shade canopy provides valuable tips and techniques to keep your canopy firmly in place.
Add Stabilizer Bars
Add stabilizer bars. Stabilizer bars are used to keep the canopy from moving. The easiest way to install them is to measure from the outside of one leg and mark where you want each bar to go, then hammer them into place every 3 feet.
Install canopy cover (if applicable). If your cover has an overlap on both sides of the frame, install it now by overlapping it on top of itself and securing with a few staples in strategic places around your frame legs and overhang edges.
You may also wish to use Velcro if you have enough left over from another project or purchase some specifically for this purpose!
Put On End Panels
There are two ways to install your panels. With the first option, you can simply lay the panels down and then secure them with the included pins.
This is a good option if you only need one side of your canopy installed.
The second option is to follow these instructions:
Step 1: Lay out all of your panels on top of each other (top to bottom) in order so that they form a complete circle around your shelter or gazebo.
The last panel should be on top of this circle, resting against its neighbors’ edges for support.
Step 2: Attach end caps at both ends by positioning them over their respective holes and driving in their fasteners with a hammer.
Make sure that there’s no gap between any cap and its corresponding hole; otherwise rainwater could leak into your unit through this opening!
“Are you looking to add a canopy to your stroller to provide shade and protection for your little one? Our easy-to-follow instructions on putting a canopy on a stroller will guide you through the process and help you create a comfortable environment for your child.
Put On A Canopy Top
To install a canopy top, you’ll need to attach it to the frame. Make sure that you have a strong grip on both ends of the canopy top and pull it over the frame until it is taut.
Put On A Valance Top
You can also install a valance top, which is an optional way to add style and create a shaded area. To install the valance top, use your tape measure to measure the length of the top frame rails.
Cut two pieces of vinyl that are 2” longer than this measurement. Attach the valance tops with 3M double-sided tape or Velcro fasteners (optional).
| Brand | Product Name | Size | Material | Color Options | Compatibility |
|---|---|---|---|---|---|
| ShelterLogic | Valance Canopy Top | 10 ft x 10 ft | Polyester | Blue, Green, White | Canopy frames |
| Eurmax | Valance Top Cover | 10 ft x 20 ft | Polyethylene | Black, Red, Beige | Carports |
| Garden Winds | Replacement Valance | Various sizes | UV-resistant fabric | Assorted colors | Gazebo frames |
| King Canopy | Valance Tarp | 12 ft x 20 ft | Polyethylene | Silver, White | Carport frames |
| ABCCANOPY | Valance Canopy Replacement | 8 ft x 8 ft | Oxford fabric | Multiple colors | Pop-up canopies |
Install Roof Vent Kit
The next step is to install the roof vent kit. This is a simple process that requires you to place the vent cover on top of your canopy and secure it with screws provided by ShelterLogic. The benefits of installing this kit include:
- It allows air flow through your canopy, which helps reduce condensation and drying time after rain
- It prevents rainwater from dripping onto your patio table while you’re eating outside
Install Anchor Stakes
You can use the included anchor stakes to secure the canopy to the ground. These stakes are made of steel and are rust resistant.
They have a diameter of 1 inch and come in packs of four. You can also buy these separately if you want to add more than four stakes (or if you need replacement stakes).
| Brand | Product Name | Material | Length | Diameter | Application |
|---|---|---|---|---|---|
| ShelterLogic | Easy Anchor | Steel | 15 inches | 0.5 inches | Canopies, shelters, tents |
| Coleman | Steel Tent Stakes | Steel | 12 inches | 0.3 inches | Camping tents |
| E-Z UP | Heavy-Duty Stake Kit | Galvanized steel | 10 inches | 0.4 inches | Instant canopies |
| MSR | Groundhog Tent Stake Kit | Aluminum | 7.5 inches | 0.3 inches | Backpacking tents |
| Quick Set | Ice Fishing Shelter Anchor Kit | Steel | 8 inches | 0.4 inches | Ice fishing shelters |
Using Ratchet Tie Down Straps And Cable Tie Downs To Secure The Structure
Once you’ve gotten the ShelterLogic canopy, you’ll need to install it on your vehicle. The first thing to do is lay out the fabric roof and make sure that it fits comfortably over your vehicle’s roof, then secure one end of it with a ratchet tie down strap.
A ratchet tie down strap is basically just a looped piece of webbing that attaches to each corner of your canopy via hooks, so that when you pull on the strap at either end, they will secure themselves around whatever object they’re attached to.
You can buy these at any hardware store or online (search for “ratchet tie downs” online).
To secure this first corner using a ratchet tie down strap:
Attach one end of the webbing onto its corresponding hook on top of your canopy’s peak (the part where all four sides meet).
Then attach another hook near where all four sides meet in order for it not only stay securely fastened but also lock itself into place once pulled tight as well!
Now take any extra length left over from securing yourself in place and double knot both ends together so there isn’t too much excess rope hanging around getting tangled up with anything else nearby while driving around town later today!
Do this same thing again at both ends until all four corners are tied down securely underneath where everyone sits inside their car or truck.”
Proper installation of a canopy frame is crucial for the stability and longevity of your canopy structure. Discover the right techniques and tips in our informative guide on installing a canopy frame to ensure a secure and durable setup.
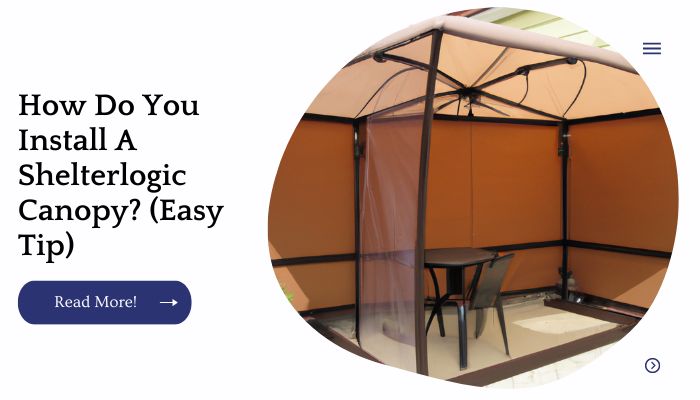
Attach Optional Sidewalls, Endwalls & Door Kits To The Shelterlogic Canopy Frame
ShelterLogic Canopy sidewalls and endwalls are optional but very helpful if you plan on leaving your canopy up for multiple days.
The sidewalls attach directly onto the frame at regular intervals (usually every 4 feet) with a set of plastic clips that screw into pre-drilled holes on both sides of the frame.
The endwalls are also attached with plastic clips that screw into pre-drilled holes on either side of one end piece of your canopy structure.
If you have an 8 foot wide canopy, then it will come with two 4 foot wide sections plus one 2 foot wide section; if you have a 10 foot wide canopy, then it will come with two 5 foot sections plus one 3 foot section; if you have a 12 foot wide shelter then it comes with two 6′6″ sections plus one 4′6″ section; etc..
Planning a camping trip and need to hang a canopy for shelter and relaxation? Our helpful guide on hanging a camping canopy provides step-by-step instructions and valuable tips to make the process hassle-free, allowing you to enjoy your outdoor adventure to the fullest.
Conclusion
There you have it everything you need to know about how to install a Shelterlogic Canopy. As we’ve said before, the process can be a bit daunting at first, but after your first go-round, it will become second nature.
And hey! If anything seems confusing or overwhelming or if something just doesn’t fit quite right don’t hesitate to reach out for help from our team or another expert in the field.
Further Reading
Shed Anchoring Tips: Learn useful tips and techniques for properly anchoring your shed to ensure stability and durability.
ShelterLogic Assembly Instructions and Tips: Get detailed assembly instructions and valuable tips for setting up your ShelterLogic outdoor structure.
ShelterLogic Outdoor Backyard Building on Amazon: Explore the ShelterLogic outdoor backyard building on Amazon, a versatile and practical solution for your outdoor storage needs.
And here’s the FAQs section in H2 with five questions and answers in H3:
FAQs
Can I install a ShelterLogic canopy by myself?
Yes, it is possible to install a ShelterLogic canopy on your own. However, having an extra set of hands can make the process easier and more efficient.
How long does it take to install a ShelterLogic canopy?
The installation time for a ShelterLogic canopy can vary depending on the size and complexity of the structure. On average, it may take a few hours to a full day to complete the installation.
What tools are required for installing a ShelterLogic canopy?
Common tools required for installing a ShelterLogic canopy include a ladder, mallet or hammer, wrenches or pliers, and a tape measure. Refer to the manufacturer’s instructions for a complete list of tools needed.
Can a ShelterLogic canopy be disassembled and moved?
Yes, ShelterLogic canopies are designed to be portable and can be disassembled and moved if needed. Follow the disassembly instructions provided by the manufacturer to ensure a smooth and safe process.
How should I clean and maintain my ShelterLogic canopy?
To clean your ShelterLogic canopy, use a mild detergent and water solution to gently wash the fabric. Avoid using harsh chemicals or abrasive cleaners. Regularly inspect the canopy for any damages and make necessary repairs to prolong its lifespan.

I am Hellen James, a professional handywoman with expertise in improving home and garden spaces by using pergolas, gazebos, and tents.
