A DIY grill canopy is the perfect way to customize your outdoor cooking experience. You can make a custom-made canopy based on your personal taste and needs, or you can use one of our tried-and-true designs to save time.
We’ve provided some ideas for building your own grill canopy below!
| Takeaways |
|---|
| Building a grill canopy can provide a covered space for outdoor grilling. |
| Choosing durable and weather-resistant materials is important for the longevity of the grill canopy. |
| Proper measurements and planning are crucial for a successful grill canopy construction. |
| Adding features like shelves and hooks can enhance the functionality of the grill canopy. |
| Regular maintenance and cleaning help prolong the lifespan of the grill canopy. |
Simple Canopy
This canopy is made with a single sheet of plywood. It has a simple design, with a gabled roof and painted white. There’s also a window in front, as well as a door in back.
This type of canopy can be built in two days or less by anyone who is handy with basic tools. The materials will cost about $120 if you buy them new at your local hardware store; if you have some scrap plywood lying around, though, it’ll cost much less!
Looking to customize your pop-up canopy? Learn some handy tips on making your pop-up canopy taller with our step-by-step guide on making a pop-up canopy taller. Elevate your canopy game today!
Stylish Canopy
So, how do you make a canopy? There are so many different materials that can be used to create your own custom grill canopy.
Wood: Natural wood is the most popular choice for creating a custom grill canopy. It’s easily available, affordable and very durable. The only downside of using natural wood as a material for your backyard grilling area is that it requires regular maintenance and upkeep to keep looking beautiful as well as functional.
Metal: Using metal in any type of creation is not always an easy task but if you have the right tools and know what you’re doing then it can be done!
The great thing about using metal for your outdoor grilling needs is that it’s very lightweight which means less stress on those delicate bones when carrying heavy loads from one place to another all day long!
Also since metals are known for being sturdy enough not break under pressure during use this means no more worrying about breaking something else either which means no replacing pieces
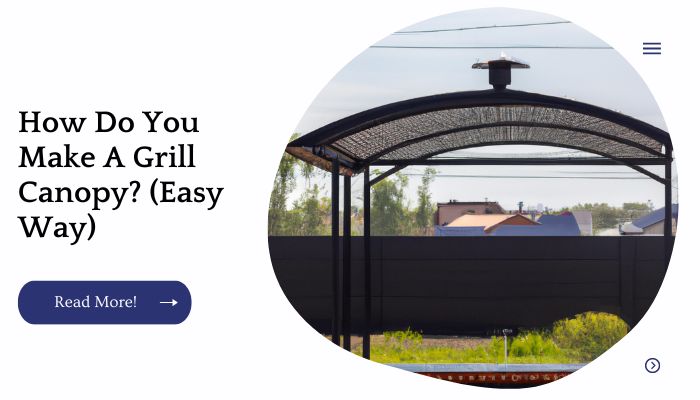
Grill Gazebo
If you’re like most people, you love grilling outside. But what if you want to cook more than just burgers and hot dogs? The answer is simple: a grill gazebo.
Grill gazebos are perfect for making any outdoor cooking experience enjoyable. They can also be used as an area for entertaining friends or family during backyard parties and barbecues by keeping bugs away from the food while it cooks on the grill below.
Want to add a canopy to your stroller for extra shade? Discover the easy way to put a canopy on a stroller with our helpful instructions in our article on putting a canopy on a stroller. Enjoy comfortable and shaded walks with your little one!
Smoker Table projects
A smoker table is a great addition to your outdoor space. You can use it to smoke meat and fish, cheese, vegetables, coffee or even flowers. It’s also a convenient way to keep everything you need for your smoking session together in one place!
A Lovely Bare Wood BBQ Shelter
The possibilities for your grill canopy are endless. You can use any wood you like, and make it as big or small as you want.
If you’re feeling particularly adventurous, you can make a custom shelter by attaching pieces of wood together in a unique shape. If not, there are many pre-fabricated grilling shelters available that look great and keep the rain out of your face while you cook outdoors.
When deciding how to decorate your grill canopy, think about what kind of aesthetic appeals to you most: do you want something rustic with character? Or maybe something modern and sleek? Maybe even something whimsical!
The best way to find out is by experimenting with different designs until one really clicks with who you are as an individual.
| Feature |
|---|
| Natural and rustic appearance |
| Constructed from bare wood materials |
| Durable and weather-resistant |
| Provides shade and protection |
| Open-sided design |
| Ample space for grilling and food prep |
| Enhances outdoor entertaining |
| Can be customized or stained to match your outdoor decor |
Another Stunning Bare Wood Construction
When it comes to grill canopies, you have a lot of options. You can buy one that’s ready-made and made of metal or plastic, but if you want something different, there are plenty of ways to make your own. One option is building the canopy out of wood and then custom painting it.
There are several steps involved in making this type of grill cover:
Build the wooden frame using a hammer, nails, and wood planks. Use thick pieces so that your finished product is sturdy enough for outdoor use during hot weather.
Cut slats from smaller pieces of lumber or plywood to fit between the main frame pieces (or just use plywood). A 1/2″ gap should be enough space between each slat; otherwise they’ll look like they’re overlapping when viewed from above instead of being spaced nicely apart as intended!
If necessary, cut extra slats into squares for small gaps where nothing else fits properly – just make sure not to overdo it because too many extra slots will make transportation difficult later on if you ever need access inside again without taking everything apart first…
This step also makes sure there won’t be any gaps between two adjacent ones where water could leak through instead directly onto your food while cooking!
Ensure your shade canopy stays secure and stable. Explore our guide on anchoring a shade canopy to learn effective techniques for keeping your canopy firmly in place. Don’t let windy days ruin your outdoor experience!
The Painted Tin BBQ Table
To paint your tin grill table, you’ll need:
- 2 cans of spray paint (1 can for each side)
- Paint brushes (one for each color)
- Clear coat spray paint (if you want to add a protective coat)
A few tips on how to get started:
Clean the grill first. The best way to do this is by brushing it with steel wool and then wiping it down with rubbing alcohol. If you don’t clean the grill, the paint will be less likely to adhere properly and more likely to chip off in places where dirt has build up over time.
| Feature |
|---|
| Rustic and vintage-inspired design |
| Made from painted tin |
| Sturdy construction |
| Compact size |
| Folding legs for easy storage and transport |
| Provides a flat surface for food preparation and serving |
| Suitable for outdoor use |
| Adds a decorative element to your outdoor space |
The Whole Grilling Set-Up with Bar and Seating
You’re going to need a spot to set up your grill, which is where the cart comes in. The whole setup can be built in a weekend and it’s made from an old wheelbarrow that you probably have lying around.
The cart itself has been customized with a custom-made grill and bar top that includes seating for family and friends. It also has some handy storage space underneath the seats so you have room for all your grilling supplies!
Cute Cart on Wheels to Keep Your Stuff Tidy
The next step is to make a cart on wheels. You can use this to keep your stuff tidy and mobile, so you don’t have to move them around when you’re done cooking.
Try making it cute and sturdy, so that it lasts longer than one season. If you want something more elaborate, add in drawers or shelves for storage!
A good way to start is by taking apart an old patio table or chair (or anything else that will fit the bill), then building up from there by adding wheels and other features.
Is your canopy tent frame in need of repair? We’ve got you covered. Check out our easy fix guide on repairing a canopy tent frame for expert tips and step-by-step instructions. Extend the life of your canopy tent!
A Clean-Lined, Modern Style Grill Cart
The materials you’ll need to build this stylish grill cart are as follows:
- 2-by-4s (five 8-foot pieces)
- 1 1x6x12 board (for the top of your cart)
- 2 ½” screws, 4″ screws and nails.
Tools required for building a wooden grill canopy include a miter saw or circular saw, drill, wood clamps and hammer. The steps to make this project are very simple: First, cut all of your lumber pieces down to size using your miter saw or circular saw.
Next, attach the two end panels on either side of the tabletop with nails at each corner where they meet up with one another as well as three more places in between these corners this will help reinforce those joints so they don’t warp over time due to constant exposure outdoors during summer grilling sessions!
Now screw together both sides using 2 ½” screws; finally place four additional screws through each leg joint into another piece below it so that there are no gaps between them while also ensuring they don’t come apart during use!
To use this stylish new wooden grill canopy simply wheel it over anywhere you’d like access while cooking hot dogs/burgers/steaks etcetera outside under an umbrella next time rain threatens our plans!
| Feature |
|---|
| Sleek and minimalist design |
| Clean lines and smooth surfaces |
| High-quality materials |
| Stainless steel construction |
| Ample storage space |
| Integrated side shelves or cabinets |
| Smooth-rolling casters for mobility |
| Convenient hooks for utensil storage |
| Easy-to-clean surfaces |
| Built-in gas or charcoal grill |
A DIY Grill Cart with Concrete Top and Glass Doors
Here’s another example of using a concrete top and glass doors. This time the idea is to have a grill cart with a concrete countertop and glass doors.
The cart will be able to store tools, charcoal and other things that you need while grilling. The lid opens up so you can use the grill space inside.
In this design there are two options for how you want your concrete countertop to look like: smooth or textured.
If you want it to look like wood then choose textured; if not then opt for smooth! In addition, there are two types of glass doors that can be used one with handles on both sides or one with handles on one side only (which may require drilling holes in the wood).
Installing a canopy frame doesn’t have to be complicated. Our easy way guide on installing a canopy frame provides clear instructions and helpful tips to simplify the process. Get your canopy frame set up quickly and hassle-free!
Conclusion
If you want to make a canopy for your grill, you can use the steps in this article to get started. You can also find more ideas on our website, where we have other DIY projects that are similar but require different materials.
Further Reading
Here are some additional resources for further reading on creating a grill canopy:
DIY Grill Gazebo: Learn how to build your own grill gazebo with this comprehensive guide. Discover step-by-step instructions and useful tips to create a customized grilling space.
How to Create a Covered Grilling Space: Find out how to transform your outdoor space into a covered grilling area with this informative article. Explore different design ideas and learn about the benefits of having a covered space for grilling.
Grill Gazebo Plans: Make a Grillzebo: If you’re looking for detailed plans and blueprints to build a grillzebo, this resource has you covered. Get access to easy-to-follow instructions and visual diagrams to construct your own grill gazebo.
FAQs
Here are some frequently asked questions about grill canopies:
How much does it cost to build a grill gazebo?
The cost of building a grill gazebo can vary depending on factors such as materials used, size, and design. It’s best to create a budget based on your specific requirements and consult local suppliers for accurate cost estimates.
Can I customize the design of a grill canopy?
Yes, you can customize the design of a grill canopy to suit your preferences and outdoor space. Consider factors such as the size, shape, materials, and additional features you want to incorporate.
Do I need any special tools or skills to build a grill gazebo?
While basic DIY skills are helpful, you don’t necessarily need specialized tools or extensive experience to build a grill gazebo. With proper planning, research, and following detailed instructions, you can successfully complete the project.
How long does it take to build a grill canopy?
The construction time for a grill canopy can vary depending on the complexity of the design and your level of experience. It’s advisable to allocate sufficient time for planning, sourcing materials, and completing the assembly. A typical timeframe could range from a few days to a couple of weeks.
Are there any safety considerations when using a grill canopy?
Yes, safety is crucial when using a grill canopy. Ensure proper ventilation, use fire-resistant materials, and follow safety guidelines when operating a grill under the canopy. Additionally, consider the placement of the canopy to minimize fire risks and protect against wind or weather-related hazards.

I am Hellen James, a professional handywoman with expertise in improving home and garden spaces by using pergolas, gazebos, and tents.
