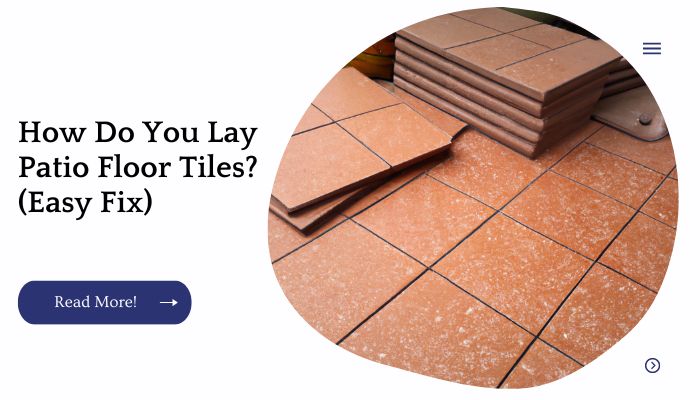
Patio floor tiles are a great way to bring the outside in and make your home look updated. However, as with any project that requires laying down tile, it can be tricky if you haven’t done it before.
You need to choose the right materials for your patio space keeping in mind things like climate, budget, and durability then do all the prep work before starting on the actual installation process itself.
When it comes to laying down patio floor tiles correctly and keeping them looking new for years to come, here’s what we’ve learned:
| Takeaways |
|---|
| Proper surface preparation is crucial for laying patio floor tiles successfully. |
| Use a level to ensure an even and flat surface before starting the installation. |
| Applying a waterproofing membrane can help protect the tiles and prevent water damage. |
| Use a high-quality tile adhesive suitable for outdoor use to ensure a strong bond. |
| Leave appropriate gaps between tiles for expansion and contraction, and use grout designed for outdoor applications. |
| Regularly clean and maintain the patio floor tiles to preserve their appearance and longevity. |
Watch The Temperatures
Now that you know the basics of laying patio tiles, here are a few tips to help you work more efficiently:
Make sure temps are right. Tile should be installed in temperatures above 50 degrees and below 90 degrees.
If it’s too hot outside, try to wait until morning or evening when temperatures are cooler before starting your project.
Watch those tempers! Once again, we’re talking about temperature here—but this time we want them above 50 degrees and below 90 degrees.
This is because some of your patio tile pieces will be exposed to direct sunlight while they’re drying (which can take up to 24 hours), so if the weather is too hot or humid, there’s a chance that your newly laid tiles could become warped over time from exposure to high heat and moisture levels.
Looking to create a patio on a budget? Our guide on building a cheap covered patio provides easy-fix tips and ideas to help you design an affordable outdoor space that doesn’t compromise on style or functionality.
Test It Out
You want to ensure that your adhesive is working well before you apply it to your patio floor tiles. You can do this by testing the adhesive on a tile or piece of paper, for example.
If you see that small pieces of the glue have come loose and have dried on top of these items, then you know that this is not a good sign and should be avoided when doing so in real life.
In addition to testing out its adhesiveness, make sure that your glue is not too sticky if it is too sticky then this will result in damage being done to surfaces such as wood floors if accidentally spilled directly onto them (which could happen if using too much).
Find A Level Surface
This is a crucial step. If your patio floor tiles are not laid on a flat surface, they will not sit evenly and may crack.
Before laying your patio floor tiles, check that the surface is level by using a spirit level.
The best way to do this is to place the spirit level on top of the surface and look for it to appear as horizontal as possible (or vertical). It doesn’t have to be perfect just try your best!
If you find that there are areas where your patio floor tile installation will be uneven due to an uneven foundation or sloped yard, here are some tips:
Laying Patio Floor Tiles Against Concrete Slabs – If you have concrete slabs underfoot, then there’s no need for additional leveling because concrete is naturally flat and level. Just lay down adhesive according this guide and go ahead with laying down your new tiles!
Maintaining and protecting your patio furniture is essential for its longevity. Discover the best techniques for staining and sealing patio furniture in our easy-fix guide, ensuring your outdoor pieces stay beautiful and durable.
Choose Tiles That Suit The Space
When choosing tiles, it’s important to take the following into account:
Choose tiles that suit the space. For example, if you have an outdoor patio that is close to your home or other buildings, you don’t want glossy tiles because they will reflect light and create glare for pedestrians.
Choose tiles that suit your budget. If you have a tight budget but still want to get great quality flooring for your outdoor living space, consider using porcelain tile instead of natural stone slabs or brick pavers. Porcelain is less expensive than natural stone and has similar finishes so it will look very appealing in an outdoor setting as well as in your home’s interior rooms.
Choose tiles that suit your style and décor scheme throughout your house so everything looks unified from room-to-room without having any glaring contrasts between different areas (like having polished concrete flooring outside while using polished marble floors indoors next door).
Use The Right Adhesive
The most important thing is to make sure you use the right adhesive.
It’s also important that you get the correct product for the job, so make sure you choose an adhesive which is specifically designed for laying tiles on your chosen surface.
If you have any doubts about what type of adhesive would be best for your patio flooring project, speak to one of our experts who will be happy to help and advise on which product would work best in your situation.
Beat the heat and add a refreshing touch to your patio with a mister system. Our step-by-step guide on setting up a patio mister provides you with all the information you need to create a cool and comfortable outdoor oasis.
Create Setting Beds In The Mortar To Lay Down Tiles
When it comes to laying your patio tiles, you’ll want to make sure that the mortar is spread out evenly and flatly.
To do this, use a trowel and level to spread the mortar in an even layer across the ground. Once it’s ready, place your tile on top of it but not too close! The tiles should be spaced about 2 inches apart from each other so that there is room between them for mortar.
Cut Tiles To Size
To get the job done, you’ll need to cut all of your tiles to size before laying them.
There are a few different ways of doing this and it really depends on the type of tile you’ve chosen, and what kind of look/feel you are going for. In general though, there are four main methods:
Tile saw – these can be used for either wet or dry cutting. A wet saw uses water while a dry saw doesn’t use any water at all.
The difference between these two types is that wet saws can cut faster because they don’t have to heat up as much as dry ones do! Wet saws also let out dust which means less mess for you in the long run (and less chance of inhaling dangerous particles).
Tile nipper – these aren’t always used by professionals but they’re great if you’re just looking for something quick and easy! They cut straight lines so if this is what your project calls for then definitely go with this option 🙂
| Point |
|---|
| Wet tile saw |
| Tile cutter |
| Score-and-snap tile cutter |
| Tile nippers |
| Oscillating multi-tool |
Keep Your Lines Straight
There are many ways to make sure your lines are straight and even, but the most important thing is that you choose one method and stick with it.
If you’re using a laser level, for example, make sure that all of your tiles are laid out on top of their mats in exactly the same way every time so that they line up correctly when it comes time to cut them.
Another option is to use a straight edge as a guide while laying down tiles (or even just marking them with chalk or pencil) so that every tile ends up being laid at an exact right angle to either side of it.
If this sounds like too much work for you and/or if you don’t want anyone else seeing how messy your patio flooring project is getting, consider hiring someone else!
Installing a patio door on concrete can seem daunting, but it doesn’t have to be. Our easy-way guide on installing a patio door on concrete walks you through the process, ensuring a secure and seamless transition between your indoor and outdoor spaces.
Keep Tiles In Place As You Lay Them Down
When laying the tile, you want to make sure that it stays in place while you are working with another tile.
You can use spacers to hold tiles in place as you lay them down on the floor. If your tiles are a different size than those around them, then you may need to use a saw or chisel to cut them down.
You can also use special tools called wet saws when laying your patio floor tiles. These tools will cut through all types of materials quickly and easily without creating any mess or waste material.
| Point |
|---|
| Interlocking design |
| Self-adhesive backing |
| Snap-together mechanism |
| Tongue-and-groove system |
| Peel-and-stick technology |
Grout And Seal To Protect
Make sure to use the right sealant for your floor tiles. There are many different types of sealants on the market, each with its own unique qualities.
For example, some sealants will last longer than others and some can withstand more wear and tear.
Try to find a durable sealant that will protect your floor from water damage. This will not only help keep it looking nice but also prevent any cracks from forming through years of exposure in your patio or garden area.
When applying the tile grout and sealing, use a sponge to apply an even coat over all joints between tiles so that no gaps remain uncovered by grout or sealant when installed correctly
Add Small Pieces As You Need To
Now that you have your patio floor tile installed, it’s time to add grout! If your tiles have a square edge (the square edge is the flat side that was against the wall) and they are not rounded on any edges, use a grout float to spread out the grout.
This will help keep the lines even in between each row of tiles. You can also use an edging tool if you want a cleaner line between each row but this may take longer than using a grout float.
Once you have spread out all of your rows and filled in all of your spaces, let them dry for 2 hours before removing excess grout with a damp sponge or rag.
Clean up any excess with warm water and then let dry completely overnight before sealing it with clear sealer for more protection from stains and dirt buildup over time
| Point |
|---|
| Use modular design |
| Flexibility in adding components |
| Customizable options |
| Efficient use of resources |
| Scalability |
Get Rid Of Excess Grout And Sealant
After laying the tile, you’ll want to clean it up. For this, you have a few options. You can use a damp cloth to wipe away any grout that has gone on too thick and make sure everything looks right before moving forward with sealing it (this is what we did).
Or, if you’re feeling ambitious and don’t mind spending some time rinsing off excess grout and sealant from each individual piece of tile or if you aren’t going for perfection here you can try using a wet vacuum or even just running water over them in the shower so that they look nice when they dry out again.
If your tiles are stained or discolored after installation (and we’ve seen some horror stories), try cleaning them with bleach or oxalic acid first the latter comes in powdered form at most home improvement stores and will literally strip paint off of walls.
Ticks can be a nuisance and a health concern when they infest your patio area. Protect your outdoor space with our helpful guide on keeping ticks off your patio, providing tips and preventive measures to ensure a tick-free environment.
Learn How To Clean Them Properly
Patio tiles can be very durable, but they still need to be cleaned regularly to maintain their appearance.
You should use a soft brush to remove dirt and dust from the surface of the tile. If necessary, clean with a damp cloth using mild detergent or a vinegar solution.
Rinse with water and dry with a paper towel before applying any protective coating on them. Do not use abrasive cleaning products because they might damage your tiles in the long run!
Conclusion
You can make your patio floor look like new again by cleaning it with a simple homemade solution. All you need is 3 parts water to 1 part bleach and some scrubbing pads or brushes.
Further Reading
Here are some additional resources that provide further guidance on laying patio floor tiles:
How to Install Outdoor Tile: This comprehensive guide from The Spruce offers step-by-step instructions on installing outdoor tiles, ensuring a durable and attractive patio surface.
How to Fit Exterior Tiles: Toppstiles provides valuable insights on fitting exterior tiles, covering essential techniques and considerations for a successful installation.
Tips and Advice for Laying Outdoor Tiles: This blog post by Tile UK offers practical tips and expert advice for laying outdoor tiles, helping you achieve a stunning and long-lasting patio flooring.
FAQs
Here are some frequently asked questions related to laying patio floor tiles:
How long does it take to lay patio floor tiles?
The time required to lay patio floor tiles depends on various factors, such as the size of the area, complexity of the design, and your experience level. It can range from a few hours to several days, accounting for surface preparation, tile cutting, adhesive curing, and grouting.
Can I lay patio floor tiles over an existing concrete slab?
Yes, it is possible to lay patio floor tiles over an existing concrete slab. However, it is crucial to ensure that the surface is clean, level, and structurally sound. Proper preparation and the use of appropriate adhesives are essential for a successful installation.
What type of tile is suitable for outdoor patios?
Outdoor patios require tiles that are specifically designed for exterior use. Porcelain and ceramic tiles are popular choices due to their durability, resistance to moisture, and low maintenance. It is recommended to select tiles with a slip-resistant surface for enhanced safety.
How do I ensure proper drainage when laying patio floor tiles?
Proper drainage is essential to prevent water pooling on the patio surface. When laying floor tiles, ensure a slight slope away from the house or toward designated drainage points. Installing a drainage system, such as perforated pipes or channel drains, can further improve water management.
How do I maintain and clean outdoor patio floor tiles?
Regular maintenance and cleaning help prolong the lifespan and appearance of outdoor patio floor tiles. Sweep or vacuum the surface to remove dirt and debris, and use a mild detergent or specially formulated tile cleaner for periodic cleaning. Avoid abrasive cleaners or tools that may damage the tiles or grout.

I am Hellen James, a professional handywoman with expertise in improving home and garden spaces by using pergolas, gazebos, and tents.
