Seaming sealer is a liquid used to coat the seams of a tent and prevent water from penetrating the structure.
It’s very important to seam seal your tent, but it can be tricky to do properly. The instructions in this article will help you get started with the process and make sure you get it right the first time.
| Takeaways |
|---|
| Seam sealing is an essential process for ensuring the waterproofness of a silnylon tent. |
| Before seam sealing, it’s important to prepare the tent by cleaning and drying it thoroughly. |
| Use a high-quality silicone-based seam sealer for effective and long-lasting seam sealing. |
| Apply the seam sealer carefully and evenly along the seams of the tent, focusing on the stitching lines. |
| Allow the seam sealer to dry completely before packing or using the tent to ensure optimal performance. |
| Regular maintenance and reapplication of seam sealer may be necessary to maintain the tent’s waterproof properties. |
Seaming Sealer
Seaming sealer is a sticky, plastic-like substance that you apply to the seams of your tent before it sets up. It helps prevent leaks from rain and condensation, but does not create a perfect barrier against them.
This is an important distinction to make because if you’re expecting to be able to camp in torrential downpours or near the ocean, seam sealing can only help so much – there’s still no way for water not to enter through any opening or seam smaller than about 2 inches wide (1/4″ = 6 mm).
As for how it works: The seam sealer creates a barrier between your tent’s fabric and the air around it – preventing moisture from reaching its surface through capillary action (capillarity is when something reaches out with tiny tubes).
When this happens, any condensation on your tent will stay on top of where you applied the seam sealer instead of soaking into its pores as would otherwise happen without protection.
With that said though – even though they do work well enough under most circumstances – they’re still not infallible barriers!
When it comes to canopy maintenance, knowledge is key. Our pro tips for fixing an EZ-Up canopy will equip you with the know-how to tackle any issues that may arise, ensuring your canopy stays in top shape.
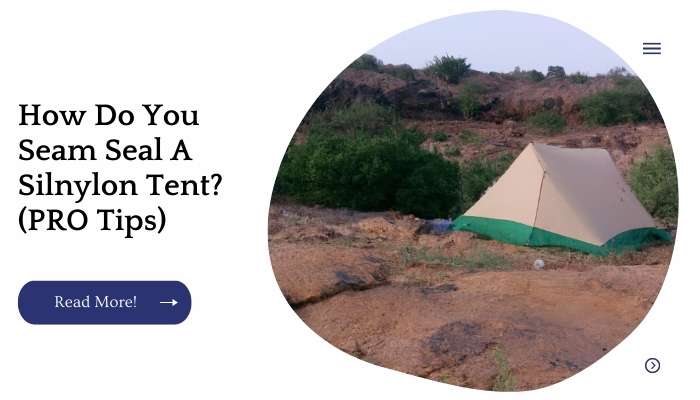
Tents
Seam sealing a tent may seem like it’s a complicated process, but it really isn’t. All you need are a few tools and materials. Some of the things that help make seam sealing easier include:
- Using a silicone cake pan to protect your floor from the heat of your torch (if using one)
- Having an ample amount of space to work in and around your tent, so there’s room for you to lay out all the pieces before applying any sealer or tape.
- Being mindful about which direction you’re applying sealant, so you don’t apply it in places where you won’t be able to remove it later on (i.e., directly over seams).
| Tent Type |
|---|
| Dome Tent |
| Cabin Tent |
| Backpacking Tent |
| Pop-up Tent |
| Canvas Tent |
Propane Torch
The best way to seam seal a silnylon tent is with a propane torch. This method takes some practice, but once you get the hang of it, it’s worth it—plus you don’t have to put on any extra clothes or go into the garage!
First, apply your seam sealer to all areas of your tent that need sealing. Be sure not to put too much on or else it will drip out of those seams while you’re trying to heat them up with your torch.
Using a silicone cake pan as a barrier between your propane torch and your tent helps keep everything from melting together in an unholy mess!
Next, use a small propane torch (you’d be surprised how many types of torches there are) and hold one end near one side of a seam for about 30 seconds until it starts bubbling up around where the flame was being held.
Then move over towards where another seam starts (about 4 inches away) and do this again until both sides have been heated properly by holding off-center flames against each side at once while moving them closer together slowly until they meet in between both sides where they’ll start melting together naturally into one piece if done correctly without burning holes through anything important).
Planning a wedding or event with a chuppah? Discover the best way to attach a canopy to a chuppah with our expert guide. Ensure your canopy is securely fastened, providing both beauty and functionality.
Scrub Brush
You will need a scrub brush to apply the seam sealer. A damp rag is also required so that you can wipe off any excess seam sealer from your tent.
Finally, it’s always a good idea to protect the floor of your tent with a plastic drop cloth before applying seam sealer in case some spills or drips occur as you are working on the project.
But what if you don’t have access to these items? No worries! There are alternative methods that work just as well:
If you have no scrub brush and no cake pan, use an old toothbrush (or even better yet—a new one!) instead! You’ll be amazed by how well this works—it even comes with its own container for catching excess silicone when finished applying it all over your Silnylon tent’s seams.
For extra fun: try using multi-colored silicone cake batter when decorating your new toothbrush/cake pan combo!
It’ll make cleaning up easier too since there will be less mess than usual due to having two separate containers rather than one big open space like in traditional recipes where everything gets mixed together into one giant bowl at once (which usually means lots more cleanup later).
If all else fails then go ahead and buy yourself something like this one here at Walmart today because they’re cheap enough not matter much money anymore once they break down over time anyway–it’s just not worth spending hours upon hours trying out different methods independently before finally landing back where we started again.”
| Brush Type |
|---|
| Bristle Scrub Brush |
| Nylon Scrub Brush |
| Wire Scrub Brush |
| Plastic Scrub Brush |
| Silicone Scrub Brush |
Damp Rag
Now, with the tent inside-out, use a damp cloth to wipe down all the seams. Don’t use a wet cloth or even paper towels—just a damp one will do.
This should seal any leaks that occurred during this process and leave your tent ready to be stored until next season.
Are you struggling with folding your Coleman canopy? Don’t worry, we’ve got you covered with our easy tips for folding a Coleman canopy. Say goodbye to tangled poles and hello to a neatly folded canopy with our step-by-step instructions.
Plastic Drop Cloth
You can purchase a plastic drop cloth, which is typically used to protect furniture and floors from spills or stains. A drop cloth also serves as a covering for your work area when assembling your tent. Drop cloths are available in a variety of sizes and colors, as well as patterns and materials.
| Use Case |
|---|
| Painting and Renovation |
| Furniture and Floor Cover |
| Protection for Surfaces |
| Gardening and Landscaping |
| Crafting and DIY Projects |
Silicone Cake Pan (Optional)
If you’re using a silicone cake pan to help hold the tent in place, apply the seam sealer to the outside of the cake pan and then run it along all seams.
The silicone cake pan will help distribute and even out your seam sealer, so that no matter how much you put on, it will get everywhere it needs to go!
When it comes to canopies, reinforcement is essential for long-lasting durability. Our easy tip for reinforcing a canopy top will help you enhance the strength and stability of your canopy, ensuring it withstands various weather conditions.
The Right Tools
As you’re getting your tools together, you’ll want to make sure you have the following:
Seaming sealer
A tent that needs seam sealing
A propane torch (or other heat source) and burner to melt the seam sealer into the seams of your tent.
You can use a portable propane tank or a stovetop flame if you don’t have access to a torch. If using a stovetop flame, keep in mind that it will take longer than using an actual torch and could damage your tent fabric if used incorrectly.
A scrub brush or scouring pad designed for cleaning pots and pans. This will help remove dirt and grime from inside of the seams when they’re exposed during this process.
It’s important not to use anything too harsh; damage may occur if you scrub too vigorously or with too much force! While this step isn’t necessary for all situations, it might be helpful if there’s already some buildup on your tents’ seams before applying seam sealant).
If so, then make sure to clean away any loose dirt before applying new sealant–otherwise it might come off as soon as water hits it!
You can also use something like soap or mild detergent instead of just plain water here; either way works fine though sometimes soap-soaked cloths work better than just plain ones because they remove stickier substances more effectively without causing any harm whatsoever.)
Folding a pop-up canopy may seem challenging, but with our easy-to-follow guide, you’ll become a pro in no time. Learn the best techniques for folding a pop-up canopy and simplify the storage process, making your canopy ready for the next adventure.
Conclusion
We hope this article has helped you to learn more about seam sealing your tent. We know it can be a little intimidating at first, but it’s really not that hard if you just follow the steps we’ve outlined above.
Remember that it’s not only important to seam seal your tent before using it, but also after every trip as well!
And don’t forget – if you get anything on your hands during the process (like from handling some of those chemicals), wash them immediately before touching anything else so as not to damage other surfaces around your home or office (like clothing). Once again: happy camping!
Further Reading
Gear Aid: Waterproof Seam Seal Tent – How To: Explore this comprehensive guide on waterproofing and seam sealing your tent, providing step-by-step instructions and expert tips for ensuring a dry and durable shelter.
The Trek: How to Seam Seal Your Tent – Step-by-Step Guide: This detailed step-by-step guide from The Trek walks you through the process of seam sealing your tent, including product recommendations and helpful techniques to maintain a watertight shelter.
MSR Gear Blog: Tents 101 – Seam Taping vs. Seam Sealing: Learn the difference between seam taping and seam sealing in tents with this informative blog post from MSR Gear. Understand the benefits and considerations of each method to choose the right approach for your tent’s needs.
These additional resources provide in-depth information and guides on seam sealing tents, offering different perspectives and techniques to help you achieve optimal waterproofing and durability for your tent.
And here’s the FAQs section in markdown format:
FAQs
How important is seam sealing for a tent?
Seam sealing is crucial for tent waterproofing as it prevents water from seeping through the needle holes created during the tent’s manufacturing process.
What materials are required for seam sealing a tent?
Common materials for seam sealing a tent include seam sealer, a brush or applicator, and a clean, dry surface for the tent.
How often should I seam seal my tent?
It is recommended to seam seal your tent when it is new and periodically thereafter, especially after significant use or exposure to harsh weather conditions.
Can I seam seal a tent on my own?
Yes, seam sealing can be done by individuals with proper guidance and the right tools. Following instructions and taking time to ensure thorough sealing is key.
Can I seam seal a tent that has already been used?
Yes, you can seam seal a used tent. However, make sure to clean and dry the tent thoroughly before applying the seam sealer for optimal adhesion and effectiveness.

I am Hellen James, a professional handywoman with expertise in improving home and garden spaces by using pergolas, gazebos, and tents.
