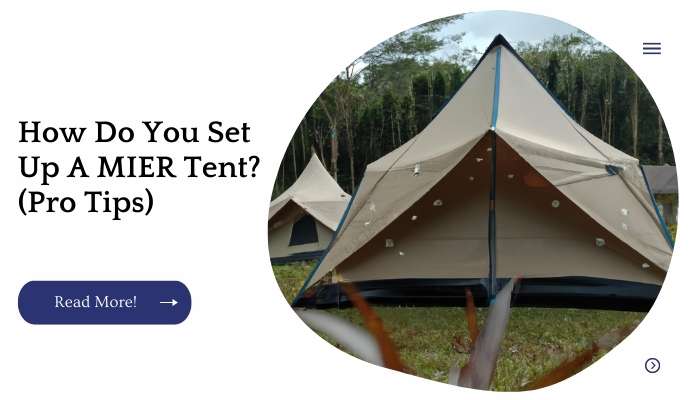
Setting up a MIER tent is relatively easy, but it can take time. For this tutorial, we’re going to use the Echo 2-Person 3-Season Tent with Footprint and Gear Loft as an example.
Let’s get started!
| Takeaways |
|---|
| Setting up a Mier tent requires proper knowledge and techniques. |
| Follow the instructions provided by the manufacturer for the specific model of the Mier tent. |
| Prepare the camping site by clearing any debris or obstacles before setting up the tent. |
| Ensure the tent is pitched on level ground for stability and comfort. |
| Use the included tent stakes and guylines to secure the tent properly. |
| Take care when handling tent poles to avoid bending or damaging them. |
| Practice setting up the tent beforehand to familiarize yourself with the process. |
| Consider using a groundsheet or footprint to protect the tent floor. |
| Properly ventilate the tent to minimize condensation and maintain airflow. |
| Store the tent in a clean and dry condition to prolong its lifespan. |
Find A Level Site
To ensure that your tent is stable and won’t be blown away in high winds, you’re going to want to find a flat surface.
Grass is great for this since it’s soft, but it might not be the best idea if there are lots of rocks or roots hiding under there. It’s also best if the ground isn’t wet since this can make setting up your tent more difficult and potentially cause damage.
If you’re worried about tall grass getting into your tent and making things uncomfortable, try finding an area with shorter grass or even some dirt on which to place your MIER tent.
In general, avoid any areas where trees could fall on top of your MIER Tent while setting up or during use–they could easily crush the structure without warning!
Also steer clear of heavy snowfall areas that might trap moisture inside once it melts the last thing you want is water leaking through into areas where people will be sleeping.
Mastering the art of folding a pop-up canopy is crucial for easy setup and storage. Our comprehensive guide on how to fold a pop-up canopy provides step-by-step instructions and expert tips to ensure hassle-free handling of your canopy, including your Mier tent.
Clear And Remove Rocks
The first step is to clear the site of rocks, sticks, and other debris. Make sure to remove any loose rocks that you can see.
If there are still large chunks of stone buried in your campsite, then make sure to place the tent on top of them when setting up your MIER tent; don’t place it on top of sharp objects or on loose ground that could collapse underneath you.
| Technique | Description |
|---|---|
| Hand Removal | Physically clear rocks and stones from the camping area by hand. |
| Raking | Use a rake to gather and remove rocks from the campsite. |
| Shovel Digging | Dig into the ground to remove larger rocks that are deeply embedded. |
| Sieving | Use a sieve or mesh screen to separate smaller rocks from the soil. |
| Rock Bar or Pry Bar | Utilize a rock bar or pry bar to lift and remove heavy rocks. |
| Rock Tumbler | Consider using a rock tumbler to smooth and polish smaller rocks. |
| Ground Cover | Lay down a ground cover or tarp to prevent rocks from causing discomfort. |
| Campsite Selection | Choose a campsite with minimal rocks to reduce the need for clearance. |
Remove Sharp Objects
Once you’ve found a suitable location for your tent, it’s time to set up. The first step is to check the area with a stick or pole.
If there are any sharp objects lying around, they must be removed before you proceed. For example, if there are any nearby trees with low-hanging branches that could potentially scratch up your tent walls, you should remove them first. This will allow you to lay down your tent without worrying about accidentally damaging it by accident when you adjust the stakes in preparation for setting up the poles and pegs.
It also reduces the risk of injury while setting up camp; this is especially important if there are children present as they may not know where all of these dangerous objects are located!
Once all of these potential hazards have been removed from view (or at least relocated), it’s time for step two: pegging down each corner post so that the corners stay firmly attached to earth even when strong winds come along later tonight after sunset (or during those rare moments when someone tries sleeping).
Don’t let the fear of leaks dampen your camping experience. Seam sealing is an essential step in ensuring the waterproofing of your tent. Learn the best techniques and products for seam sealing a silnylon tent in our informative guide, ensuring a dry and comfortable camping adventure with your Mier tent.
Stake Out The Corners
Stake out the corners of your tent.
Place the stakes in the ground at an angle, and make sure they’re long enough to go into the ground at least 6 inches. After you pound them in with a hammer or mallet, it’s time for step two: setting up your rainfly.
Pulling Back The Rainfly
Now that you’ve got the tent body out, it’s time to set up your rainfly. The first thing you want to do is make sure the rainfly is pulled taut, so that it covers the area of your tent body underneath.
Then stake out each corner of the tent with rock-solid pegs or stakes you don’t want any flimsy plastic ones here! Be careful not to damage either one of these important pieces of equipment.”
Attaching The Poles To The Tent
The first step to setting up a MIER tent is to attach the poles to the tent. The first thing you need to do is find your pole sleeve, which is located at the top of your tent. It should look like a small bag hanging from two hooks that attach it to the upper end of your tent body.
Once you have found it, open up your pole sleeve and drop in one end of each pole into its corresponding sleeve hole (there should be two holes).
Close up those sleeves by folding them over onto themselves until they meet with Velcro closures on either side; then secure everything together using cord ties or ropes if necessary.
Efficiently closing and packing up your outdoor tent is crucial for convenience and longevity. Discover the simple and effective methods for closing an outdoor tent in our step-by-step guide, ensuring a stress-free experience with your Mier tent from setup to takedown.
Setting Up The Rainfly
You’ll want to make sure that the rainfly is properly staked out, and not touching the tent body or ground. If it is touching either of these things, it could trap moisture between them and cause condensation inside your tent. If you are in an area where there is a chance of rain, we recommend taking down some extra stakes just in case.
Stake Out The Rainfly
You’ll be able to attach the rainfly to your tent more easily if you stake out the rainfly first. Use the stakes provided with your tent, and make sure they’re in good soil.
You want them to stay firmly in place so that when you tighten down the guy lines on it, there will be no shifting or moving of the rainfly once it’s attached to your tent!
| Rainfly Staking Style | Description |
|---|---|
| Standard Staking | Secure the rainfly using the provided stakes and guylines. Common practice in most tents, including brands like Marmot and MSR. |
| Adjustable Stakes | Use adjustable stakes to fine-tune the tension and angle of the rainfly. Brands like Big Agnes and NEMO offer tents with adjustable stake-out points. |
| J-Stake Method | Utilize J-shaped stakes to create a secure and reliable anchor for the rainfly. Recommended for windy conditions. Brands like Hilleberg and Black Diamond offer J-stakes for their tents. |
| Rock or Sand Anchors | Use rocks or sandbags as anchors when camping in areas with limited soil or rocky terrain. Helpful for tents from brands like REI and The North Face. |
| Snow Anchors | Employ specialized snow stakes or anchors to secure the rainfly in snowy environments. Essential for winter camping in tents from brands like Mountain Hardwear and Exped. |
Attach Any Vestibules
Attaching the vestibules is optional, but it’s a good idea if you have them available. If you have room in your bag or vehicle for them, they can be put to good use storing gear and cooking as well as providing an extra layer of protection from the elements.
They can be attached to either the rainfly or tent body, but we recommend attaching them to the tent body if possible.
This will help keep things dry when you go inside after a storm because the vestibule will act as a barrier between your stuff and any wetness that may have crept in through openings in the rainfly (such as those inevitable tiny pinholes).
Setting up a 5×5 grow tent requires careful planning and execution to create an optimal environment for your plants. Our detailed guide on setting up a 5×5 grow tent provides valuable insights and tips to help you maximize your yield and create a thriving growth space, similar to the process of setting up your Mier tent.
Connect The Fly To The Tent With Clips
Once the fly is connected to the tent, you can use clips to adjust how tightly it’s secured to the tent. These are also handy for attaching vestibules, which are side panels that extend out from your main tent and provide an extra space for storing equipment.
Set Up Your Vestibules
You can use your vestibules in a variety of ways. The best way to set them up is to have one that faces away from the weather, and another that faces towards it.
You can use them as changing rooms, storage areas for gear or just a place to sit with your boots on while you eat lunch.
Vestibules are easily added onto any MIER tent because they are sold separately as an accessory for most models (except for our ultralight tents). To set up your vestibule:
Place the footprint (the ground cover) inside each of your tent’s corners with the hooks facing upwards so when you attach them, the hooks will lock into place securely.
Attach each corner using two stakes per stake pocket – one near where it attaches at the bottom and one near where it attaches at the top inside of each corner pole opening (where there is no fabric). You’ll need about six stakes total for this step.
| Vestibule Type | Description |
|---|---|
| Integrated Vestibule | Built-in vestibule attached to the tent, providing extra storage space and protection from the elements. Found in tents like Mier Fusion 2P and North Face Stormbreak 2. |
| Add-On Vestibule | Detachable vestibule that can be added to compatible tents, expanding the covered storage area. Compatible with brands like Big Agnes and MSR. |
| Tarp as Vestibule | Using a separate tarp as a makeshift vestibule by suspending it over the tent entrance. Requires additional equipment like guylines and trekking poles. Common among ultralight backpackers. |
| Awning-style Vestibule | Extended rainfly or canopy that creates a covered outdoor area in front of the tent. Offers shade and protection from light rain. Found in tents like Coleman Evanston and REI Half Dome. |
| Porch-style Vestibule | Larger vestibule that provides a semi-enclosed space with standing room, suitable for changing clothes or storing gear. Featured in tents like Black Diamond HiLight and NEMO Dagger. |
Add Your Gear!
Place your gear inside the vestibules. If it’s not raining, you can hang outdoor jackets and vests on an included vestibule hook or drape them over a nearby branch or tree limb.
Place your sleeping bag inside the tent itself. You’re probably going to be putting your head right there, so make sure it doesn’t smell like moldy socks!
Leave extra space in the tent for movement—you don’t want to hit your head on a pole when you go to sit up!
Don’t leave anything lying around outside of your tent: food, clothing items (who knows what kind of critters live out there?), etc…
Ensure the stability and safety of your tent in windy conditions with our expert tips on keeping a tent down in the wind. Discover practical techniques and anchor solutions that will help secure your Mier tent, allowing you to enjoy your outdoor adventures with peace of mind.
Conclusion
I know you’re excited to get out there and camp, but before you go, it’s important to make sure your gear is safe.
That means making sure the tent is properly staked in place and that all sharp points have been removed from around it.
When setting up any tent, I always recommend using a good pair of gloves because they can save your hands from blisters or cuts!
And lastly (but perhaps most importantly), don’t forget about making sure everything fits into its proper place once assembled there should be no loose straps hanging around inside!
Further Reading
Here are some additional resources for further reading on related topics:
MierSports – Lanshan 2 Person Tent: Explore the features and specifications of the Lanshan 2 Person Tent from MierSports, a high-quality tent designed for outdoor adventures.
Family Handyman – How to Set Up a Tent: Learn the step-by-step process of setting up a tent with this comprehensive guide from Family Handyman. Perfect for beginners and experienced campers alike.
Mom Goes Camping – Cheap Ultralight Tents: Discover affordable and lightweight tent options for your outdoor adventures with this informative article from Mom Goes Camping. Find budget-friendly options without compromising on quality.
FAQs
How long does it take to set up a Mier tent?
The time required to set up a Mier tent can vary depending on the model and your familiarity with the process. Generally, it takes around 10 to 20 minutes to set up a Mier tent.
Are Mier tents waterproof?
Yes, Mier tents are designed to be waterproof. They are made with durable and water-resistant materials, and most models come with a waterproof rainfly to provide additional protection during wet weather conditions.
Can I use a Mier tent for backpacking?
Absolutely! Mier tents are popular choices for backpacking due to their lightweight design and compact size when packed. They offer a balance of durability, comfort, and weight, making them suitable for various backpacking adventures.
How do I clean and maintain my Mier tent?
To clean your Mier tent, use a mild soap and warm water solution to gently scrub the tent fabric. Rinse thoroughly and allow it to air dry before packing it away. It’s essential to follow the manufacturer’s instructions for cleaning and maintenance to ensure the longevity of your tent.
Can I use a Mier tent in all seasons?
Mier offers a range of tents suitable for different seasons. Some models are specifically designed for three-season camping, while others are built to withstand harsher conditions and can be used for winter camping. Check the specifications of the particular Mier tent model to determine its seasonal suitability.

I am Hellen James, a professional handywoman with expertise in improving home and garden spaces by using pergolas, gazebos, and tents.
