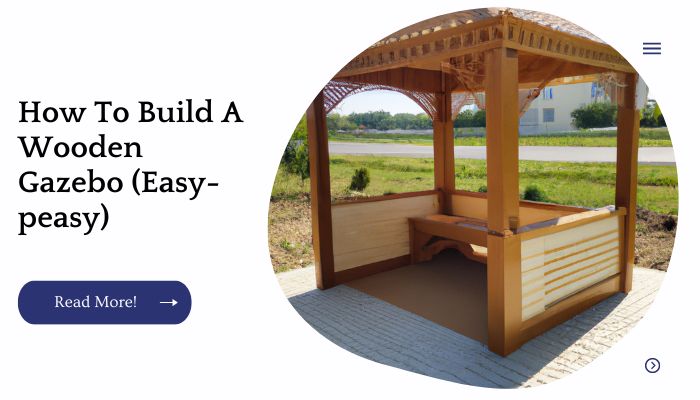
A wooden gazebo is a great way to relax in your yard. It offers shade, privacy, and can be used for gardening or as a grill station.
The best part is that it’s easy to build! Here’s how I built my own gazebo using some basic tools and materials that you probably have sitting around your house right now:
| Takeaways |
|---|
| Building a wooden gazebo can be made easy with the right guidance and instructions. |
| Understanding the steps involved in constructing a wooden gazebo is essential for a successful project. |
| Proper planning, including selecting the right location and obtaining necessary permits, is crucial before starting the construction process. |
| Choosing the right materials and tools is important to ensure the durability and stability of the wooden gazebo. |
| Following safety precautions and guidelines throughout the construction process is necessary to prevent accidents and ensure a secure structure. |
| Regular maintenance, such as cleaning and sealing, helps to preserve the appearance and lifespan of the wooden gazebo. |
Construct The Base
The first step in building a wooden gazebo is to construct the base. You will need to use treated lumber for this part because it’s going to be exposed to the elements.
To make sure that your base is level, use a level as you go along so that everything is straight and even. If you don’t have access to a carpenter’s level, you can always use a two-by-four as a guide by marking where it intersects with each side of your foundation.
If you’ve built your base according to plan and it’s strong enough for its purpose, congratulations! Now move on to constructing the frame for your gazebo itself.
When it comes to building a gazebo roof, having the right guidance is crucial. Our comprehensive guide on building a gazebo roof – Handyman Advice provides step-by-step instructions and expert tips to help you create a sturdy and beautiful roof for your gazebo.
Lay The Floor
You can choose to have the gazebo flooring included in the project, or you can opt to lay it later. Either way, this is a simple step that requires some careful measuring and proper installation.
To ensure that your floor is level and flat, use a laser level. Place one end of the device on one corner of your planned rectangle shape and aim it at an opposing corner so that you get an accurate reading from one side to another (you may need someone else’s help with this).
Adjust until these measurements are equal for all four sides before continuing with laying down any pressure treated wood or cedar boards for your surface.
If you want extra protection against moisture damage underneath where water could leak through cracks between boards, use some extra linoleum pieces underneath each layer just as before
This will prevent mold from forming underneath when high levels of humidity start collecting there due to rain or snowfall being absorbed by nearby trees during heavy storms like hurricanes etcetera
| Step | Description |
|---|---|
| 1 | Prepare the ground surface for the floor installation |
| 2 | Place the {Brand Name} flooring materials in the desired pattern |
| 3 | Secure the flooring pieces together using the provided connectors |
| 4 | Ensure proper alignment and levelness of the floor |
| 5 | Apply any necessary finishing touches or treatments |
Construct The Frame
The first step is to build the frame of the gazebo. You will need to cut 2x4s into pieces that are 24 inches long, then screw them together using a level to ensure that they are level as you go along.
Once you have finished constructing the frame, use an electric drill to attach it firmly in place on both ends and in the middle so that it does not move during later construction steps.
The next step is attaching your decking boards over the top of this frame. This can be done by drilling holes through each board where necessary and then nailing them into place with long wood screws or galvanized nails.
The final thing we recommend doing is adding flooring inside your gazebo which will prevent water damage if any drips through cracks or leaks occur during storms or heavy rain showers since this prevents standing water from pooling up between planks which could eventually lead
Are you ready to make a gazebo of your own? Our simple guide walks you through the process, from selecting materials to assembling the structure. Discover how to bring your vision to life with our easy-to-follow instructions.
Install The Uprights
Install the first upright by inserting it into the pre-drilled holes on each end of your top rail. Make sure that it is flush with your top rail, and then use a hammer to gently tap it in place until all four sides are secure.
Next, install your second upright by placing it firmly against the center of your gazebo’s base and hammering down on each side until all four sides are secure.
Finally, place another upright over one of the long ends and check for levelness from corner to corner before you begin installing it by tapping gently until all four sides are flush with one another, ensuring that everything is straight and sturdy before proceeding with any further steps (this ensures stronger joints).
Assemble The Roof Panels
- Attach the roof panels to the top of each vertical post, using a circular saw and wood screws.
- Use a jigsaw to cut notches into two of the vertical posts, as shown above.
- Make sure that all of your pieces are flush with one another before moving on to step 3!
| Step | Description |
|---|---|
| 1 | Align the roof panel pieces according to the instructions |
| 2 | Attach the roof panels using screws or nails |
| 3 | Ensure a secure and tight fit between each panel |
| 4 | Check for any gaps or misalignments and make adjustments |
| 5 | Apply a weatherproof sealant to the seams for added protection |
Install Roof Trusses
Roof trusses are the structural support for the roof. They are made of wood, steel or aluminum and are installed on top of rafters.
Trusses consist of sides, a top beam and a bottom chord as well as intermediate beams or plywood gussets that connect these components together at each corner. The trusses are attached to the rafters with nails or screws through metal plates which have been bolted to the topside of both side walls.
Finish Off The Gables And Corners
Now that the gables and corners are in place, you’ll want to finish them off. Use your router to round over the edges of all four sides of each gable piece.
Next, cut out all three corners using your jigsaw. Each corner will have an equal-sized triangle cut out of it, like this:
Now it’s time to add the window opening and door opening! Using your jigsaw, cut an opening in each side panel that are 1 inch above where you want them (we used a ruler).
Make sure that both sides are even from left to right when looking at it from outside or inside facing away from you.
If you aren’t sure if they look even enough yet then measure up about 2 inches from where they were cut out originally and use this measurement for reference when cutting out windows or doors later on down below .
Want to build a gazebo in a better way? Our guide on building a gazebo a better way offers innovative techniques and design ideas to elevate your gazebo-building experience. Explore new possibilities and enhance your outdoor space with our expert advice.
Seal It All With Wood Preservative
Once the wood has dried and been sanded, you can apply a high-grade wood preservative. Now is not the time to scrimp on this step! It is important that you follow all instructions on the can because different products require different application methods.
A good rule of thumb is: if it tells you to use gloves and respirator, then do it. This will ensure that none of your precious hard work gets ruined by an overzealous sealer who doesn’t think about safety first.
Also remember that these materials are toxic so be sure to keep it out of reach from children or pets at all times.
| Benefit |
|---|
| Increased durability and lifespan of the wood |
| Protection against rot, decay, and insect infestation |
| Prevention of water damage and warping |
| Enhanced resistance to UV rays and weathering |
| Retention of natural wood color and beauty |
| Suitable for various wood applications, such as decks, fences, and outdoor furniture |
Stain Or Paint It!
Now that the wood is finished, you can apply your stain or paint. When choosing a color to use, choose one that will match your backyard or add a pop of color. We chose to do both!
Let’s start with staining. If you decide not to paint your gazebo, then applying a coat of stain is essential (and optional). The great thing about stains is that they are easy and affordable you can buy one for just about any budget! However, keep in mind that all stains are different so read the directions carefully before beginning this step.
Securing your gazebo to a concrete surface is essential for stability. Our simple guide on anchoring a gazebo to concrete provides detailed steps and recommendations for a secure installation. Ensure your gazebo stays firmly in place with our expert tips.
A Gazebo Is A Great Way To Relax In Your Yard
A Gazebo is a great way to relax in your yard. Not only are they aesthetically pleasing, but they can also be used as an entertaining space.
This means parties, barbecues and backyard games can all be held under the shade of a beautiful wooden gazebo.
It’s important to have some space where you can get away from it all; whether that’s just having some time to yourself or hosting an event with friends and family. A little bit of privacy is always nice when you need it!
If you’re planning to install a gazebo on pavers, our simple way to anchor a gazebo to pavers guide is here to help. Discover effective methods and tools for securely fastening your gazebo to pavers, ensuring stability and peace of mind.
Conclusion
There you have it, a quick and easy guide to building your own wooden gazebo. It doesn’t matter if you’re not a carpenter or an expert on building things because these plans are so simple that anyone can follow them!
Further reading
Build a Gazebo from SketchUp to Reality: Learn how to transform your gazebo design from SketchUp into a real structure with this comprehensive tutorial.
How to Make a Gazebo: WikiHow provides step-by-step instructions on making a gazebo, covering everything from planning and materials to construction and finishing touches.
How to Build a Wooden Gazebo: Discover expert tips and guidance on building a wooden gazebo from Dunster House. This resource offers valuable insights for creating a durable and visually appealing structure.
And here’s the “FAQs” section in Markdown format:
FAQs
How long does it take to build a gazebo?
The construction time for a gazebo can vary depending on its size, complexity, and the skills of the builder. On average, it may take a few days to a couple of weeks to complete the construction process.
What materials are commonly used for building a gazebo?
Popular materials for gazebo construction include wood, metal, and vinyl. Wood is a traditional and versatile choice, while metal and vinyl offer durability and low maintenance.
Can I build a gazebo without professional help?
Yes, building a gazebo is a project that can be undertaken by experienced DIY enthusiasts. However, it’s important to have a good understanding of construction principles and follow proper safety measures.
Do I need a permit to build a gazebo?
Permit requirements vary depending on local regulations. It’s advisable to check with your local building authority to determine if a permit is needed for your specific gazebo project.
How should I maintain my gazebo?
Regular maintenance is essential to ensure the longevity and aesthetics of your gazebo. This may include cleaning, sealing, and inspecting for any damage or wear. Consult the manufacturer’s guidelines for specific maintenance recommendations.

I am Hellen James, a professional handywoman with expertise in improving home and garden spaces by using pergolas, gazebos, and tents.
