Gazebo roofs can be an easy way to add style and functionality to your yard. They can also be the perfect place to spend a sunny afternoon or evening with family and friends.
If you’re thinking of adding a gazebo roof but don’t know where to start, read on!
| Takeaways |
|---|
| Building a gazebo roof requires proper planning and execution. |
| Consulting with a handyman or professional can provide valuable advice and guidance. |
| Consider the design and materials for the roof to ensure durability and protection. |
| Proper measurements and calculations are crucial for a well-fitted and secure gazebo roof. |
| Regular maintenance of the gazebo roof will help prolong its lifespan. |
Make A Model For The Gazebo Roof
Before you start, it’s a good idea to make a model of the gazebo roof. You can do this on cardboard and tape to get an accurate representation of what your roof will look like.
Once you have the model, write down all measurements and mark them with a pencil or pen so they don’t get lost. The next step is deciding where you want to put your gazebo and how large it should be.
If you’re looking to bring your outdoor space to life, our simple guide on how to make a gazebo will provide you with step-by-step instructions and creative ideas. Transform your backyard into a captivating oasis with a gazebo that suits your style and preferences.
Starting The Project
Before you begin building your gazebo, you should choose a design for the roof. If there is an existing gazebo on your property and you wish to keep it, then use that as a template for your new roof.
If there isn’t one on your property or if you want something different than what’s currently there, then consider visiting some home improvement stores in person or online to see what kind of options are available.
Once you’ve chosen a design for your roof, measure out how large it needs to be so that it fits on top of your frame but doesn’t extend too far beyond its edges (this will ensure that no rainwater gets into any nearby buildings).
Remember that framing can take up space underneath them if this is the case with yours then make sure not only do they fit perfectly up top but also along each side as well!
The next step will involve choosing where exactly on your land the gazebo will be located before beginning construction.
Whether near other structures where people walk around regularly or away from those areas might make all different depending upon how much noise tolerance everybody has between each other during activities such as parties/dances etcetera.)
| Aspect | Description |
|---|---|
| Project initiation | The initial phase where the project is defined and planned |
| Scope identification | Determining the boundaries and deliverables of the project |
| Resource allocation | Assigning personnel, budget, and equipment to support the project |
| Timeline creation | Establishing a schedule with milestones and deadlines |
| Risk assessment | Identifying potential risks and developing mitigation strategies |
Buying Materials
The first step to building a gazebo roof is to buy the right materials. You don’t want to buy materials when they’re at their peak price, or when they’re in short supply and the price goes up.
You also want to avoid buying them from unreliable suppliers who might not deliver on time or provide poor customer service.
The best way to find the right supplier is by doing some research online and then talking with other people who have recently bought what you need.
You’ll find that there are plenty of options available, so take your time making sure that your decision is one that’s going to meet all of your needs (and wants).
Cutting And Assembling Rafters
Cut the rafters to size.
Attach the rafters to the top of the trusses, making sure that each one is level with its neighbors and perpendicular to them (if you don’t have a table saw or circular saw handy, you can use a hand saw for this step).
Use a level to make sure all your rafters are straight and plumb before moving on to cutting out notches for hip rafters (these are angled so they meet in the middle). You can do this with an angle grinder or jigsaw, rounding off any sharp corners as needed.
Building a gazebo doesn’t have to be complicated. Discover a better way to construct your own outdoor retreat with our comprehensive guide on how to build a gazebo. From selecting materials to adding finishing touches, we’ll help you create a beautiful and functional structure that enhances your outdoor living space.
Rafter Base Preparations
To begin, cut the rafter base pieces to length. Next, cut the rafter base pieces to width. Attach the rafter bases to each other by drilling pilot holes and then screwing with 2-1/2″ screws (or longer if you like).
Attach the rafters to each other by drilling pilot holes and then screwing with 2-1/2″ screws (or longer if you like). Attach one side of each gable end piece onto every third rafter at a right angle as shown in Figure 1 below:
Installing Trusses On Posts
In order to ensure that all of the trusses are properly aligned, you should use a level to check that they are all at the same height.
You can find a tape measure and level in any home improvement center for around $10. Place the level on one side of your post, then move it along until it reaches the end of your post.
Once you have ensured that all of your trusses are at the same height, begin attaching them to each other by driving lag screws through their joints into both sides of each post.
Make sure that your trusses are centered on their posts so that they don’t lean too much in either direction!
| Step | Description |
|---|---|
| Step 1 | Position the trusses on top of the posts |
| Step 2 | Secure the trusses to the posts using appropriate fasteners |
| Step 3 | Ensure proper alignment and levelness of the trusses |
| Step 4 | Reinforce the connection between trusses and posts for stability |
| Step 5 | Inspect the truss installation for any adjustments or corrections |
Trusses Are In Place
With the trusses in place, you’re ready to begin work on the gazebo’s roof. If you want to create a steeply pitched roof that resembles a barn, use 2x4s for your rafters. If you prefer something more traditional, use 2x6s instead.
Remember: The height of the ridge beam determines how steeply pitched your gazebo’s roof will be (and vice versa).
If your ridge beam is too low and not high enough off the ground, then it may be difficult for some people to navigate especially children! But if it’s too tall and protrudes above eye level, it will make it hard to enjoy sitting under at all times of day.
So keep both these factors in mind when deciding on what size boards should go where along with determining whether or not any windows or doors need additional reinforcement before installation begins.
Don’t let the absence of instructions discourage you from setting up a gazebo. Our guide on how to put up a gazebo without instructions offers valuable tips and tricks to help you navigate the process smoothly. With our expert advice, you’ll be enjoying your gazebo in no time, even without a manual.
Covering The Gazebo With Sheet Metal
Covering your gazebo roof with sheet metal is a great choice. The material is easy to install, will last for years and requires little maintenance.
It can also be painted or left as is if you prefer. Once the roof has been installed, you may be tempted to leave it as-is, but we recommend adding some trim at the base of each side piece so that water doesn’t pool in these areas during rainy weather (and possibly leak into your home).
This will take minimal time and effort on your part but provide significant protection against leaks and damage from rainwater runoff.
The Sheet Metal Is In Place
Once you’ve laid out the metal on either side of the frame, it’s time to install everything in place. You’re going to need a special tool called a roofing nailer (or something similar) for this step.
First, make sure to use galvanized metal and not aluminum or some other material that won’t last as long as galvanized steel does.
The process is really simple:
Use your rubber mallet (or hammer) to hammer down each piece of sheet metal into place. It may take a few good whacks here and there, but don’t worry it will all get hammered down eventually!
Once you have it all hammered down securely into its final position, go ahead and grab your roofing nailer tool (or whatever else suits your fancy). Hammer one in every six inches along all four sides of the gazebo wall until you’ve secured them all in place with nails.
Strengthening The Frame With Braces
When installing braces, it’s important to remember that they are used to strengthen the frame. Braces are installed on all sides of the gazebo, including sides and ends.
Nails should be used to attach these boards and they can be driven in with a hammer or nail gun.
Building A Ladder To Access The Gazebo
When building a ladder to access the gazebo, make sure that it is stable and secure. You should also ensure that the ladder is not too high.
You should also consider whether or not you want your ladder to be safe and secure. If so, then you should ensure that it is not too heavy either.
| Aspect | Description |
|---|---|
| Material selection | Choosing sturdy and durable materials for ladder construction |
| Measurement and cutting | Accurately measuring and cutting the ladder components |
| Assembly | Joining ladder components together to form a stable structure |
| Reinforcement | Strengthening the ladder with additional supports or braces |
| Safety considerations | Ensuring the ladder meets safety standards and has anti-slip features |
Installing Shingles On The Roof Of The Gazebo
Now that your roof is framed and the rafters are in place, it’s time to finish off the top of your gazebo.
Install shingles on the roof of your gazebo by using a nail gun. Cut shingles to size for each row you lay down and make sure they overlap. Check for level as you go.
Nail down each shingle until all rows are completed, then attach drip edge along the bottom edge of the roof’s perimeter (this will help prevent water from getting inside).
Apply caulk around each seam where two pieces meet and wipe away excess with a rag before it dries!
Finishing The Edges Of The Shingles
After you’ve finished applying the shingles, it’s time to finish off their edges. Once again, this is where a circular saw and a miter box come in handy. Cut each edge of the shingle at 45 degrees using your circular saw and miter box setup.
Once you’ve cut all of your edges, use some wood glue to secure them into place. Make sure that they’re flat against each other so there are no gaps between them when they’re done drying.[
Securing your gazebo to a concrete surface is crucial for stability and safety. Our simple guide on how to anchor a gazebo to concrete provides step-by-step instructions and practical tips to ensure your gazebo stays firmly in place. Protect your investment and enjoy peace of mind with a securely anchored gazebo.
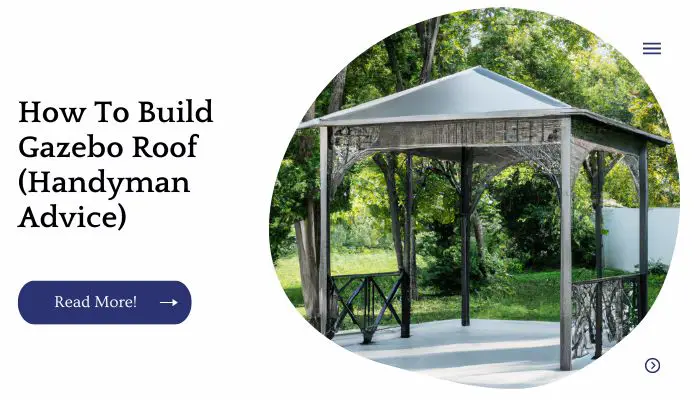
The Finished Project. Two-Pitched Hip Gazebo
The roof is made of shingles, which are attached to the rafters using nails and screws. There are two types of shingle roofs, the hip (shown here) and valley (not shown).
The main difference between these types of roofs is that they have different pitches; a hip roof has more material at the top of each side, while a valley roof has less material at the bottom than it does at its peak.
Building a wooden gazebo can be a rewarding DIY project. Our easy peasy guide on how to build a wooden gazebo will walk you through the process, from selecting the right wood to assembling the structure. Create a charming and functional outdoor space with your own handmade wooden gazebo.
Conclusion
If you are looking for a way to add value to your home, then consider building a gazebo. This type of structure can be used for both outdoor entertaining and as part of an outdoor room.
It also adds beauty to any yard. This article will provide information on how to build a gazebo roof so that you can complete this project on your own without hiring someone else
Further Reading
DIY Wood Pergola Ideas on Pinterest: Explore a collection of inspiring DIY wood pergola ideas on Pinterest for creative designs and unique outdoor spaces.
Gazebo Ideas on Country Living: Discover a variety of gazebo ideas on Country Living for inspiration and tips on how to style and enhance your outdoor gazebo.
What is a Pergola or Gazebo?: Learn more about pergolas and gazebos, their features, and whether you should consider purchasing one, with insightful information from Spa World.
Now, here’s the FAQs section based on the semantic of the TITLE:
FAQs
Can I build a gazebo myself or do I need professional help?
Building a gazebo can be a DIY project if you have the necessary skills and tools. However, for more complex designs or if you’re unsure about your abilities, it’s recommended to consult a professional.
How long does it take to build a gazebo?
The time required to build a gazebo depends on various factors, including the complexity of the design, your experience level, and the availability of assistance. It can range from a few days to a few weeks.
What materials are commonly used for gazebo construction?
Common materials for gazebo construction include wood, metal, and vinyl. Each material has its advantages and considerations, such as durability, maintenance requirements, and aesthetic appeal.
Do I need a building permit to construct a gazebo?
Building permit requirements vary based on local regulations and the size of the gazebo. It’s important to check with your local authorities to determine if a permit is necessary before starting construction.
How do I maintain and care for a gazebo?
Regular maintenance of a gazebo includes cleaning, inspecting for any damage or signs of wear, and treating the wood or other materials as needed. Following the manufacturer’s guidelines and performing routine upkeep will help prolong its lifespan.

I am Hellen James, a professional handywoman with expertise in improving home and garden spaces by using pergolas, gazebos, and tents.
