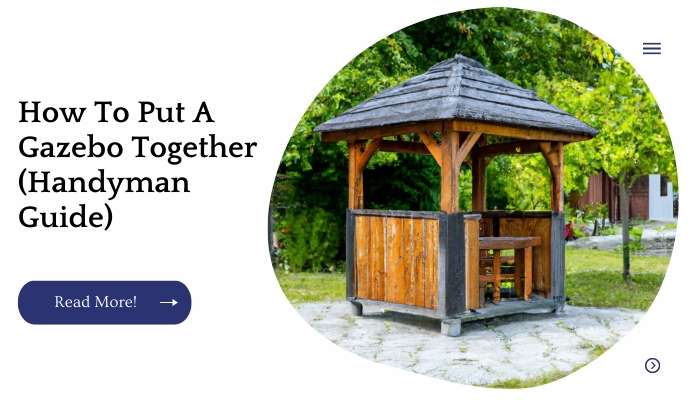
Building a gazebo is fun and rewarding, especially if you’re a DIY-er. It’s also an inexpensive way to add value to your home or backyard.
You’ll need some basic tools and materials before you begin construction, but the project itself is not complicated and it doesn’t require any advanced carpentry skills!
| Takeaways |
|---|
| Building a gazebo requires proper understanding and step-by-step guidance. |
| Anchoring the gazebo to a concrete foundation ensures stability and safety. |
| Securing the gazebo from wind is essential for its longevity. |
| Proper installation is crucial for a successful and hassle-free gazebo assembly. |
| Additional ways to secure the gazebo can enhance its stability and safety. |
Plan
There are a few considerations you’ll need to make before you begin putting your gazebo together. The first is size, because the size of your gazebo will dictate where you put it and what kind of flooring material (if any) will be needed.
Most people choose to install their gazebos close to their home or house, but there are other options such as in the backyard or even on top of a balcony or patio if it’s large enough.
If you’re planning on putting an electric heater in yours, it’s important that you plan an electrical installation early on so that they can be installed at the same time as your gazebo assembly process.
You’ll also want to think about what type of roofing materials are best suited for your climate: there are different types available depending on whether or not they allow rainwater through them; some types do while others don’t!
When putting a gazebo together, it’s essential to pay attention to the roof construction. Our handyman advice on building a gazebo roof provides valuable insights and tips to ensure a sturdy and aesthetically pleasing roof for your gazebo.
Tools and Materials
Tools and Materials Required:
- Hammer
- Nails (2x3s)
- Saw (circular saw or jig saw)
- Drill/driver, if you don’t already have one that can be used as a drill driver. Ask your local hardware store if they have any special offers on them or if they can recommend one that they feel is best for this purpose.
The Gazebo Kit comes with 1x4s pre-cut so all you need to do is hammer the nails into place! It also comes with screws for attaching the roof panels together which are optional but recommended depending on how strong of a surface the gazebo will be resting on
| Category | Examples |
|---|---|
| Tools | Screwdriver, Hammer, Saw, Drill |
| Fasteners | Screws, Nails, Bolts |
| Measuring Tools | Tape Measure, Level, Square |
| Safety Equipment | Gloves, Safety Glasses, Dust Mask |
| Power Tools | Circular Saw, Drill, Jigsaw |
| Lumber | 2x4s, Plywood, Beams |
| Hardware | Hinges, Latches, Brackets |
| Paint and Finishing | Paint Brushes, Sandpaper, Stain |
| Electrical | Wire, Electrical Tape, Wire Cutters |
| Plumbing | Pipe, Pipe Fittings, Plumber’s Tape |
| Adhesives | Wood Glue, Construction Adhesive |
| Roofing | Shingles, Tar Paper, Roofing Nails |
Location
To get the most out of your gazebo, you’ll want to place it in a sunny location that is not shaded by trees and structures.
The best way to do this is by creating an open space where the sun can touch all sides of your gazebo. You should also consider how much room you will need around the gazebo for walking and maintenance purposes.
To ensure the stability and safety of your gazebo, anchoring it to concrete is crucial. Learn how to securely anchor your gazebo with our simple guide on anchoring a gazebo to concrete, providing step-by-step instructions for a firm foundation.
Ground Preparation
Before you start to put your gazebo together, it’s important that you prepare the ground where it will be situated.
The first thing you should do is remove any debris from the area and make sure that it’s level. You should also dig out any roots or stones that could interfere with the construction of your gazebo, as well as compacting down any loose soil to create a solid base for your structure.
Before putting up your gazebo, check for drainage problems around its location and make sure this won’t cause water damage by taking appropriate action if necessary (e.g., installing drainpipes).
Layout
The first step in any gazebo assembly is making sure that you have all of the parts, and none are damaged.
The easiest way to ensure this is to lay out all of the wooden pieces on a tarp or plastic tablecloth and give them a once-over with your eyes.
Look over each piece for any cracks or chips in the wood, as well as loose screws or nuts and bolts; if anything looks amiss, take it back immediately (or at least before continuing further).
Next, take an inventory of what you need to do next:
- Marking where each leg will go
- Drawing a square around your gazebo design
Anchors
Anchors are required to support the gazebo, and they should be installed in concrete or gravel. It is important that anchors are installed at least 4 inches below ground level, and they should be installed at least 6 inches apart.
Don’t let strong winds ruin your gazebo experience. Discover proven ways to secure your gazebo from wind with our expert tips and techniques. Explore our guide on securing a gazebo from wind to ensure a stable and enjoyable outdoor space even in windy conditions.
Flooring
If you plan on using your gazebo for heavy-duty purposes, such as hosting a wedding or corporate event outdoors, then you will want to install a hardwood flooring.
This type of flooring is designed to withstand the elements and last for many years. If you are interested in building this type of flooring, you can easily find instructions online or at your local hardware store.
There are other types of floors that work well for gazebos as well. Many people choose to use linoleum because it is inexpensive and easy to clean up after parties or events have taken place there.
You can find linoleum in many colors and patterns which makes it easy for you to personalize your space even more!
You may also consider installing carpeting on top of the framing structure so that it covers all areas underneath where people might walk around while they enjoy their gazebos without having any worries about falling through holes created by missing boards/boards with large gaps between them due
| Type | Description |
|---|---|
| Hardwood | Natural wood flooring, durable and timeless |
| Laminate | Synthetic flooring resembling wood or stone |
| Vinyl | Resilient and water-resistant flooring |
| Tile | Ceramic or porcelain tiles for a variety of styles |
| Carpet | Soft and cozy flooring option |
| Bamboo | Eco-friendly and sustainable flooring |
| Cork | Natural and renewable flooring material |
| Linoleum | Environmentally friendly and versatile flooring |
| Engineered Wood | Composite wood flooring for added stability |
| Stone | Natural stone flooring, durable and elegant |
| Luxury Vinyl | High-quality vinyl flooring with realistic designs |
Frame
- Make sure that the frame is level and square. If it’s not, your gazebo won’t be either.
- Use a spirit level to ensure that every corner is at least 6 inches off the ground (or any height you prefer) so that water doesn’t pool on top of your gazebo.
- Find someone to help you lift each piece into place; this will save time since two people can put up one piece faster than one person can do it alone.
Roof Support Beams and Trusses
The next step is to install the support beams and trusses. Support beams are the horizontal pieces that run between each post, while trusses are the vertical pieces that support your roof.
A standard gazebo has four posts, so you need four beams and eight trusses (four on each side).
You can use wood or metal for these parts, as long as they’re made of something sturdy enough to hold up your roof; a good rule of thumb here is to make sure that every two feet there’s another beam or truss to connect everything together.
Roof Sheathing
Install the roof sheathing
The roof sheathing is a layer of wood that covers the roof. The best way to install it is with nails or screws (use either one), spaced every 8 inches across the length of the gazebo.
You can also use heavy duty staples if you prefer, but this may make it difficult for you to remove the sheathing in future years if necessary.
Assembling a gazebo can be a rewarding project, and proper installation is key. Check out our easy-to-follow guide on installing a gazebo to learn the necessary steps and ensure a successful and hassle-free gazebo assembly experience.
Roofing Shingles and Finishing Nails
Shingles should be installed in a shingle pattern with each shingle overlapping the next by at least 3 inches.
The first row of shingles should start with an end lap, which is an end piece that is laid down on the flat side of another row of shingles. The second row of shingles should start with no end lap; it will overlap only one-third to one-half of its thickness.
Finishing nails are used to fasten your roof deck to the frame posts and rafters. These nails should be spaced 6 inches apart, so that they do not interfere with drainage holes in your particular type of gazebo cover material (there may also be other stipulations).
Screen Kit Installation
- Install the screen to the frame
- Lay out your gazebo and check that all components are in good condition
- Take one of the eight-foot panels and attach its bottom edge to an inside corner of two legs using a screen clip (you can use clips on both sides of the leg if desired)
- Take another panel, align it with the top edge of a leg on an adjacent panel, and then secure it to this side as well using three or four more clips per panel
- Repeat this step for each remaining side (i.e., four sides total) until you have finished installing all eight panels
| Step | Description |
|---|---|
| 1. | Measure and mark the desired area for the screen kit installation. |
| 2. | Prepare the materials and tools needed, such as the screen kit, spline, and screen rolling tool. |
| 3. | Cut the screen material to fit the dimensions of the installation area. |
| 4. | Position the screen material over the frame and secure it in place. |
| 5. | Use the screen rolling tool to press the spline into the groove, securing the screen material tightly. |
| 6. | Trim any excess screen material and clean up the installation area. |
| 7. | Test the screen for proper functionality and adjust if necessary. |
| 8. | Enjoy your newly installed screen kit, providing insect protection and outdoor comfort. |
Upgrading Your Gazebo with Electrical Installation (Optional)
By upgrading your gazebo with an electrical installation, you can transform it into a fully functional outdoor entertainment area. It’s important to consider safety and wiring standards when working on electrical circuits.
Before beginning, make sure that the area where you will be installing your electrical system is well-ventilated and located at least eight feet away from any combustible materials such as wood or other flammable materials.
It’s also important to note which type of circuit breaker you need for your project. The United States requires that each circuit carry its own load, so if there are multiple items being powered by one circuit (such as lights), these must all be connected to different outlets in order for them all to work properly.
If this is not possible due to space constraints or lack of outlets near where they will be needed most often (like under each seat inside), then consider using heavy duty extension cords instead.
These may come with longer lengths between plugs compared with regular ones but they still only deliver power at roughly half strength just like normal extension cords do – so keep this limitation in mind when deciding whether or not they’re right for your needs!
Looking for additional ways to secure your gazebo? Our guide on easy ways to secure a gazebo provides practical tips and techniques that can further enhance the stability and safety of your gazebo, ensuring peace of mind while enjoying outdoor relaxation.
Conclusion
So, after we’ve gone through the entire process of planning, ordering and building your gazebo, you should be ready to have a truly beautiful piece of outdoor living space.
The best part about having a gazebo is that it can be used year-round! Just make sure to keep it clean and cleared of snow when winter rolls around so it doesn’t get damaged from exposure or water damage from melting ice/snow runoff.
Further Reading
Here are some additional resources for further reading on the topic of gazebos:
How to Build a Gazebo: A comprehensive guide with detailed instructions and illustrations for building your own gazebo from scratch.
Gazebo Cost Guide: This guide provides insights into the factors that affect the cost of building a gazebo, helping you estimate and plan your budget accordingly.
Zomg The Handyman: Explore this website for a wide range of handyman-related articles and guides, including tips and advice on gazebo construction and maintenance.
FAQs
Here are some frequently asked questions about gazebos:
How long does it take to build a gazebo?
The construction time for a gazebo can vary depending on its size, complexity, and the skills of the builders. Generally, it may take anywhere from a few days to a few weeks to complete the construction.
Do I need a permit to build a gazebo?
Permit requirements for gazebo construction vary by location. It’s essential to check with your local building department to determine if a permit is needed for your specific project.
Can I install a gazebo on a concrete patio?
Yes, a gazebo can be installed on a concrete patio. Proper anchoring methods, such as using concrete screws or anchors, should be employed to secure the gazebo to the patio.
How much does a gazebo cost?
The cost of a gazebo can vary significantly depending on factors such as size, materials, design complexity, and additional features. It’s best to consult with contractors or utilize online cost guides to get a more accurate estimate for your specific requirements.
How do I maintain and care for a gazebo?
To maintain a gazebo, regular cleaning, inspection, and upkeep are recommended. This includes cleaning the roof, removing debris, checking for any structural issues, and treating or sealing the wood or other materials as necessary. Following the manufacturer’s guidelines and using appropriate maintenance techniques will help prolong the lifespan of your gazebo.

I am Hellen James, a professional handywoman with expertise in improving home and garden spaces by using pergolas, gazebos, and tents.
