Pergolas are magnificent structures that elevate the beauty and utility of any outdoor space. Now, why choose Wayfair Pergola Kits, you might wonder? Let’s delve into the details.
| Key Takeaways |
|---|
| Understand the challenges associated with pergola installation. |
| Choosing the ideal location is crucial – consider sun exposure, ground level, and nearby structures. |
| Anchoring is not optional; it ensures stability and longevity of the pergola. |
| Customize your pergola to match your style – think about painting, lighting, and other enhancements. |
| Regular maintenance, including checks for pests and weather damage, is essential for the pergola’s durability. |
| Safety first! Use tools responsibly and always ensure ladder stability during installation. |
| A well-installed pergola can transform outdoor spaces and potentially boost property value. |
| Celebrate your installation achievement; it’s not just about the end product but the journey and memories. |
Why Choose Wayfair Pergola Kits?
Wayfair has carved a niche for itself in the home decor space, and their pergola kits are no exception. They’re designed for DIY enthusiasts, ensuring an effortless yet robust setup. Remember that summer evening when I was setting up my very first pergola? It was a Wayfair kit, and the ease of installation, even for a newbie like me back then, was commendable.
Exploring pergola ideas is essential for transforming your outdoor space into a haven of relaxation and beauty. With these stunning steel pergola ideas, you can create a captivating retreat that enhances your lifestyle.
Personal Experience with Wayfair Kits
I remember my first Wayfair pergola installation like it was yesterday. The sun was setting, and I was a bit nervous about getting it all done. But as I went step by step, guided by their clear instructions and well-designed components, I felt like a pro!
Table: Benefits of Wayfair Pergola Kits
| Benefit | Description |
| Easy Installation | Clear instructions and pre-drilled holes make the setup process straightforward. |
| Quality Materials | Crafted with durable wood or metal, ensuring longevity. |
| Aesthetically Pleasing | Modern designs that complement various outdoor decors. |
| Affordable | Competitive pricing without compromising on quality. |
Unpacking the Kit
Ah, the excitement of opening a new package! But with big kits like these, there’s a method to the madness. Let’s make sure we unpack our Wayfair Pergola Kit correctly and efficiently.
When you’re facing the challenge of securing your pergola to a concrete patio, fear not. Our comprehensive guide on anchoring a pergola to a concrete patio will equip you with the know-how to ensure a sturdy and reliable installation.
Initial Steps and Precautions
First and foremost, ensure you have a spacious area to lay out all the components. You don’t want to be rummaging through the box every time you need a piece. I once made the mistake of unpacking in a cramped space and spent more time looking for parts than assembling them! Learn from my blunders.
Table: Items Included in Wayfair Pergola Kit
| Component | Description |
| Beams | Horizontal bars that connect the vertical posts. |
| Posts | Vertical supports that hold the entire structure. |
| Slats | Thin, flat pieces placed on top, providing shade. |
| Hardware Kit | Includes screws, bolts, and other necessary items for assembly. |
| Instructions | Step-by-step guide on assembling the pergola. |
Common Installation Challenges
No assembly process is without its challenges. While Wayfair kits are user-friendly, there can be occasional hiccups. But hey, no worries! We’ve got solutions.
Misaligned Holes
This is a rare issue but can be a tad bit frustrating. If you find a hole that’s slightly off, don’t force the screw. A simple solution is to slightly enlarge the hole using a drill. Remember that time I tried to hammer a bolt into a misaligned hole? Bad idea. Drilling is the way to go.
Missing Components
On the off chance you’re missing a component, don’t panic. Wayfair’s customer service is top-notch. Give them a call, and they’ll sort it out. Pro tip: always check the component list before you start assembling. I once overlooked a missing beam, realized halfway, and had to pause my installation. A quick call to Wayfair had it sorted, but lesson learned!
Table: Troubleshooting Common Issues
| Issue | Solution |
| Misaligned Holes | Use a drill to slightly enlarge the hole. Avoid forcing the screw or bolt. |
| Missing Parts | Check the component list before starting. If something’s amiss, contact Wayfair customer service immediately. |
| Bent Component | While rare, if you find a bent piece, it’s best to get a replacement rather than trying to bend it back. |
Safety Measures during Installation
Safety first! Whenever you’re embarking on a DIY project, ensuring you’re safe is paramount. Let’s dive into some safety precautions you should adhere to.
Want to learn how to ensure your pergola is firmly anchored to your deck? Discover the answers and techniques you need in our guide on anchoring a pergola to a deck. A solid connection is key to your outdoor structure’s stability.
Personal Protective Equipment
Always wear safety goggles to protect your eyes from any flying debris, especially when drilling. A pair of sturdy gloves can also protect your hands. I’ve had my fair share of splinters, and trust me, you’d rather be safe with gloves on!
Safeguarding the Installation Site
Keep children and pets away from the installation site. You wouldn’t want a playful dog running into your half-assembled pergola. Also, always be aware of your surroundings. In my early days, I once tripped over a beam, spilling my entire toolbox. A clear, spacious area is your best friend.
Foundation and Anchoring
Building on a strong foundation is the key to a durable and sturdy pergola. With Wayfair kits, while the assembly might be straightforward, ensuring it’s anchored well is crucial.
Choosing the Right Foundation
Depending on where you’re planning to set up the pergola, your foundation choice might vary. If you’re placing it on a wooden deck, for instance, you’ll need to anchor it to the deck’s beams, not just the planks. Setting it up on concrete? Make sure to use the right masonry anchors. I remember a friend who anchored his pergola to his deck’s planks – let’s just say it wasn’t standing after a strong wind.
Anchoring Techniques and Tips
Proper anchoring ensures your pergola doesn’t become a safety hazard. Ensure you drill deep enough for stability. Also, always double-check the anchor points. On a personal note, after setting up a pergola on a concrete base, I always give it a good shake to test its stability. Better safe than sorry!
Table: Foundation Types and Their Benefits
| Foundation Type | Benefits |
| Concrete Slab | Sturdy, long-lasting, and offers high stability for larger pergolas. |
| Wood Deck | Provides a natural look. Ensure it’s anchored to beams for enhanced stability. |
| Grass/Soil | Natural look, but requires digging post holes and using concrete for stability. |
Assembling the Main Structure
Now, to the exciting part! The assembly process can be therapeutic if done right.
Beam and Post Installation
Start with the posts. Ensure they’re level and equidistant. Then, attach the beams. A helpful tip from my early days: always get a second pair of hands. Balancing a beam and screwing it in place is a tricky job solo. I once dropped a beam trying to be a one-man show, and the scratch on it still reminds me of my overconfidence!
Color fading can mar the beauty of your Costco pergola. But worry not, our proven tips to restore its beauty will guide you through effective methods to bring back its vibrant and appealing appearance
Attaching the Top Slats
Once your main structure is up, you can proceed with the slats. Space them evenly for a consistent look. Remember, they provide the shade, so think about how much sunlight you’d like peeking through.
Table: Assembly Order and Tips
| Assembly Step | Tips and Tricks |
| Post Setup | Use a level to ensure they’re straight. If on soil, dig post holes and set them in concrete for added stability. |
| Beams | Always get help. Two people make this process smoother and safer. |
| Top Slats | Space them evenly. Consider the shade you want when deciding on the spacing. |
Adjusting for Weather Conditions
Weather can be unpredictable. Your pergola should be prepared for it all – be it strong winds, heavy rains, or even snow.
Windy Climate Adjustments
In areas prone to strong winds, ensure the pergola is anchored deeply. Additionally, consider adding side panels or windbreaks. I had installed a pergola near the coast once, and while the view was breathtaking, the winds were challenging. Side panels were a lifesaver!
Precautions for Rainy and Snowy Climates
Ensure the top slats are angled to guide rainwater away, preventing water pooling. For snowy areas, it’s essential to periodically remove snow from the top to avoid structural damage. I’ve seen a pergola collapse under the weight of snow – not a pretty sight!
Personal Touches and Customization
One of the joys of setting up your own pergola is the ability to add your unique touch to it. Here’s how you can elevate your Wayfair pergola to reflect your style and taste.
Painting and Finishing
While Wayfair pergolas come with a lovely finish, adding a splash of color can enhance its look. Whether you go for a natural wood stain or a vibrant hue, ensure the paint is weather-resistant. A personal anecdote: I once painted a pergola in a beautiful teal, only to see it fade in a few months because I skipped the weather-resistant part. Lesson learned!
Experiencing sagging issues with your Sunbrella canopy? Don’t let it ruin your outdoor enjoyment. Check out our top troubleshooting methods to rectify the problem and keep your outdoor space shaded and comfortable.
Adding Accessories
From hanging planters to fairy lights, the customization possibilities are endless. My personal favorite is adding a fabric canopy for added shade and a dash of elegance.
Table: Popular Pergola Customization Options
| Accessory | Description |
| Fairy Lights | Illuminate your pergola during the evenings, adding a magical ambiance. |
| Hanging Planters | Infuse a touch of greenery and natural beauty. |
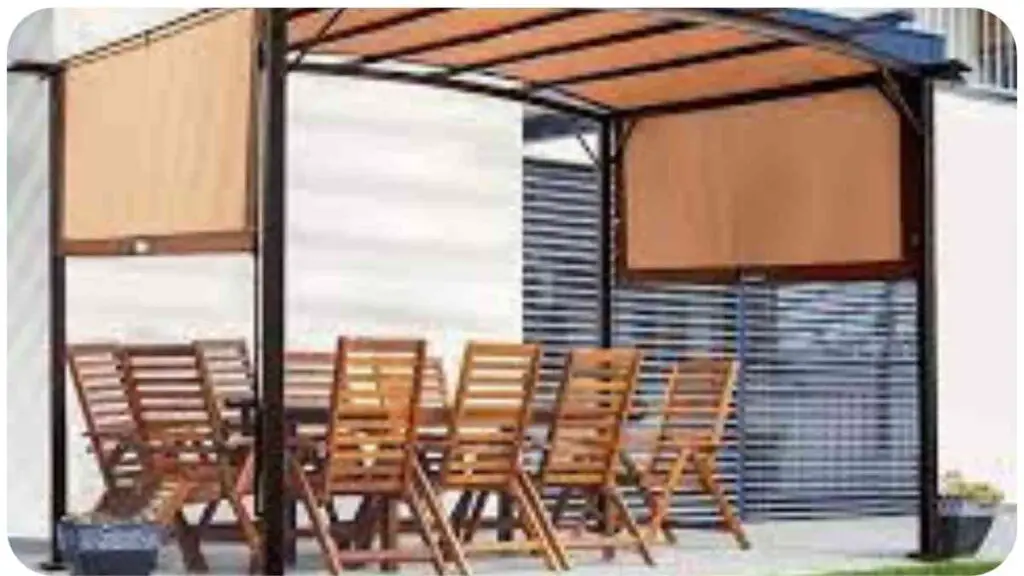
| Fabric Canopy | Enhance shade and offer a sophisticated look. |
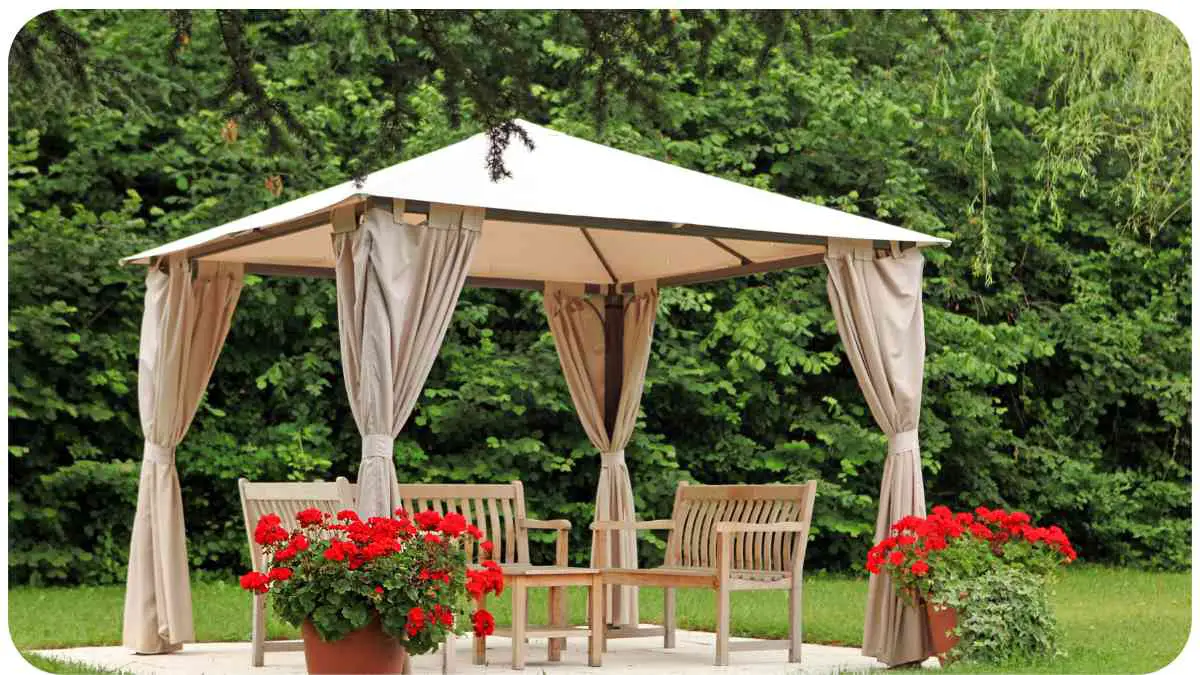
| Curtains or Drapes | Add privacy and shield against the elements, while also elevating the overall aesthetic. |
Maintenance Tips for Longevity
Ensuring your pergola stands the test of time is crucial. Regular maintenance goes a long way in ensuring its longevity.
Routine Checks
Monthly checks can help identify potential problems. Look out for loose screws or bolts and tighten them. Also, inspect the wood for any signs of rot, especially if it’s been a particularly wet season.
Cleaning and Upkeep
A simple annual clean with a wood-safe detergent can do wonders. For those who live in areas prone to mold or mildew, consider a mildew-resistant finish. A client of mine neglected their pergola, and in just two years, mildew had taken over. After a thorough cleaning and a new coat of finish, it was as good as new.
Table: Maintenance Schedule and Checklist
| Maintenance Task | Frequency | Tips |
| Tighten Screws/Bolts | Monthly | Use the right tools to avoid stripping the screws. |
| Check for Wood Rot | Quarterly | Replace affected sections promptly to avoid structural issues. |
| Clean | Annually | Use a gentle, wood-safe detergent. |
| Repaint/Refinish | Every 2 years | Ensure the paint or finish used is weather-resistant. |
Avoiding Common Mistakes
Even seasoned DIY enthusiasts can make mistakes. Here are some to watch out for and how to rectify them.
Mistakes I’ve Encountered
From misaligned beams to over-tightening screws, I’ve made my share of blunders. But each mistake was a lesson. One memorable incident was when I failed to anchor a pergola adequately, and a storm left it leaning precariously. Thankfully, no one was hurt, and it was a potent reminder of the importance of secure anchoring.
How to Rectify Them
Mistakes happen, but rectification is essential. If you notice a misalignment, it’s better to correct it early on than to forge ahead. If unsure, consult the manual or even consider getting expert advice.
After-Installation Care
Once your pergola is up and shining, you might think the job is done. But the journey has just begun! Ensuring its pristine condition requires a bit of effort.
Sheltering from Extreme Elements
While pergolas are designed to withstand outdoor conditions, shielding them during extreme weather can enhance their longevity. For instance, if a heavy storm is forecasted, adding temporary side panels can protect it. I recall an incident when a hailstorm damaged a newly installed pergola. Since then, I always advise on a proactive approach.
Treating for Pests
Wooden structures can sometimes attract pests. Regularly checking for signs of wood-eating insects and treating the wood can prevent potential damage. Once, I had to replace an entire post because termites had weakened it – an ounce of prevention is indeed worth a pound of cure.
Table: After-Installation Care Tips
| Care Aspect | Tips |
| Weather Protection | Use temporary side panels or canopies during harsh conditions. |
| Pest Control | Look for signs of termites or other wood-boring insects. Treat the wood with repellents if necessary. |
Benefits of a Well-Installed Pergola
A pergola is not just an architectural piece; it’s a lifestyle enhancer. Let’s delve into the perks of a job well done.
Enhancing Outdoor Space
A properly installed pergola can transform your outdoor space, making it the perfect spot for relaxation or entertaining. I’ve had countless evenings under my pergola, just soaking in the serenity.
Increasing Property Value
Believe it or not, a well-maintained pergola can boost your property’s value. Potential buyers often see it as a plus, envisioning themselves enjoying under it.
Table: Benefits of a Pergola
| Benefit | Description |
| Enhanced Outdoor Living | Provides a structured area for relaxation or gatherings. |
| Boosted Property Value | Seen as a value-add for potential homebuyers. |
Wrapping it Up – Finishing Touches
Every project deserves a finishing touch. These final steps can truly make your pergola shine.
Landscaping Around the Pergola
Consider planting vines that climb, adding a touch of green to the structure. Or perhaps add some potted plants around. A pergola I once installed for a client was surrounded by beautiful rose bushes, making it a picture-perfect spot.
Adding Furniture
From swings to comfy outdoor sofas, the choices are endless. Choose furniture that complements your pergola’s style.
Safety Precautions
As with any home improvement project, safety should be paramount. Working on pergolas is no exception. Let’s go through the safety measures that have served me well over the years.
Tool Safety
Always handle tools with care. This may seem obvious, but in the rush of excitement, it’s easy to overlook. Ensure they’re kept away from children and are stored safely when not in use. I can’t count the number of times I’ve seen minor accidents just because a tool was left carelessly on the ground.
Ladder Safety
When assembling the higher parts of your pergola, you’ll likely need a ladder. Always check its stability before climbing and never overreach when you’re on it. A personal tip: always have someone spotting you when on a ladder. It’s saved me from potential falls more times than I can remember.
Table: Safety Precautions during Installation
| Safety Aspect | Precaution |
| Tool Handling | Keep them out of children’s reach and store them securely after use. |
| Ladder Use | Ensure its stability, don’t overreach, and preferably have someone with you for added safety. |
The Joy of Completion
After all the hard work, the satisfaction of seeing a completed pergola is unparalleled. The journey, however, isn’t always smooth, but it’s always worth it.
Admiring Your Work
Take a moment to step back and admire your handiwork. It’s not just about the physical structure but also the memories and experiences created during the process. I’ve always found this moment to be a mix of relief, pride, and anticipation of the good times to come.
Celebrate the New Space
Host a little get-together, a tea, or even a dinner under your new pergola. Celebrate your accomplishment and share the joy with loved ones. After one of my most challenging installations, I threw a small party, and the joy of friends complimenting the pergola was the cherry on top.
Table: Post-Completion Activities
| Activity | Description |
| Photography | Capture the beauty of your new installation. Share it on social media or with friends. |
| Host a Gathering | Celebrate your hard work by inviting friends or family for an evening under the pergola. |
Conclusion
Building and installing a Wayfair pergola can be a rewarding experience. With the right knowledge, a bit of patience, and a sprinkle of personal touches, you can overcome common challenges and have a structure that not only beautifies your space but also adds value to your home.
Remember, it’s not just about following instructions; it’s about infusing the project with your personality and creating a space that reflects you. So, here’s to many sunny afternoons and starry nights under your Wayfair pergola! Cheers!
Further Reading
For those eager to delve deeper into the world of pergolas and their installation, I’ve compiled a list of resources that you might find helpful:
Wayfair’s Guide on Pergola Installation
An extensive guide that covers the intricacies of pergola installation. Perfect for those looking for a step-by-step manual.
Wayfair’s Collection of Pergolas
Explore a vast collection of pergolas available on Wayfair. Whether you’re looking for design inspiration or ready to make a purchase, this is your go-to destination.
Wooden Pergola Kits on Wayfair
A focused look at wooden pergola kits available on Wayfair. If wood is your material of choice, you’ll find this resource invaluable.
FAQs
Based on the article’s content, here are some commonly asked questions and their answers:
What are the main challenges in installing a Wayfair pergola?
The common challenges include picking the right location, anchoring the pergola securely, understanding the assembly instructions, and customizing it to suit personal preferences.
Can I customize my Wayfair pergola?
Absolutely! From painting and finishing to adding accessories like fairy lights and fabric canopies, there are numerous ways to add a personal touch to your pergola.
How often should I maintain my pergola?
It’s advisable to conduct routine checks monthly, especially focusing on tightening any loose screws or bolts. An annual cleaning with a wood-safe detergent can help maintain its appearance, and repainting or refinishing every 2 years is recommended.
Are there any safety precautions to consider during installation?
Yes, always handle tools with care, and when using a ladder, ensure its stability and preferably have someone to spot you. Also, store tools safely away from children’s reach.
Is it necessary to anchor the pergola?
Absolutely! Proper anchoring is crucial to ensure the stability and safety of the pergola, especially in areas prone to strong winds or storms.

I am Hellen James, a professional handywoman with expertise in improving home and garden spaces by using pergolas, gazebos, and tents.
