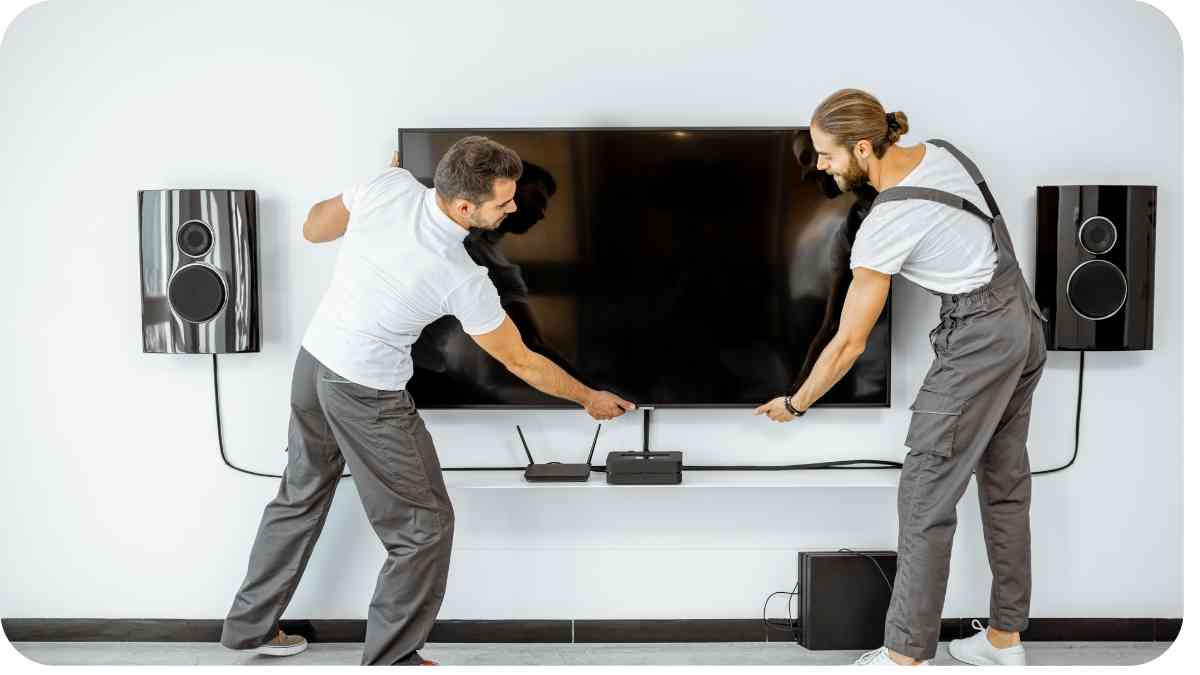
Mounting a TV on an angled wall can be a challenging yet rewarding endeavor. Not only does it save space and enhance the aesthetics of your room, but it also provides a better viewing experience.
However, this task requires careful planning and execution to ensure safety and optimal performance. In this guide, we’ll explore everything you need to know about mounting TVs on angled walls, from understanding the unique challenges to selecting the right tools and materials, and finally, the step-by-step mounting process.
| Takeaways |
|---|
| Mounting a TV on a slanted ceiling requires careful planning and consideration of the unique challenges posed by the angled surface. |
| Choose a TV mounting bracket specifically designed for angled surfaces to ensure a secure and stable installation. |
| Properly measure and assess the angle of the ceiling to determine the best positioning for optimal viewing comfort. |
| Use appropriate tools and hardware, including a stud finder, drill, level, and mounting hardware, for a successful installation. |
| Consider cable management solutions to hide and organize cables and wires behind the TV for a clean and professional-looking setup. |
| Experiment with tilt and swivel adjustments to find the perfect viewing angle that suits your seating arrangement and room layout. |
2. Understanding Angled Walls
What are Angled Walls?
Angled walls, also known as sloped or vaulted walls, are architectural features commonly found in modern homes and apartments. They add character and visual interest to a space but can present challenges when it comes to mounting TVs or shelves. These walls slope upward or downward, making it difficult to achieve a flat mounting surface.
Installing a pergola can be daunting, but fear not! Wayfair Pergola Kits offer solutions to common challenges, making the process smoother and more enjoyable for DIY enthusiasts.
| Challenge | Description |
|---|---|
| Uneven Surface | Angled walls are not flat, which can affect the stability of the TV mount. |
| Limited Space | Mounting a TV on an angled wall may require careful placement to avoid obstructions or interference with furniture. |
Challenges of Mounting TVs on Angled Walls
Mounting a TV on an angled wall poses several challenges, including:
- Limited Mounting Surface: Unlike flat walls, angled walls offer less surface area for mounting brackets to secure the TV.
- Uneven Surface: Angled walls are not perfectly flat, making it difficult to achieve a level installation.
- Accessibility: Accessing the rear of the TV for cable management and maintenance can be more challenging on angled walls.
3. Assessing Your Wall and TV
Wall Angle Measurement
Before you begin the mounting process, it’s essential to measure the angle of your wall accurately. This will help you determine the type of mount and adjustments needed for proper installation. You can use a digital angle finder or a protractor to measure the angle accurately.
| Tool | Description |
|---|---|
| Digital Angle Finder | A digital tool that accurately measures angles, ideal for determining the slope of angled walls. |
| Protractor | A simple tool that can be used to measure angles manually, but may not be as precise as a digital angle finder. |
TV Size and Weight Considerations
When mounting a TV on an angled wall, consider the size and weight of your TV. Larger TVs may require sturdier mounts and additional support to ensure stability. Check the manufacturer’s specifications for your TV’s mounting requirements and weight capacity.
When mounting your TV, ensure stability with reliable anchors. Read Drywall Anchors Reviews to select the best ones for your setup, ensuring your TV stays securely on the wall.
| Consideration | Description |
|---|---|
| TV Size | Measure the diagonal size of your TV to ensure compatibility with the chosen mount. |
| Weight Capacity | Check the maximum weight capacity of the mount to ensure it can support your TV securely. |
4. Tools and Materials Needed
Essential Tools
Gathering the right tools is crucial for a successful TV mounting project on angled walls. Here are some essential tools you’ll need:
- Stud Finder: To locate studs within the angled wall for secure mounting.
- Drill: For drilling holes for mounting hardware.
- Level: To ensure the mount and TV are properly aligned.
- Screwdriver: For attaching mounting hardware and securing the TV.
- Measuring Tape: For accurate measurements of the wall and TV.
- Pencil: For marking drill points and guidelines on the wall.
Mounting Hardware
In addition to tools, you’ll need the following mounting hardware:
- Mounting Bracket: Choose a bracket suitable for angled walls, preferably with tilt and swivel features for flexibility.
- Bolts and Screws: Select appropriate bolts and screws for attaching the mounting bracket to the wall studs.
- Wall Anchors: If studs are not available or properly aligned, use wall anchors for added support.
- Cable Management Kit: Optional but recommended for organizing and concealing cables behind the TV.
Adding an electrical outlet for your wall-mounted TV is crucial. Follow our Step-by-Step Instructions to ensure safe and convenient power access, enhancing your viewing experience without hassle or risk.
5. Choosing the Right Mount
Types of TV Mounts
There are several types of TV mounts available, each with its advantages and considerations:
- Fixed Mounts: These mounts hold the TV flush against the wall, ideal for rooms where tilt or swivel functionality is not needed.
- Tilting Mounts: Tilting mounts allow you to adjust the vertical angle of the TV, making them suitable for angled walls where the viewing angle may need adjustment.
- Full-Motion Mounts: Also known as articulating mounts, these offer the most flexibility, allowing you to tilt, swivel, and extend the TV away from the wall. Ideal for larger rooms or multiple viewing areas.
Best Mounts for Angled Walls
When choosing a mount for angled walls, look for the following features:
- Adjustability: Opt for mounts with tilt and swivel functionality to accommodate the slope of the wall and achieve the desired viewing angle.
- Compatibility: Ensure the mount is compatible with both your TV size and the angle of your wall.
- Sturdiness: Select mounts made from durable materials capable of supporting the weight of your TV securely.
Ensure to research and read customer reviews to find a mount that suits your specific needs and budget.
6. Preparing Your Workspace
Clearing the Area
Before you start mounting your TV, clear the area around the wall to create a workspace free from obstructions. Remove furniture, decorations, and other items that may interfere with the installation process.
Gathering Necessary Equipment
Gather all the tools and materials you’ll need for the installation, including the mounting bracket, hardware, and tools listed earlier. Having everything readily available will streamline the process and prevent unnecessary delays.
By preparing your workspace and gathering the necessary equipment, you’ll set yourself up for a smooth and successful TV mounting experience on angled walls. In the next section, we’ll dive into the step-by-step mounting process.
Transform your gazebo into an enchanting space with LED Lighting. Create a captivating ambiance for evening gatherings or quiet relaxation, adding warmth and charm to your outdoor oasis.
7. Mounting Process
Marking Drill Points
Once you’ve cleared the area and gathered your equipment, it’s time to mark the drill points on the wall. Follow these steps:
- Locate Wall Studs: Use a stud finder to locate the studs within the angled wall. Mark the stud locations with a pencil.
- Position Mounting Bracket: Hold the mounting bracket against the wall at the desired height and angle. Use a level to ensure it’s straight and aligned with the studs.
- Mark Drill Points: With the bracket in place, mark the drill points on the wall through the bracket’s mounting holes using a pencil. These points will indicate where to drill for the mounting hardware.
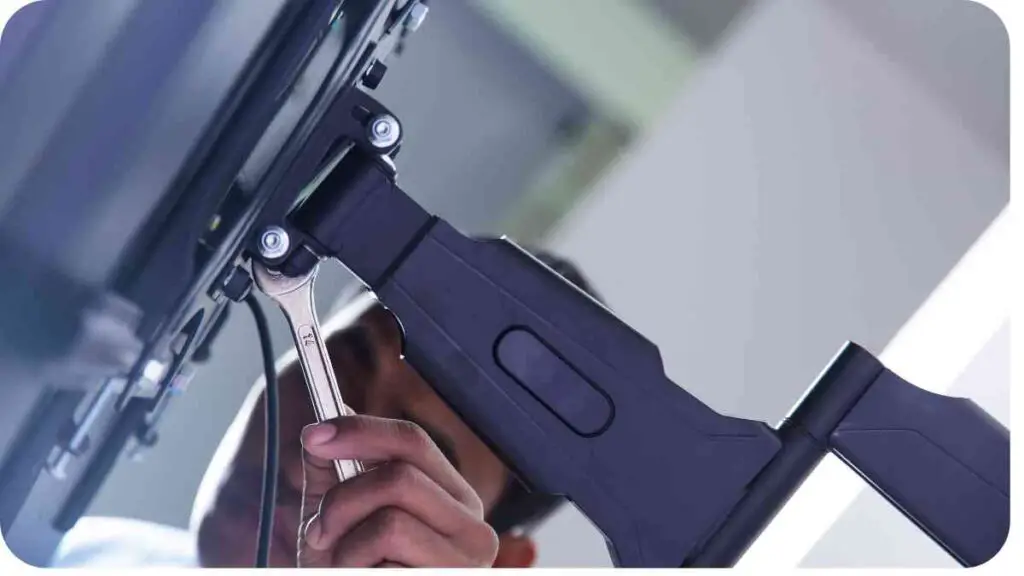
Installing Mounting Bracket
With the drill points marked, proceed with installing the mounting bracket:
- Drill Pilot Holes: Using a drill bit appropriate for the mounting hardware, drill pilot holes at the marked points on the wall.
- Attach Bracket to Wall: Secure the mounting bracket to the wall using screws or bolts, ensuring they penetrate the studs for maximum stability.
- Check Alignment: Double-check the alignment of the bracket using a level to ensure it’s straight and securely attached to the wall.
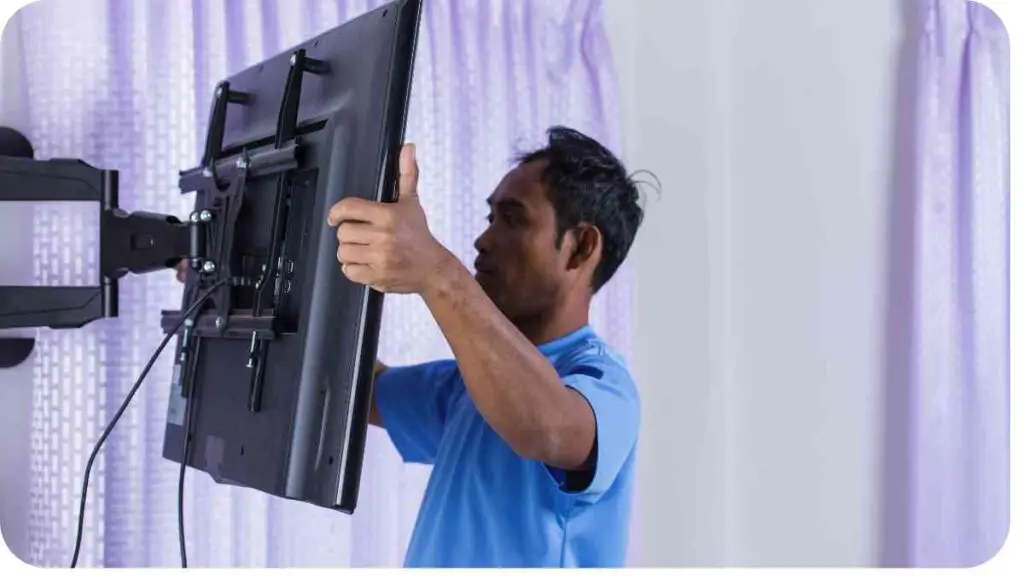
Attaching the TV
Once the mounting bracket is securely in place, it’s time to attach the TV:
- Secure Mounting Plate: Depending on the type of mount, attach the mounting plate or arms to the back of the TV using the provided hardware.
- Lift and Hook: With the help of a friend or family member, carefully lift the TV and hook it onto the mounting bracket.
- Secure TV: Once the TV is in position, secure it to the bracket according to the manufacturer’s instructions, usually with screws or locking mechanisms.
Congratulations! You’ve successfully mounted your TV on an angled wall. But before you kick back and enjoy your favorite shows, let’s explore how to adjust for the optimal viewing angle.
8. Adjusting for Viewing Angle
Tilt and Swivel Features
Most modern TV mounts come with tilt and swivel features, allowing you to adjust the viewing angle for optimal comfort and visibility. Here’s how to make adjustments:
- Tilt Adjustment: Use the tilt feature to angle the TV up or down to reduce glare and achieve a better viewing angle from different seating positions.
- Swivel Adjustment: If your mount has swivel capabilities, you can rotate the TV left or right to accommodate different viewing areas in the room.
Upgrade your living room aesthetic with sleek and stylish Wall Mounted Fireplaces. Enhance coziness and modernity simultaneously, transforming your space into a contemporary retreat for relaxation and entertainment.
Optimizing Viewing Experience
Experiment with different tilt and swivel settings to find the optimal viewing angle for your space. Consider factors such as seating arrangement, lighting conditions, and the location of windows or other light sources. Remember, the goal is to create a comfortable viewing experience for everyone in the room.
Adjusting the tilt and swivel of your TV mount ensures that everyone can enjoy a clear, glare-free view of the screen, whether they’re sitting directly in front of the TV or off to the side. Next, let’s cover some essential safety tips to keep in mind during the mounting process.
9. Safety Tips
Proper Lifting Techniques
When lifting and mounting a TV, always use proper lifting techniques to prevent injury:
- Use Assistance: Enlist the help of a friend or family member to assist with lifting and positioning the TV.
- Lift with Your Legs: Bend your knees and lift with your legs, keeping your back straight to avoid straining your back muscles.
- Take Breaks: If the TV is heavy or awkward to lift, take frequent breaks to prevent fatigue and strain.
Securing Cables and Wires
After mounting the TV, take care to secure cables and wires to prevent tripping hazards and maintain a clean, organized appearance:
- Use Cable Clips: Secure cables along the wall or mounting bracket using cable clips or zip ties to prevent them from dangling.
- Conceal Cables: If possible, conceal cables behind furniture or use cable management solutions to hide them from view.
By following these safety tips, you can ensure a smooth and injury-free TV mounting experience. However, there are some common mistakes to watch out for, which we’ll cover next.
10. Common Mistakes to Avoid
Overlooking Wall Studs
One of the most critical steps in mounting a TV on any wall, especially angled walls, is ensuring that the mounting hardware is securely anchored to wall studs. Avoid the mistake of overlooking or improperly locating studs, as this can compromise the stability of the mount and pose a safety risk.
Incorrect Mount Placement
Mounting your TV too high or too low on the angled wall can result in discomfort and strain while viewing. Additionally, placing the mount too close to the ceiling or floor may limit the tilt and swivel capabilities of the mount. Take the time to measure and position the mount at an appropriate height for optimal viewing comfort.
Insufficient Weight Capacity
Choosing a mount with insufficient weight capacity for your TV can lead to instability and potential damage to both the TV and the wall. Always check the manufacturer’s specifications for the mount’s weight capacity and ensure it can safely support the weight of your TV before installation.
Inadequate Cable Management
Neglecting to properly manage and conceal cables and wires behind the mounted TV can detract from the overall aesthetics of the setup and create potential safety hazards. Invest in cable management solutions, such as cable clips or wall-mounted cable channels, to keep cables tidy and organized.
By avoiding these common mistakes, you can ensure a successful and safe TV mounting experience on angled walls. Now, let’s address some frequently asked questions to provide further clarity and guidance.
11. FAQs
Can any TV be mounted on an angled wall?
While most TVs can be mounted on angled walls, it’s essential to consider the weight and size of the TV, as well as the angle of the wall. Choose a mounting bracket and hardware suitable for both your TV and the specific angle of your wall.
How do I find the studs in an angled wall?
Use a stud finder to locate studs within the angled wall before drilling for mounting hardware. Mark the stud locations and ensure the mounting bracket is securely anchored to the studs for maximum stability.
What if my TV is too heavy for the mount?
If your TV exceeds the weight capacity of the chosen mount, consider upgrading to a heavier-duty mount capable of supporting the weight of your TV. Avoid compromising on safety by using a mount with insufficient weight capacity.
By addressing these frequently asked questions, you can feel more confident and informed about the TV mounting process on angled walls. In conclusion, let’s recap the key points covered in this guide.
12. Conclusion
Mounting a TV on an angled wall presents unique challenges, but with the right tools, knowledge, and preparation, it’s entirely achievable. By understanding the characteristics of angled walls, assessing your wall and TV, choosing the right mount, and following a systematic mounting process, you can enjoy the benefits of a space-saving and aesthetically pleasing TV setup.
Remember to prioritize safety by properly anchoring the mounting hardware to wall studs, using appropriate lifting techniques, and securing cables and wires to prevent accidents. Avoid common mistakes such as overlooking wall studs, incorrect mount placement, and inadequate weight capacity, to ensure a secure and stable installation.
With careful attention to detail and adherence to best practices, you can create a comfortable and immersive viewing experience for yourself and your guests. Whether you’re enjoying movie nights with family or streaming your favorite shows, a well-mounted TV on an angled wall enhances the ambiance and functionality of any room.
For additional guidance or troubleshooting, consult reputable resources, manufacturer instructions, or seek assistance from professionals. With patience and perseverance, you can successfully mount your TV on an angled wall and elevate your home entertainment setup to new heights.
Thank you for joining us on this journey to master the art of mounting TVs on angled walls. We hope this guide has empowered you with the knowledge and confidence to tackle this project with ease and efficiency. Happy mounting!
Further Reading
- Ultimate Guide: How to Mount a TV on a Slanted Ceiling: This comprehensive guide provides detailed instructions and tips for mounting a TV on a slanted ceiling, covering important considerations and step-by-step procedures.
- Angle Surface Bracket: Explore this website for innovative TV mounting bracket sets designed specifically for angled surfaces. Find the perfect solution for securely mounting your TV on angled walls or ceilings.
- Vogel’s Angle & Swivel TV Mount: Vogel’s offers a range of angle and swivel TV mounts designed to enhance your viewing experience. Discover versatile mounting solutions that provide flexibility and adjustability for optimal viewing angles.
FAQs
Can I use any TV mount for an angled wall?
Yes, but it’s essential to choose a mount compatible with both the angle of your wall and the weight of your TV. Look for mounts specifically designed for angled surfaces for the best results.
How do I determine the right height to mount my TV on an angled wall?
Consider factors such as seating arrangement and eye level to determine the ideal height for mounting your TV. Generally, the center of the TV screen should be at eye level when seated for comfortable viewing.
Do I need special tools for mounting a TV on an angled wall?
While basic tools like a stud finder, drill, and level are essential, you may also need additional tools depending on the complexity of the installation. Consider investing in a digital angle finder for accurate measurements on angled walls.
How can I hide cables and wires when mounting a TV on an angled wall?
You can use cable management solutions such as cable clips, wall-mounted channels, or in-wall cable concealment kits to hide cables and wires behind the TV and along the wall, creating a clean and organized appearance.
Is it possible to adjust the viewing angle of the TV after it’s been mounted on an angled wall?
Yes, most TV mounts come with tilt and swivel features that allow you to adjust the viewing angle even after the TV has been mounted. Experiment with different settings to find the optimal viewing position for your space.

I am Hellen James, a professional handywoman with expertise in improving home and garden spaces by using pergolas, gazebos, and tents.
