If you’re looking to grow your own food or plants, a portable greenhouse is a great option. They’re relatively inexpensive and easy to assemble, plus they can be moved around as needed.
But how do you get started? In this article, we’ll outline every step involved in putting together your very own portable greenhouse so that you can start enjoying all the benefits of gardening in an instant—without having to take out a second mortgage first!
| Takeaways |
|---|
| Assembling a portable greenhouse requires careful planning and organization. |
| Start by preparing the site and ensuring a level foundation for stability. |
| Follow the manufacturer’s instructions for assembling the frame and connecting the components. |
| Install the cover or panels, ensuring a tight and secure fit. |
| Consider adding additional features such as shelves or ventilation systems based on your needs. |
| Regular maintenance and upkeep are essential to keep your portable greenhouse in optimal condition. |
| Properly anchoring the greenhouse and protecting it from harsh weather conditions is crucial. |
| Utilize resources such as instructional videos or manuals for step-by-step guidance. |
| Seek assistance if needed to ensure a safe and successful assembly process. |
Start With The Foundation
When it comes to assembling your portable greenhouse, you’re going to need a solid foundation.
Make sure that the ground is level before laying down the foundation. If your site isn’t flat, then make sure that you have some kind of leveling device handy so that you can get your greenhouse in the right position.
Also make sure that the foundation is firm and stable when it’s laid out. No matter how well-constructed or sturdy your portable greenhouse may be, if its foundation isn’t solid, then it won’t be able to hold up under pressure from wind or rainstorms (or even high winds).
When it comes to fixing your EZ-Up canopy, our experts have got you covered! Learn valuable pro tips and techniques for fixing your canopy to ensure it stands strong in any weather condition.
Set Up The Frame Next
Set up the frame next. From here on out, you will be constructing the greenhouse in a series of steps as outlined in your instructions. The first step is to build the frame of your greenhouse so that it is level and square (that means all four corners are 90 degrees). You can use a square or tape measure for this task.
Make sure each corner of your frame is 90 degrees! This is important because if one side isn’t at 90 degrees, then everything else won’t be either! If there’s a problem with one corner, check to make sure each edge meets at exactly 90 degrees before continuing with assembly.
Leveling: Use spirit levels along every horizontal surface inside your greenhouse to ensure it’s perfectly level—this process will ensure your plants thrive as well as prevent any water drainage problems due to uneven surfaces over time.”
Secure The Frame
You can secure a greenhouse frame by using metal connectors. We recommend you use at least one connector per corner and a third connector in the middle of each side or end.
If you’re creating a simple, rectangular greenhouse with four sides, we suggest using two connectors per corner and three connectors in the middle of each wall.
Is your canopy top in need of reinforcement? Discover an easy tip to strengthen your canopy and extend its lifespan. Find out how to reinforce a canopy top for added durability and peace of mind.
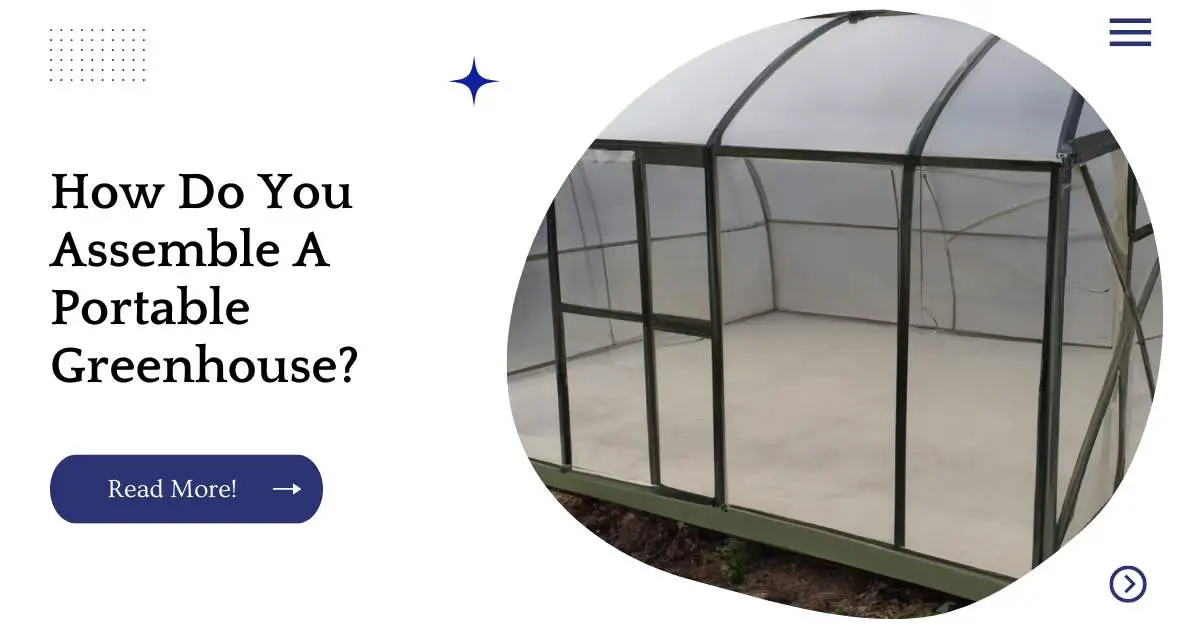
Add The Glazing
The next step is to add glazing. Glazing covers the framing, protecting plants from wind and weather. There are many materials used for glazing, including glass and plastic.
These are available in various thicknesses and sizes to suit your needs. You can purchase it at most hardware stores or online retailers like Amazon or eBay.
If you’re using a greenhouse kit with pre-cut panels (such as our Deluxe Greenhouse Kit), you’ll need to assemble the frame first before adding glazing onto it. Otherwise, skip ahead!
| Option | Description |
|---|---|
| Polycarbonate Panels | Lightweight and durable panels that provide excellent insulation and UV protection for plants. Brands like Palram and Solexx offer quality polycarbonate glazing options. |
| Glass Panels | Traditional glass panels that offer a clear view and allow maximum sunlight transmission. Brands like Rion and Juliana provide glass glazing options for portable greenhouses. |
| Acrylic Panels | Impact-resistant acrylic panels that provide good light transmission and insulation properties. Brands like FlowerHouse offer acrylic glazing options for portable greenhouses. |
| Polyethylene Film | Affordable and easily replaceable polyethylene film that provides basic protection and diffuses sunlight. Brands like Farm Plastic Supply offer polyethylene film for greenhouse glazing. |
| Shade Cloth | Breathable shade cloth that can be used to cover the greenhouse to reduce direct sunlight and regulate temperature. Brands like Agfabric and EasyShade offer shade cloth options. |
| High-Performance Films | Specialized films like EVA or ETFE that offer advanced light transmission and durability. Brands like Solawrap and SolaMaster provide high-performance film options. |
| Twin-Wall Polycarbonate | Double-layered polycarbonate panels that provide enhanced insulation and diffusion of sunlight. Brands like OGrow and Palram offer twin-wall polycarbonate options. |
| Brand-Specific Glazing Systems | Explore glazing systems offered by specific brands tailored to their portable greenhouse models for a perfect fit and performance. |
| DIY Glazing Solutions | Consider DIY options like repurposing old windows or using recycled materials for glazing your portable greenhouse. |
Add A Floor
Now that you have a good idea of what you need to build your greenhouse, it’s time to start thinking about how to assemble it. Assembling your greenhouse is not difficult; however, there are some key considerations that will help you get the most out of your greenhouse.
Choose the right flooring for your greenhouse. You should select a flooring material based on whether or not you have a slanted roof and also what type of soil conditions exist under where the greenhouse will be placed. If these aren’t issues for you then consider using hardscaping materials such as concrete pavers or flagstone tiles instead of wood planks. These materials tend not to absorb water like wood does so they won’t rot over time which means fewer repairs!
Install insulation under the floor if needed (to prevent heat loss). If possible use insulation blocks between joists instead of rigid foam sheets because they’re easier to cut when necessary (e.g., when adding ventilation slots).
This can be done by simply drilling holes through them rather than having someone else do this work for free as part of their job description.”
Insulate The Greenhouse
Insulate the greenhouse with a vapor barrier. The best way to do this is by using a vapor barrier on the top and bottom of your greenhouse, as well as its sides. A vapor barrier is used to keep moisture from escaping through any holes in the wall of your greenhouse, and it can also be used to keep heat from escaping or cold from entering during winter months or times when it’s raining outside.
The type of material you choose for your walls depends on what materials are most readily available in your area — but if you want an inexpensive option that will help retain heat well while keeping out rainwater, consider using plywood sheets cut into panels before putting them together with screws or nails (or both).
Looking for a reliable source to buy replacement canopies for your gazebo or portable greenhouse? Explore our curated list of trusted suppliers offering high-quality replacements. Check out our recommendations for where to buy replacement canopies and keep your structure protected.
Install Vents
Install vents in the greenhouse. Vents are important for air circulation, and they should be able to be opened or closed as desired.
They should be placed on opposite sides of the greenhouse so that one side does not get more ventilation than the other, which could cause uneven heating or cooling.
The vents should also be adjustable—you want to be able to regulate how much heat gets into your greenhouse during winter months so that you don’t accidentally kill off all your seedlings.
Finally, make sure that any material used in making these vents is not susceptible to rusting or rotting due to water exposure (this may include metal).
| Option | Description |
|---|---|
| Roof Vents | Adjustable roof vents that allow hot air to escape and promote air circulation within the greenhouse. |
| Side Vents | Side vents that can be opened or closed to regulate airflow and control the temperature inside the greenhouse. |
| Louver Vents | Louver-style vents with adjustable slats to fine-tune the ventilation and optimize air exchange. |
| Automatic Vents | Automatic vents that use heat-sensitive mechanisms to open and close based on the temperature, providing hassle-free ventilation. |
| Solar-Powered Vents | Vents equipped with solar-powered fans to actively draw out hot air and introduce fresh air into the greenhouse. |
| Wall-Mounted Fans | Wall-mounted fans that can be installed to enhance air movement and prevent stagnant air pockets. |
| Brand-Specific Ventilation Systems | Explore ventilation systems offered by specific brands tailored to their portable greenhouse models for optimal performance. |
| DIY Ventilation Solutions | Consider DIY options such as installing small fans, creating window openings, or using mesh screens for passive ventilation. |
| Thermostat-Regulated Ventilation | Ventilation systems with integrated thermostats to automatically adjust airflow based on temperature settings. |
Set Up Fans And Watering Systems
Once you’ve assembled the greenhouse, it is time to set up fans and watering systems.
There are several different types of fans to choose from, including:
- Wall-mounted fans – these are easy to install and can be placed anywhere within the greenhouse. They usually come with a variety of speeds and settings so that you can adjust how fast they blow air through your plants.
- Ceiling fans – these work similarly to wall-mounted ones in terms of being able to control the amount of airflow but have an added benefit of keeping insects out because they hang above the plants instead of sitting on top like walls do.
Fan placement varies depending on what kind you buy but generally speaking, it should be kept as close as possible without touching any leaves or stems so that only cool air reaches them directly rather than having some indirect contact with warmer outside air first).
Add Shelving And Benches
- Shelving: The greenhouse must have shelving to place your plants on.
Benches: You can place benches inside the greenhouse where people can sit while working in it. This is especially useful if you plan on having more than one person working in the greenhouse at once.
Sink: A sink with running water allows you to wash your hands and other tools after use, which will prevent diseases from spreading between plants and help keep your greenhouse clean and sanitary.
| Option | Description |
|---|---|
| Freestanding Shelves | Sturdy and versatile shelves that can be easily moved and adjusted to accommodate different plant sizes and heights. |
| Hanging Shelves | Suspended shelves that maximize vertical space and provide additional storage for smaller potted plants or gardening tools. |
| Wire Mesh Shelves | Lightweight and durable shelves with wire mesh surfaces that allow for proper airflow and drainage. Ideal for storing pots or trays. |
| Foldable Benches | Space-saving benches that can be folded and stored when not in use. Provides a convenient workspace for potting and organizing plants. |
| Adjustable Workbenches | Versatile workbenches with adjustable height and storage options, perfect for various gardening tasks and potting activities. |
| Potting Tables | Purpose-built tables designed for potting plants with features like built-in sinks, storage compartments, and work surfaces with drainage holes. |
| Tiered Shelving Units | Multi-tiered shelving units that maximize vertical space, allowing you to display and organize plants at different heights. |
| DIY Solutions | Explore creative DIY options like repurposing old furniture, crates, or pallets to create customized shelving and bench solutions. |
| Brand-Specific Options | Check out brands that offer dedicated shelving and bench solutions designed specifically for their portable greenhouse models. |
Organize Your Space
The first thing you’ll need to do is decide where in your yard you want to put it. You’ll also need to consider what size greenhouse will work best for you, as well as whether or not there is enough room for you to maneuver the greenhouse around once it’s assembled.
Once this is done, organize the space by laying out all of the materials that come with your particular model and step back for a moment you don’t want any injuries during assembly! Make sure everything is clearly labeled and organized so you know exactly where everything goes later on down the line.
Once that’s done, determine which parts are going together first before assembling anything else (like walls). This will help prevent confusion later on down the line when putting together certain sections of your portable garden structure.
For example: if we were building our own portable greenhouses from scratch without instructions provided by manufacturers like ourselves above here at Greenhouse Direct Canada Ltd., then this would mean reading carefully through all directions before starting construction because no two models may look alike despite having similar functionality due to their form factors being custom-made based on specific needs such as whether or not they’re meant only indoors or outdoors usage only etcetera etcetera ad nauseam ad infinitum until death takes us away…
Protecting your greenhouse from the elements is essential for optimal plant growth. Discover the benefits of covering your greenhouse with polyurethane and learn how to do it effectively. Our comprehensive guide on covering a greenhouse with polyurethane will help you ensure a conducive environment for your plants.
Add Lighting To Your Greenhouse
Your greenhouse is the perfect place to grow your own food, but without proper lighting, you’ll have a hard time seeing what you’re doing.
It’s a good idea to install LED lights in your greenhouse to make it easy for you to work on your plants and get them in the right position for optimal growth. LED lights are also more energy efficient than other types of artificial light, so they’re better for the environment as well.
If you want natural light in addition to artificial light, consider building a skylight or opening up some windows on either side of your structure.
This will provide sufficient ambient light while still letting in plenty of fresh air through an open door or window. You could even just hang up some curtains if natural sunlight isn’t important enough yet!
You may also want something more specialized like low-voltage fluorescent tube fixtures that come with their own ballasts (or power supplies).
These can be used instead if desired depending on how much space there is available within each corner section when stacking multiple staging areas together vertically like this one does; however these are not required unless you plan on having overhead equipment hanging down from above at least 1 inch above each floor level.”
Heating a greenhouse efficiently is crucial for maintaining the ideal temperature for your plants. Find out how much propane you’ll need to heat your greenhouse and optimize energy consumption. Check our informative article on how much propane it takes to heat a greenhouse and ensure a warm and thriving environment for your plants.
Conclusion
So, now you know the basics of how to assemble a greenhouse. And if you’re feeling ambitious, there are plenty of other things you can do once your greenhouse is up and running.
For example, you can add lighting or watering systems that make it easier on yourself when tending plants inside during cold months or dry spells.
You may even want to consider adding shelves or benches so that visitors have somewhere comfortable while they enjoy the view!
Further Reading
Here are some additional resources to further explore the topic of portable greenhouses:
Portable Greenhouse – A Comprehensive Guide: Dive deeper into the world of portable greenhouses with this comprehensive guide that covers everything from types of portable greenhouses to their benefits and setup instructions.
How to Build a Greenhouse – DIY Guide: If you’re interested in building your own greenhouse, this DIY guide provides step-by-step instructions, materials needed, and valuable tips for constructing a greenhouse tailored to your needs.
Building a Small Greenhouse – Backyard Garden Lover: Discover the joys of building a small greenhouse in your backyard with this resource. Learn about different designs, materials, and techniques for creating a functional and beautiful small greenhouse space.
FAQs
What are the benefits of using a portable greenhouse?
Portable greenhouses offer several advantages, such as flexibility in terms of location, easy assembly and disassembly, and the ability to extend the growing season.
How do I choose the right size of a portable greenhouse?
Consider factors like available space, the number of plants you want to grow, and potential future expansion. Measure the area and ensure the portable greenhouse’s dimensions align with your requirements.
Can I use a portable greenhouse for year-round gardening?
Yes, depending on the climate and insulation capabilities of the portable greenhouse, it’s possible to use it for year-round gardening. Additional heating or cooling mechanisms may be necessary for extreme temperatures.
What materials are commonly used in portable greenhouse construction?
Common materials for portable greenhouses include lightweight metals like aluminum or steel, as well as durable plastics or polycarbonate panels for the walls and roof.
How do I secure a portable greenhouse against wind?
Securing a portable greenhouse involves anchoring it to the ground using stakes, weights, or tie-down systems. Additionally, positioning the greenhouse in a sheltered area can provide additional protection from strong winds.

I am Hellen James, a professional handywoman with expertise in improving home and garden spaces by using pergolas, gazebos, and tents.
