Whether you’re looking to add some cooling fun to your backyard or simply want a way to keep your patio area from getting too hot, a patio misting system is one of the best ways to do so.
Not only does it provide much-needed relief from the heat, but it can also help improve the appearance of your home by adding some extra color and beauty.
| Takeaways |
|---|
| Setting up a patio mister can be done easily with the right guidance. |
| A patio mister can provide various benefits, such as cooling the outdoor space and repelling insects. |
| Proper maintenance and cleaning of the patio mister are important for its efficient functioning. |
| Choosing the right location and positioning for the mister nozzles is crucial for optimal mist coverage. |
| Troubleshooting common issues, such as low water pressure or clogged nozzles, is essential for uninterrupted misting. |
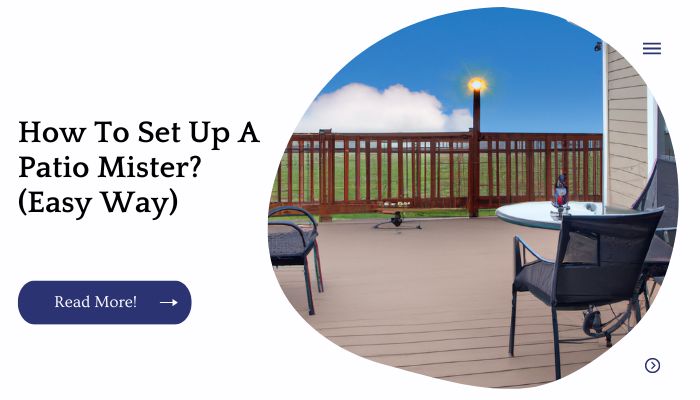
Step 1: Choose A Location For A Patio Misting System
Choose a location that is easy to access. Patio misting systems are powerful, so you’ll want to put them in an area where they’re easily accessible when you need them.
Choose a location with good ventilation. Misting systems work best when there’s plenty of fresh air and circulation around them, so it’s important to choose the right spot for yours based on this factor alone.
Choose a protected location when possible. As we mentioned earlier, patio misting systems can be pretty heavy duty so if possible, it’s best not to place yours in an area with high winds or lots of rain/snow/dust flying around!
Enhance the longevity of your patio furniture by properly maintaining it. Our comprehensive guide on staining and sealing patio furniture provides valuable tips and techniques to help you protect and preserve your outdoor furniture investment.
Step 2: Decide Where You Want To Start The Misting System
Once you’ve decided on the location for your patio misting system, it’s time to start setting up the system. The first step is to decide where you want to start the misting system.
Location of water source: Your patio misting system will need a water source. The best place for this would be close to where you plan on placing your patio misting system and control box.
Location of power outlet: The second thing that should be considered when setting up a patio misting system is where a power outlet can be found so that it can be plugged in and turned on without having any hiccups along the way or interruptions in operation due to lack of power.
Location of control box: Last but not least, consider where best place will be for your control box; this should also take into account access points since if cords are run behind furniture or walls there may not be enough room once everything is set up properly.”
| Starting Point |
|---|
| Patio |
| Backyard |
| Garden |
| Outdoor Kitchen |
| Pool Area |
| Gazebo |
Step 3: Mount The Nozzle Holder To The Surface
Mount the nozzle holder to the outer surface of your patio. Use a screwdriver to tighten the nozzle holder to your chosen surface.
Make sure it is level and straight, so that water can flow evenly from all nozzles.
If you are using a drill, make sure it is a corded one as this will provide more power than an electric one this will allow you to make holes in concrete or hardwood faster and easier than with an electric drill that has limited torque.
Step 4: Attach The Stainless Steel Mounting Bracket To The Wall
Next, use a power drill to make pilot holes in the wall. Then secure the bracket to the wall using mounting screws (you’ll want two). Make sure that each screw is level and flush with the surface Of Your Exterior Wall.
Looking for creative ways to illuminate your patio without traditional string lights? Explore our article on lighting a patio without string lights for innovative lighting ideas that will enhance the ambiance of your outdoor space.
Step 5: Cut And Attach Your Misting Line
To attach the line to the nozzle holder, first cut it to a length of about six inches. This should be long enough to reach over the edge of your patio and into an area where there will be water pressure (this could also mean attaching it to an extension cord).
Next, use a hacksaw or other sharp-edged tool to remove any burrs from one end of the line.
This should create a flat surface on which you can attach a stainless steel hose clamp so that you can easily connect and disconnect your nozzle holder from the main tube.
Once you have finished cutting and connecting all components, turn on your garden hose faucet just enough so that there’s some water pressure coming out of it you don’t need much for this project!
Then place everything together and test whether or not everything works properly before moving on with Step 6: Connecting Your Patio Mister To A Faucet/Water Supply
Step 6: Test Your Misting System
Test your misting system. You want to make sure that your misting system is working properly, so try it out. The best way to do this is by testing the water pressure and flow rate at the nozzle of your patio mister.
Check for leaks in the system. If you find any leaks, then you’ll need to repair them before continuing with your installation process!
| Step | Description |
|---|---|
| Step 1 | Ensure all connections are securely tightened. |
| Step 2 | Turn on the water supply for the misting system. |
| Step 3 | Inspect for any leaks or water drips. |
| Step 4 | Activate the misting system using the control mechanism. |
| Step 5 | Observe the misting nozzles for proper mist dispersion. |
| Step 6 | Check for any clogged nozzles and clean if necessary. |
Step 7: Install A Patio Misting Pump
Now that you have the misting lines in place, it’s time to install a pump. These versatile devices can be used to power all sorts of things, including fountains, hot tubs and other outdoor appliances. You can usually find these at your local hardware store or online retailer.
When selecting a patio misting pump, look for one with an output range matching your system’s flow rate (usually listed on the packaging).
If you choose one with too low a capacity, this will lead to poor performance and reduced longevity; if you choose one with too high of a capacity, this will result in wastefulness (and higher electricity bills!).
Setting up a patio doesn’t have to break the bank. Our guide on how to build a cheap covered patio provides easy fixes and budget-friendly tips to create an inviting outdoor space without overspending.
Step 8: Connect The Misting Pump To A Water Supply
Connect the misting pump to a water supply. If you have a garden hose, connect it to your misting pump (see picture).
If not, you can use a hose adapter and then connect that to your household water supply. Do not connect the misting pump until after testing the system for leaks!
Step 9: Install An Outdoor Power Outlet At The Easy-Access Point (Outlet Or Electrical Box)
To ensure that you can easily access the mister from all sides of your patio, it’s important to install a power outlet at an easy-access point.
To install an outdoor electrical outlet:
Cut a hole in the drywall for the outlet box using a drywall saw or utility knife.
Measure and mark the area for the box on the wall with chalk or pencil. You should expect about 0.5 inches of clearance around the box for wiring and conduit, so make sure that there is room on your wall before you begin cutting into it!
Use a hammer drill to bore holes through both sides of your studs (if applicable), as well as through any other obstructions like joists or rafters that may be in front of where you want to place your new outlet box (you should use 1/2″ copper tubing behind these obstructions if needed).
If necessary, you can also drill right through ceramic tile and other materials if they are thin enough!
In cases where no studs are available but solid concrete blocks instead exist – here’s what I did: With one person holding onto each end of their forearm while standing upright parallel next door neighbor’s house…then gently tapping pipe wrench against metal pipe until crack appeared then twisting sharply clockwise until removed entire length”
Installing a patio door on concrete can be a challenging task, but with our easy-to-follow instructions, you can do it with confidence. Check out our guide on installing a patio door on concrete to learn the step-by-step process and ensure a seamless integration of your patio door.
Step 10: Power Up Your New System And Enjoy It!
You can use a timer, or a remote control to turn it on and off. You can set it to turn on automatically at certain times of day. If you have a remote control for your patio mister, you can use the remote for this as well. Enjoy!
| Step | Description |
|---|---|
| Step 1 | Ensure all electrical connections are properly made. |
| Step 2 | Switch on the power supply for the misting system. |
| Step 3 | Activate the control panel or remote control. |
| Step 4 | Adjust misting settings for desired output and coverage. |
| Step 5 | Sit back, relax, and enjoy the refreshing mist! |
Conclusion
The next time you’re looking to cool off, consider installing a patio misting system. Whether it’s for your own enjoyment or for an event like a birthday party or wedding reception, this project is sure to bring the fun on any warm summer day!
Further Reading
How to Install Your Patio Misting System: Learn step-by-step instructions and pro tips for installing a patio misting system to create a comfortable outdoor environment.
How to Install a Misting System: Discover the process of installing a misting system for effective cooling and learn about the different components involved.
How to Install an Outdoor Misting System: Get expert guidance on installing an outdoor misting system, including necessary tools, materials, and maintenance tips.
And here’s the FAQs section in Markdown language:
FAQs
How long does it take to install a patio misting system?
The installation time for a patio misting system can vary depending on factors such as the size of the area, complexity of the system, and your level of experience. On average, it may take a few hours to a day to complete the installation.
Do I need professional help to install a misting system?
While it’s possible to install a misting system yourself, seeking professional help can ensure proper installation, especially for complex systems. Consider your DIY skills, system complexity, and the manufacturer’s recommendations before deciding.
Can I install a misting system on my own without any prior experience?
Yes, it is possible to install a misting system on your own, even with limited prior experience. Many misting systems come with detailed installation instructions and online resources to guide you through the process.
What maintenance is required for a misting system after installation?
Regular maintenance is important for the optimal performance of a misting system. It typically involves tasks such as cleaning nozzles, checking for leaks, and ensuring proper water pressure. Refer to the manufacturer’s guidelines for specific maintenance instructions.
Are misting systems suitable for all outdoor spaces?
Misting systems can be suitable for various outdoor spaces, including patios, gardens, restaurants, and event venues. However, it’s essential to consider factors like climate, available space, and intended use to determine if a misting system is the right choice for your specific outdoor area.

I am Hellen James, a professional handywoman with expertise in improving home and garden spaces by using pergolas, gazebos, and tents.
